
Presented to you in this article and collection of videos are some basic lessons on waxing your waxless cross-country skis. I prefer to use the term “functional” when describing my style of waxing. This is because I aim for function rather than high-performance results.
I cross-country ski for enjoyment, exploration, and exercise (not racing), so my skis are essentially tools for adventure.
Regardless of your approach, those tools need to be maintained. And, learning to wax them is an important way in which to accomplish this.
Support Tahoe Trail Guide with a financial contribution via PayPal (single contribution) or Patreon (reoccurring contributions). Your support of Tahoe Trail Guide is very much appreciated!

The effort and supplies required to achieve functional, or good enough, results versus perfection when waxing skis is far less. This translates to more time on skis and less time in the wax room or garage!
Read my introduction article to waxing your waxless xc skis if you haven’t already. The introduction provides more insight about my approach to waxing waxless cross-country skis.
Again, this wax lesson centers on functional waxing waxless cross-country skis. Primarily, I’m working with the kinds of xc skis that feature a standard fish scale-type pattern. Most of what I describe is straightforward and streamlined and shouldn’t take long to complete.
For example, so long as my tools and supplies aren’t buried in the back of my storage shed it usually only takes me between 10-15 minutes to wax a pair of skis.
Even when functional waxing, follow these principles:
Everything you do to prepare your cross-country skis should support forward movement (i.e. the primary direction of travel).
Consistently work your skis from tip to tail so that all the fibers of the base lay down in line with the direction of movement. Although it’s OK to occasionally scrape or brush your skis back and forth in a linear movement (parallel with the skis), always finish with strokes that run from the tip to the tail of the ski.
Never move your tools laterally (perpendicular) across the base of the ski or in a circular motion.
Use an iron specifically designed for use in ski waxing applications and use it at the correct temperature (for your glide wax).
Don’t use a regular household iron when waxing your skis. This is because they don’t maintain a consistent temperature. And, most don’t have any type of temperature gauge (just low, medium, and high).
Also, don’t set the iron to a temperature hotter than the wax requires. Otherwise, you’ll cause the wax to burn and smoke.
Be sure to work in a well-ventilated area.
Stick with one manufacturer’s line of wax.
Additives used in one brand of wax might affect another brand’s performance.
Don’t apply traditional (block) glide wax directly to the scale pattern.
Do, however, brush the scale pattern when cleaning the bases. Then either apply a thin layer of liquid or paste wax (i.e. Swix F4) to the scales, or just brush over the pattern when brushing free the excess (new) wax.
If left untreated, the scale pattern will dry out like the rest of the base. This will cause snow to stick to the kick zone.
Only use brushes specifically designed for use in ski waxing applications.
They should be purchased at a store that sells cross-country skis and/or cross-country ski equipment. Don’t buy your waxing tools and supplies at a hardware store.
Again, the three main objectives that we’re trying to achieve when waxing the bases of waxless cross-country skis are:
- Clean and open the base’s structure
- Apply glide wax (appropriate for the snow conditions) to the base
- Retain the thinnest layer of wax while revealing the base’s structure through scraping and brushing (all excess wax)
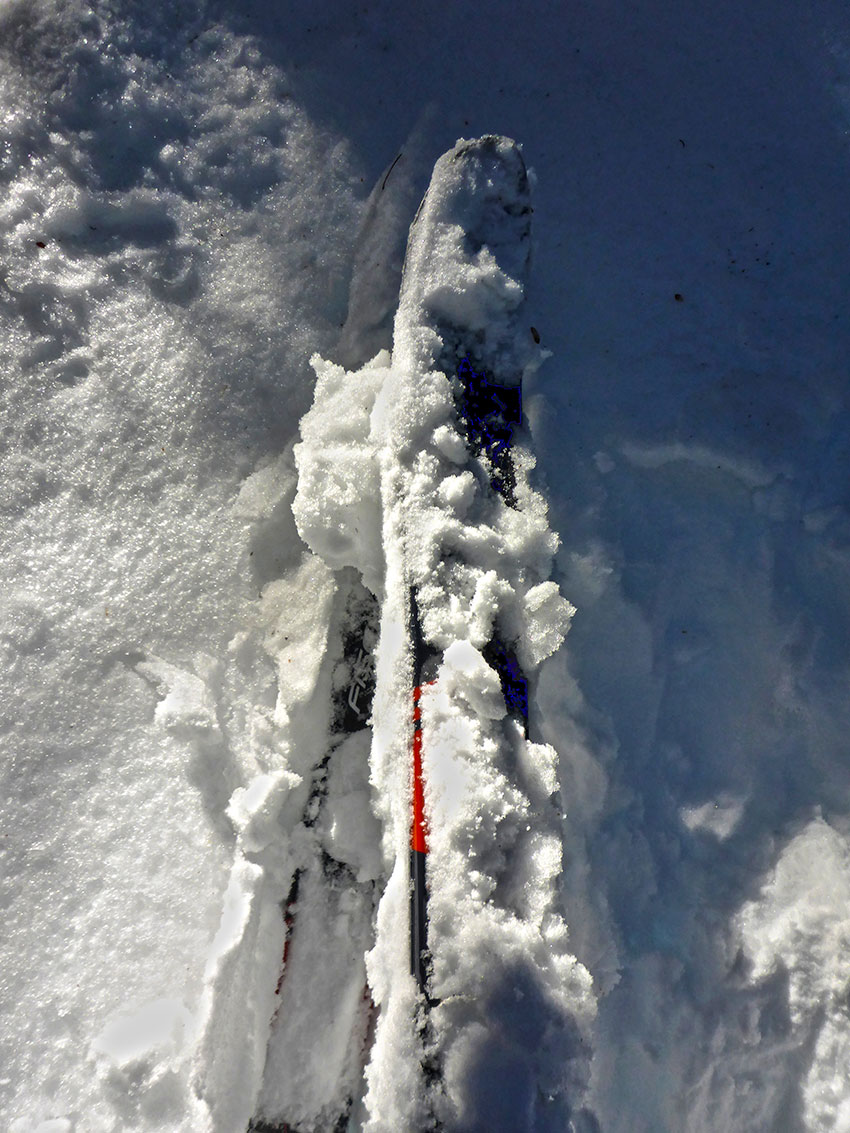
Step 1: Brush Your Skis Clean
Clean the base and open up the structure by brushing out old wax, dirt and debris, and oxidized fibers.
Essential Tools:
- Bronze Brush
Optional Tools:
- Steel brush
- Base cleaner
With the bronze brush (or steel if the bases are exceptionally nasty), brush the ski from tip to tail a few times. Use a fair amount of pressure when brushing. Also brush over the scale pattern to clean it out.
If your classic skis feature “skins” or are “zeros” or have anything other than a standard fish scale pattern in the grip zone, do not brush this area.
Just keep it simple. Give your skis a few quality brushstrokes from tip to tail so that they’ll be more accepting of fresh wax.
Step 2: Applying Glide Wax
Increase glide by applying temperature appropriate wax for the snow conditions, as well as to “moisturize” and protect the base.
Essential Tools:
- Glide wax for the snow condition in which you will ski
- Ski iron with which to melt and apply the ski wax
Optional Tools:
- Multiple waxes to accommodate different ranges of temperatures
The packaging of glide wax will feature a temperature range in which the wax will work optimally (in snow). It will also list the appropriate temperature for melting the wax (with the iron). Heed both of these pieces of information when applying the wax.
There are two main ways in which to apply wax to the base of a cross-country ski. They are the crayoning technique and drip method.
The crayoning technique is safer (for the ski) and more economical than the drip method. The reason crayoning wax to the base of the ski is more safe is because the layer of wax acts as a barrier between the hot iron and the base of the ski.
The reason it’s more economical is because you can apply the wax in a more controlled manner.
Although the crayoning technique is the preferred way to apply wax, I still often use the drip method. Why? Old habits. Also, it always seems like when I’m crayoning the wax I wind up applying too thin of a layer of wax to the ski. The answer to this situation is to then drip a little additional wax over the crayoned layer.
The primary criticism (and legitimate reason) that the drip method is unsafe for the ski is that at some point the heated surface of the iron will come in direct contact with the base of the ski (i.e. the places that aren’t covered with drops of wax).
This means there’s a risk of the iron searing the base of the ski and causing the structure to melt into a nonporous surface. Remember that relationship between structure and suction I wrote about in the introduction to this lesson?
Theories and risks aside, I’ve used the drip method for years and have never burned a ski. This may be a result of living at Lake Tahoe where the outside temperatures never get cold enough to necessitate a really cold-rated wax (which requires a really hot iron to apply). That, and I’m diligent about moving the iron around quickly so as not to linger in any one spot for too long.
Interestingly, a mentor and co-worker of mine who has been cross-country skiing for decades and is a fantastic instructor and wax tech, described to me one of his past experiments. He attempted to burn the base of a (broken) ski by holding an iron set at its highest temperature directly on the base for a prolonged amount of time. In spite of his devious efforts, he was unable to find any evidence of melted plastic. So, who knows?
To apply glide wax using either method, set the iron to the appropriate temperature for the glide wax.
For the crayoning technique, hold the iron above the ski and quickly press the block of wax to the iron’s heated surface. Immediately rub the slightly melted portion of the block of wax onto the ski’s base. This will create a crayon-type smear of wax over the base. Repeat this process until you’ve adequately covered the tips and tails of your skis.
For the drip method, hold the iron directly above the ski and press the block of wax to the iron’s heated surface. Hold the wax to the heated surface until it begins to drip. Then quickly move up and down the base of the ski (tips and tails only!) to create a uniform spatter pattern of wax drops.
After you’ve crayoned or dripped the glide wax onto the tips and tails, quickly run the iron over the wax to create a uniform surface of wax. Don’t forget to heat a bead of wax down the groove of the ski. When you’re satisfied that the wax has been thoroughly applied to all areas of the tips and tails, set the skis aside to cool down.
Keep in mind that one wax doesn’t always cover the day’s forecasted temperature range, so I’ll occasionally apply two different temperature range waxes (i.e. red and purple).
Although there are a gazillion theories on how to layer and combine wax, I find it easiest to just use the drip method. Again, I try to keep it simple so I can get out and ski that much sooner.
One factor to consider when applying two temperature waxes is that one will require a hotter iron than the other. So when you apply the softer (for warmer conditions) wax, be careful to avoid burning it and/or causing it to smoke. I just turn the iron down to the lowest temperature that will still melt the colder wax, then work quickly to avoid any burning or smoking of the warmer wax.
Another note is that once the second ski has been set aside, some people prefer to scrape the first ski’s groove (followed by scraping the groove of the second ski) because the wax is still warm. This is fine, but only scrape the groove, not the entire ski.
The rest of the wax needs to set for a little longer to maximize the amount of penetration the wax achieves into the structure and base fibers. In fact, some people will re-iron the tips and tails a couple more times to ensure that the base warms up and absorbs as much of the wax as possible. As you might imagine, I don’t do this. I do it one time and then get out there and ski!
Step 3: Scraping the Wax
Clear out the groove and scrape free as much of the newly applied wax as possible.
Essential Tools:
- Groove cleaning tool
- Flat plastic scraper
- A means to sharpen the scraper (i.e. file or sandpaper)
Optional Tools:
- Different width scrapers
Begin the process of scraping the wax from the base of your ski by starting with the groove (unless you’ve already done that). Use the groove cleaning tool to accomplish this.
Since the diameter of the groove and cleaning tool are often different, you’ll probably have to make a few passes to clean the wax completely from the groove. Scrape from tip to tail, and do whatever’s necessary to get those bits trapped in either ends of the groove.
Once you’ve cleaned the groove, grab your flat plastic scraper tool and check that the sides are flat and the edges are sharp. If the edges are dull, caked with old wax, or lined with nicks and burrs, run the scraper over a metal file or sheet of sandpaper to correct it. Just be sure to create perfectly flat planes and 90 degree corners as this will ensure the cleanest possible scraping action.
A trick to creating flat planes and 90 degree corners is to hold the scraper next to a small block (wood, book, sturdy box) so that the plane of the scraper (in contact with the file or sandpaper) is perpendicular to your choice of sharpening implement.
When scraping the base of the ski, hold the scraper at an acute angle to the ski (angle faces the tail). Apply a fair amount of pressure to scrape the wax from the base, moving from tip to tail. Be especially careful when scraping the very ends of the tips and tails because they can be delicate. Ensure both ends are supported by the wax profile and not dangling beyond its edges.
Paying attention to the details when scraping will make brushing (next step) the ski that much easier. This may require you to scrape at some different angles or even flex the scraper slightly, especially if the base of the ski is anything other than perfectly flat.
Sometimes the edges of the skis wear down quicker because they’re used to stop the ski (snowplowing and hockey stops).
Other times the ski slightly warps due to being stored in too hot of a location during the summer.
There’s a million different reasons for why the base of a ski might not remain perfectly flat during its lifetime, but ultimately you just want to make sure you scrape away as much of the wax as possible during this step.
Also know that some people prefer to put their body behind the scraper and push it from tip to tail, whereas others (like myself) prefer to pull the scraper toward themselves (still beginning at the tip and moving toward the tail). I’ve heard arguments for both approaches and neither are compelling. Do what you need to do in order to scrape the ski thoroughly and quickly.
Step 4: Brushing Off the Wax
Brush free as much of the remaining wax from the base to create a high-buff shine and silky black sheen.
Essential Tools:
- Bronze brush
- Soft nylon finishing brush
Optional Tools:
- All-purpose white nylon brush
- Various grades of xc ski appropriate abrasives and “papers” such as Swix brand Fibertex and Fiberlene
Start with a bronze brush and be fairly aggressive with it when brushing off the remaining wax. You ultimately want to leave the least amount of wax that will still cover every fiber of the base. This accomplishes two goals.
The first goal is that (assuming you’ve used the appropriate temperature-rated wax for the snow conditions) you’ll achieve the ideal amount of friction that creates the bead-like layer of water over which you’ll glide.
The second goal is to reveal the maximum amount of structure so as to minimize suction.
If you don’t brush the ski enough, all the excess wax that remains will clog up the structure and create the nonporous surface I discussed previously.
You can feel confident you’ve used the bronze brush enough when you no longer see small particles of wax appearing with each stroke. At this point, switch to the softer nylon finishing brush and give the base a few good brushstrokes from tip to tail.
If your ski is outfitted with a traditional fish scale pattern, make sure to brush over it a number of times using both the bronze and softer nylon brushes. As I mentioned earlier, this will help to prevent snow from clumping and collecting in the kick zone of your ski. Additionally, you could apply a thin coat of liquid or paste wax, such as Swix brand F4, to the scale pattern.
At Lake Tahoe, we often suffer during the spring from “Sierra cement.” This snow is wet and humid and has great sticking power. In spite of my efforts to treat the scale pattern of my cross-country skis, snow invariably sticks to it as the temperature rises.
This isn’t as big of a deal at a groomed ski resort. But when it happens miles into the backcountry, I’d be lying if I said it didn’t cause me some stress.
Remove that first ski from the wax bench. Then, wipe off any particles from the sidewalls and top sheet. Finally, put it aside while you finish the second ski.
When you’ve completed both skis, clean up your work station and go cross-country skiing!
Assembling Your Wax Kit
Essential Tools:
- Wax bench/profile to fully support your skis during the waxing process
- Ski iron with which to melt and apply the ski wax
- Glide wax for the snow condition in which you will ski (I only buy wax of the CH variety, which is the least expensive among the three main options—LF and HF are the two others)
- Bronze brush for cleaning and brushing the majority of wax free after scraping
- Soft nylon brush for finishing
- Groove cleaning tool to clear wax from the groove of the ski
- Flat plastic scraper to scrape the majority of excess wax free
- A means to sharpen the scraper (i.e. file or sandpaper)
- Small bag or tool box to store and transport your wax kit
Optional Tools:
- Multiple temperature-rated waxes to accommodate different ranges of temperatures
- Steel brush does wonders for cleaning out really dirty bases
- All-purpose white nylon brush falls somewhere in stiffness between the bronze and finishing brushes
- Various grades of xc ski appropriate abrasives and “papers” such as Swix brand Fibertex and Fiberlene
- Different width scrapers allow for different types of pressures to be applied (thinner bends easier than the thcker widths)
- Base cleaner to remove kick wax (waxable classic skis) and other substances from the bases (and sides and tops sometimes!) of the skis, although I’m not a big fan of chemicals so I seldom use this stuff
As you can see, you don’t need a ton of gear to perform the basic wax maintenance. But there definitely are costs associated with purchasing the necessary equipment. My recommendations provide the least amount of waxing gear in order to achieve the maximum (basic) waxing experience.
However, you may find that the most prudent and cost effective course of action for maintaining your skis is to pay a professional to wax them for you. Or, you could buy a block of wax and use the public wax room at your nearest cross-country ski area. This assumes that your local area has loaner tools and a wax profile, though.
The elephant in the room with regard to buying gear for yourself is the wax profile. This is clearly a large and specialized piece of gear that might be cost and space prohibitive. However, they’re invaluable to the cross-country ski waxing experience. I find they’re essentially a requirement since there aren’t any good alternatives to adequately supporting your skis when scraping and brushing them.
If you decide to invest money into your own wax kit, again, buy your equipment from stores and shops that actually sell cross-country ski gear. Don’t try to cut costs by buying this stuff from a hardware store. You will regret it.
Choose a local ski shop near you from which to purchase the items, if at all possible. Otherwise, Gear West and Tognar offer a wide selection of tools, and their prices are competitive.
I realize that to many beginner and hobbyist cross-country skiers, this whole process may seem excessive or unnecessary.
Why bother when I can just run some liquid wax over the ski and be on my way?
This is a totally legitimate question, and I know many people who do this. I will even do this on occasion, but in the end all those quick wax options are just half-measures. It’s like tossing five bucks in your gas tank everyday rather than just spending a few more minutes to fill the thing up.
There are no hard and fast rules as to how often you need to wax your skis. However, when the bases start to look white and ashen it’s definitely time. I generally wax my skis after 3-5 times of use. This is regardless of whether or not they look like they need it—they do need it!. And, I brush them with the bronze brush after each use.
Even just brushing the skis with a bronze brush that has a bunch of wax still stuck in its bristles is better than nothing. I would argue that it’s even better than using a quick wax. Both applications are considered one-time uses anyway.
If you’re only cross-country skiing a few times during the winter you may only need to invest in a one-time full wax job.
The long and the short of it is that you do need to wax your waxless cross-country skis. By waxing them, you will prolong their lives and have a consistently more enjoyable and safer experience.
I recommend picking up a copy of The Complete Guide to Cross-Country Ski Preparation #ad by Nat Brown for a more in-depth discussion of preparing your skis. The book may be a bit cerebral for beginner skiers and people with little knowledge of skiing technique, but the information is presented in an easy to understand format. It’s an invaluable resource that provides a thorough overview of cross-country ski preparation, which ultimately will help you to become a better cross-country skier. Follow the Amazon link and you should be able to find some options for buying a used copy. Highly recommended and worth having in your library.
Cross-Country Skiing Explained Articles and Videos
Please note that I wrote and produced the Cross-Country Skiing Explained series of articles and videos with the beginner and intermediate cross-country skier in mind. This is the demographic for whom I most often serve(d) while working in the outdoor recreation industry at Lake Tahoe. I basically treat these articles and videos as extensions of the conversations that I have (had) with those customers.
That said, expert skiers probably could take away something of value from these resources. Just know that I don’t address race-oriented philosophy, technique, or gear selection.
Considerations for buying cross-country ski gear (new and beginner xc skiers)
- Intention, Types of XC Skis, and Whether to Buy New or Used (Part 1)
- How Much Gear to Acquire, Evaluate Your Commitment, Value of Taking XC Ski Lessons (Part 2)
- Can One Set of Classic Cross-Country Skis Work for Groomed and Off-Track XC Skiing? (Part 3)
- Can I Use One Set of XC Ski Boots for All of My Cross-Country Skiing Needs? (Part 4)
- Overview of Off-Track and Backcountry Cross-Country Ski Gear
- Invest in Technique More than Gear
Classic Cross-Country Ski Components
- Introduction to Classic Cross-Country Skis (Part 1)
- Geometry of Classic Cross-Country Skis (Part 2)
- The Grip Zone of Classic Cross-Country Skis (Part 3)
- Types of Bindings for Classic Cross-Country Skiing (Part 4)
- Ski Boots for Classic Cross-Country Skiing (Part 5)
- Classic Cross-Country Ski Poles (Part 6)
- FAQs about Classic Cross-Country Skiing
Waxing Your “Waxless” Cross-Country Skis (for beginner and intermediate xc skiers)
- Introduction to Waxing Your Waxless XC Skis
- Step-by-Step Waxing Tutorial
- FAQs About Waxing Your Waxless XC Skis
Cross-Country Skiing Techniques, Demonstrations, and Related Concepts
- Outdoor VLOG (emphasis on the cross-country skiing experience)
- Cross-Country Skiing in Challenging Conditions
- Considerations for Winter Adventure in Lake Tahoe’s Backcountry
- Using the Side-Step and Herringbone Techniques in the Backcountry
- 10 Tips for Spring Cross-Country Skiing in the Backcountry
- 5 Reasons to Love Spring Cross-Country Skiing
- Considerations for Cross-Country Skiing During the Fall and Early Winter
- Discussing the Goal of Becoming a Better Cross-Country Skier and Embracing Backcountry and Groomed Terrain in Pursuit of that Goal
- The Cross-Country Skiing Experience: Immersing Yourself in Winter
Sir,
I want to thank you for this pragmatical, clear, non-nonsensical approach.
I have now some guidelines to treat my waxless skis with scales.
I have friends doing competitions here in Germany, and they would be “cautious” about the general outline you’re giving (especially on which wax and how to apply and/or brush), but as they say themselves, they do not have the same need as me, and do not have waxless.
So that’s thumbs up from me.
Very cool 🙂 I appreciate the feedback!
Waxing for racing is a whole other ball of wax – pun intended 😉 And I just don’t have a whole lot of patience for that style of waxing because it’s so idiosyncratic. Over the years, I’ve seen so many people in the wax room obsess about waxing for the day. Now, I admit that grip wax is something that should be obsessed about because if you don’t get it right, it’s the worst xc ski experience ever (i.e. no grip!). But glide wax, whether for waxless classics or even skate skis is not nearly as critical in my opinion. Well, unless the snow is completely sticky, anybody with good technique could realistically have fun for a 1-2 hour session at the resort with whatever glide wax they have on hand.
Mostly I just make sure I’m in the ballpark, and that I actually wax my skis fairly routinely. And that usually seems to be good enough 🙂
Again, thank you for tuning in and commenting. I really appreciate it!
Hi Jared, I am new to cross country skiing and your website/videos have been priceless. I live about 3 hours south of you in the town of Lee Vining and share similar snow conditions. In my enthusiasm to start skiing, I went out when the coverage was not consistent and wound up scratching the heck out of my new Fisher 68’s. The scratches seem more surface with only a couple areas that seem less than 1 mm deep. I’m super bummed about this and I am considering taking them to one of our shops in Mammoth that specialize in cross country skiing. I’d like them to take a look and do whatever they feel is necessary to get them looking like new again.
I guess my question is would brushing and waxing the skis take care of most scratches? Something I could do myself? Is a “stone grind” applicable to cross country skis like it is to downhill skis?
Thanks again for all of the information you provide. Hopefully, at some point, I can find a pair of “rock skis”.
Amy
Hey Amy,
Welcome to the fun world of cross-country skiing 🙂
And thanks for the kind words. Glad you’re finding value in my website and YouTube videos.
As far as those scratches go, I think brushing them consistently and routinely waxing will keep your bases fine. Most of my off-track and backcountry cross-country skis have numerous scratches on their bases, as well. It’s all part of the fun (even though nobody likes the added damage). Unless those scratches penetrated to the actual core of the ski I wouldn’t worry about it. But it sounds like they’re relatively cosmetic so, again, I don’t be overly concerned. In time you may want to consider a base grind, but I’ve had most of my skis for a number of years and haven’t even considered it. If you were on the World Cup racing circuit, you may want to consider taking more corrective measures to address the scratches. But it sounds like you have the skis for fun.
And, believe it or not, if you find that you really enjoy cross-country skiing you’re going to wind up with multiple pairs of xc skis. So, having a set of rock skis is a natural part of the xc ski experience.
The only real concern I’d have at this point is whether or not any base material is sticking out and could potentially peel off more of the base. Usually, this winds up being a nick on the edges/sidewalls (kinda like a hangnail). It’s best to trip those off so they don’t make more of a problem.
Anyway, I hope you get some significant snow this week. Up here in Tahoe the forecast is calling for multiple feet of snow. I’m crossing my fingers because we’ve been absent any good storms for awhile now.
Let me know if you have any other questions!
Hello,
I had my waxless cross country skis tuned up for the season and they have glide pretty good. However, I have no traction. They slip and fly out from under me and I even slide backward when standing still.
Any help would be appreciated!!
Respectfully,
MJH
Elliston, MT
Hey Margaret,
Thanks so much for reaching out! Although, that’s a bummer that you can’t get any grip with your xc skis.
Without seeing your skis or you skiing on them, it’s a bit challenging for me to problem solve. However, there are a couple of basic things to consider regarding grip. First off, I’m going to assume that whoever prepared your skis didn’t actually hot wax the grip zones. That would be incorrect. But, applying a slight amount of liquid glide wax would be fine in order to decrease the likelihood of snow sticking to the scale pattern. If the skis are correct for your weight, that little bit of glide wax shouldn’t affect your ability to grip so dramatically.
So, I would then confirm whether or not your body weight is appropriate for the length of ski that you have. Basically, you need to be heavy enough to compress/squish the ski flat when all of your weight is on one ski. This is one of the key elements to good diagonal striding/classic technique — the ability to balance all of your weight on one ski and compress it flat so the scales (grip zone) connect with the snow in order for you to push off to the next ski.
To test that the ski is appropriately sized for you, have a person place a piece of paper under one of your skis. Then, balance on that ski with all of your weight on it. This test will show one of two things: 1) If the person holding the paper can’t pull it out from under your ski without ripping it, the ski length is most likely appropriate for you. 2) But, if the person holding the paper can pull it out from under your ski without problem and without ripping it, the ski is probably too stiff for you.
I don’t know what your xc skiing experience is, or if you noticed slipping before the tuneup. But I would first do that paper test to make sure the ski is appropriately sized for you. All classic cross-country skis are primarily sized for weight. So, if you’re too light for the ski, you won’t ever get any grip.
This article I wrote might also help:
https://tahoetrailguide.com/cross-country-skiing-explained-part-3-the-grip-zone-of-classic-cross-country-skis/
Start with the paper test, and then let me know how things go. Good luck!