People call me weird and bizarre. Some even say possessed. They look at me as if I’d lost all connection with reality as I sit eating my lunch at the local sandwich shop while still wearing my cross-country ski boots. Later in the day, I call my best friend to tell him about my latest spring backcountry cross-country skiing adventure.
“Jared, why are you still talking about cross-country skiing?” he says. “It’s May for crying out loud. Just let it go!”
What can I say?
Perhaps I am possessed. I’d like to think, however, that it’s more about being inspired and motivated.
Support Tahoe Trail Guide with a financial contribution via PayPal (single contribution) or Patreon (reoccurring contributions). Your support of Tahoe Trail Guide is very much appreciated!

Or, most likely, my enthusiasm for spring cross-country skiing simply stems from my willingness to embrace the reality of Lake Tahoe’s terrain during the springtime.
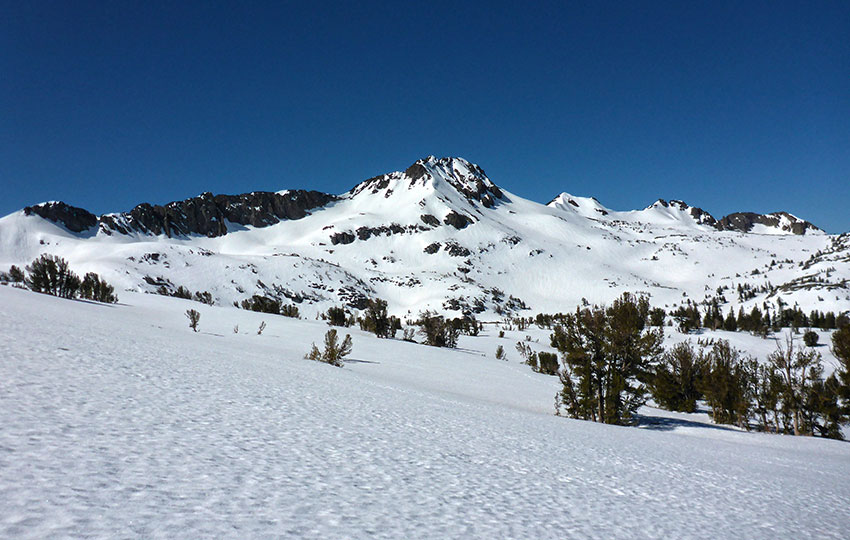
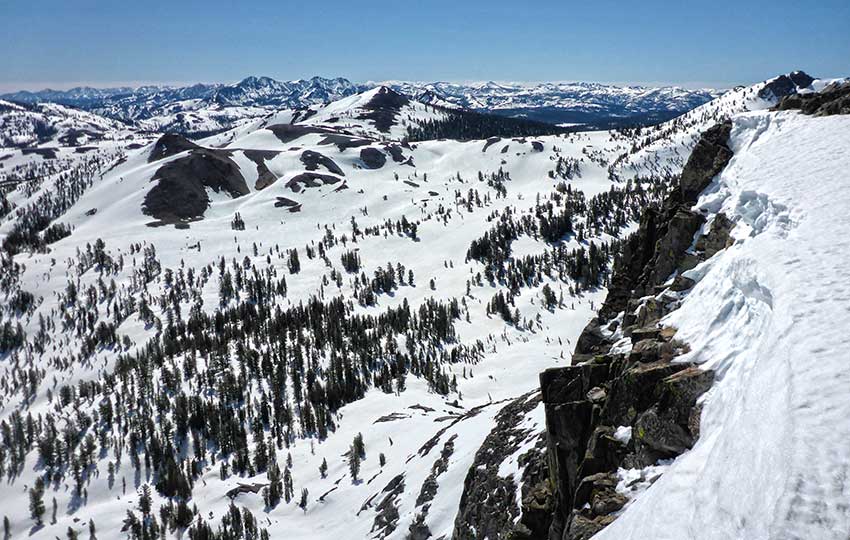
After all, just because the groomed resorts have closed doesn’t mean the ski season is over. In fact, after a normal winter at Lake Tahoe there’s always plenty of snow in the high country for adventure well into the month of May.
So, now you’re interest is piqued and you’re considering joining me in keeping the ski season alive. What can you do to make your spring cross-country ski sessions safer and more enjoyable? Here’s my list of tips and considerations to take into account when spring cross-country skiing in the backcountry.
For more inspiring thoughts about spring cross-country skiing,
read 5 Reasons to Love Spring Cross-Country Skiing after you’ve finished reading this article.
1) Adjust your expectations
This isn’t to say that you’re not going to have a blast. During ideal spring skiing conditions, when the snowpack is firm and the top layer is slightly soft (usually only for about two hours during late morning) you can travel far and fast.
However, that short window of time is bookended by icy snow early in the morning and slush in the afternoon. So overall, you’re probably not going to travel nearly as far or as fast as you would under traditional winter conditions (i.e. consistent temperature and snow).
Many of the scenes I filmed for the following backcountry cross-country skiing video were filmed during spring conditions. As you’ll see, the snowpack was uniform and easy to navigate.
2) Ski during the late morning or early evening
The ideal time to cross-country ski in the spring is usually between 9:30-11:30 am. At this time of the day, the base is firm but the top layer of snow has softened up from the previous night’s freeze.
You can also find great skiing conditions between 4:30-6:30 pm because the snow will begin to again set and become firm. The middle of the day is least desirable for spring skiing because the sun is at its highest intensity (sunburn and sweat) and the snow is in its mushiest phase.
3) Use rock skis
Don’t use your best or most expensive pair of cross-country skis when skiing during the spring. They are going to get worked due to the natural debris ever-present on spring snow, as well as terrain hazardous that begin to manifest once the snow melts and recedes.
If you don’t own a pair of skis dedicated to skiing in less than ideal conditions (i.e. “rock” skis), get with the program. Spring skiing is less about performance skiing and more about cutting loose and having a great time without worrying about wrecking your gear. Just about any old pair of classic waxless cross-country skis will do so long as they are appropriately sized for your weight and height (to a lesser degree).
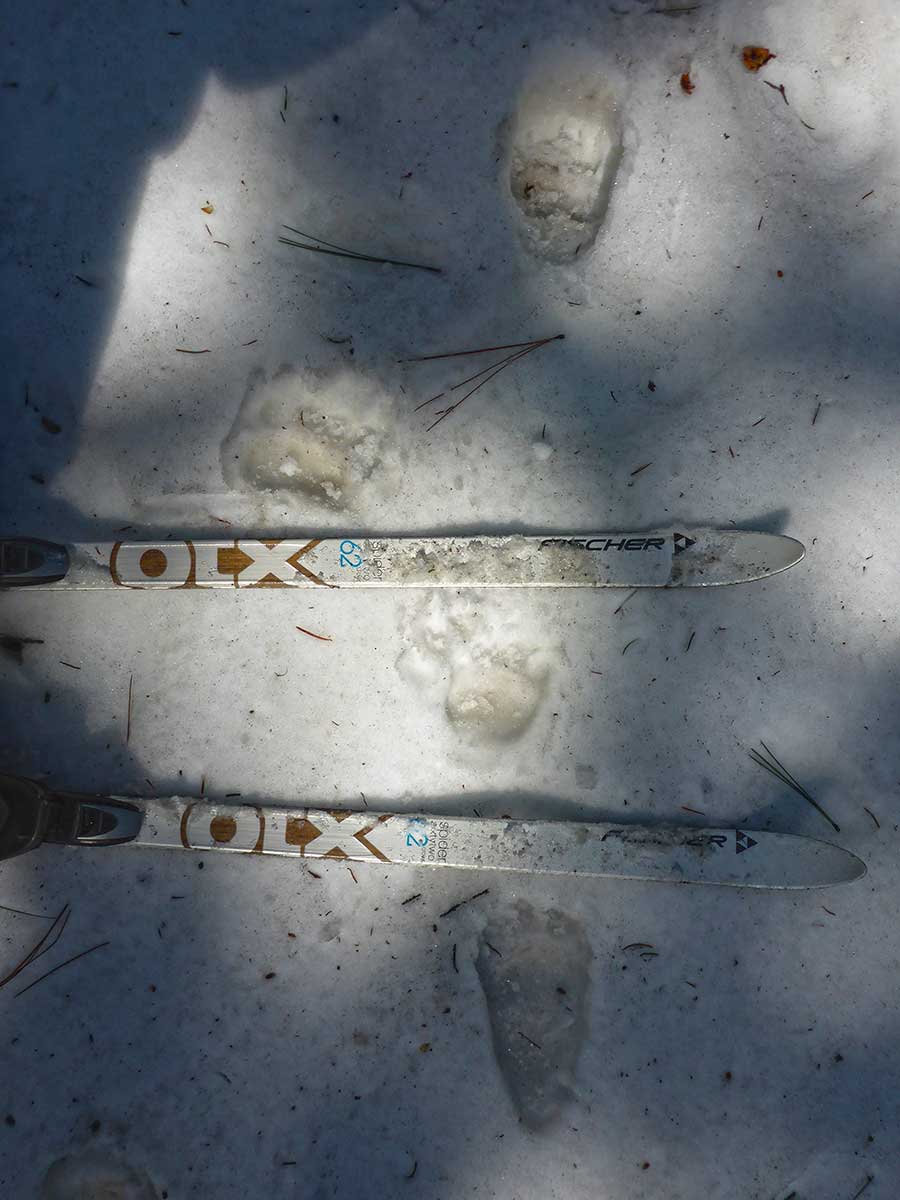
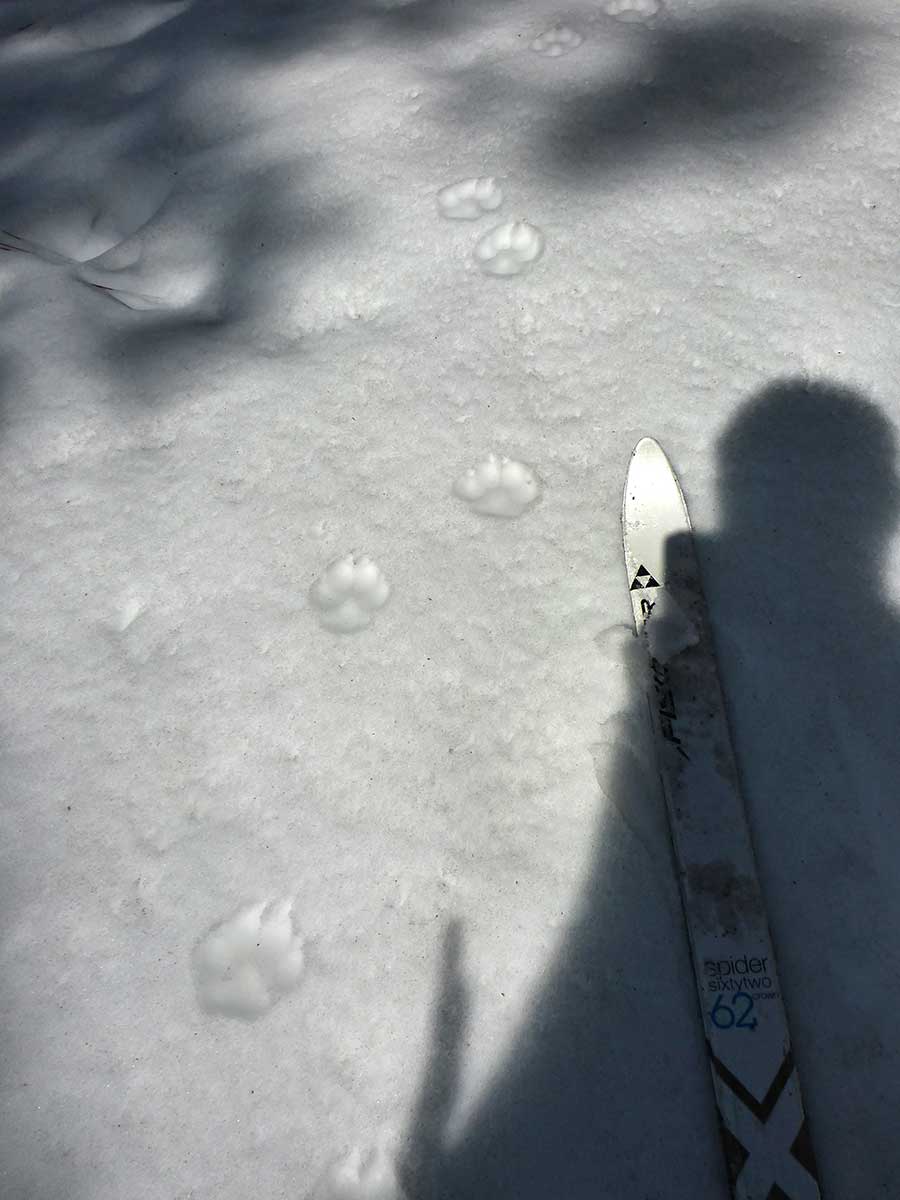
I have two sets of Fischer Spider 62 off-track classic cross-country skis (62mm wide at the tip). One has a standard NNN binding while the other is equipped with NNN BC bindings. Both pairs work perfectly in spring conditions. I usually pick one over the other based on whether or not the boots are dry or the skis have been recently waxed (please note that NNN and NNN BC are not compatible).
Along those same lines, leave your carbon fiber or composite ski poles at home and opt for a standard aluminum ski pole. Aluminum poles are less expensive and can take way more punishment than their costly brethren.
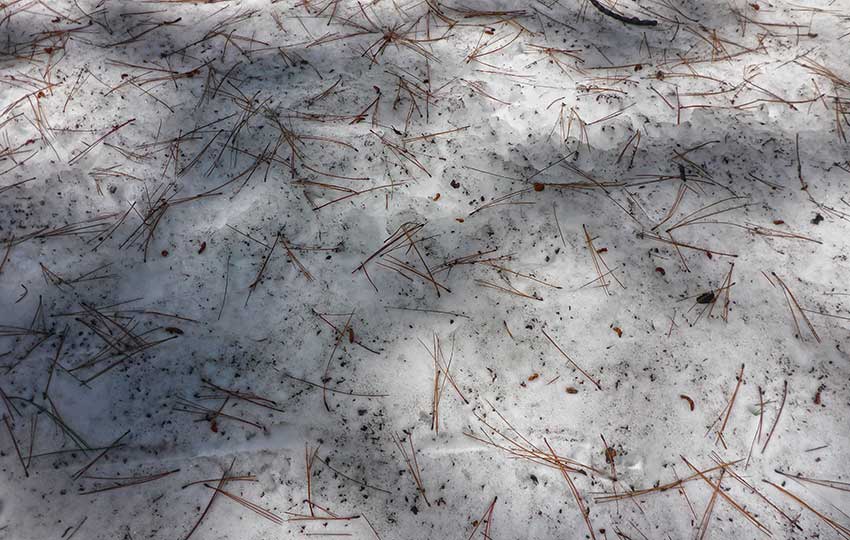
4) Keep your skis waxed
Or, at the very least, brush them thoroughly after each session. Spring snow is usually “dirty.” As the snow melts, natural debris such as pine needles, pine cones, grasses, branches, twigs, and dirt remains on top of the snow.
At Lake Tahoe, where pine and fir trees are prominent, sap also contributes to the dirty snow.
Honestly, I mostly just brush the heck out of the bases with a steel brush and then apply some paste wax. No matter what wax you use, it’s guaranteed to wear off within two hours anyway. So, I don’t spend a lot of time waxing. But I am diligent about brushing the bases clean after every ski session.
5) Use technique (but be prepared to modify it as needed)
Modify your technique to accommodate the ever-changing snow of spring. When the snow’s base is firm but there’s a thin top layer of soft snow, diagonal striding or skate skiing is on the menu.
Although I have many friends who specifically go out to crust ski with their skate skis, I just skate ski on my classic skis when the mood strikes me.
When classic skiing, sometimes you’ll have to be more aggressive with setting the scales (grip zone) and using the edges, particularly when it’s early and the snow is firm and/or icy. Under those same conditions, I’ll often just double pole my way around.
Other times, when you’ve outstayed your welcome and are stuck traveling through slush, it’s best to be softer when compressing the camber of your classic cross-country ski and patient with the slowness of the glide.
The trick to diagonal striding in these conditions is to match your tempo to the conditions. Keep the same rhythm, but just slow down the tempo and you’ll have a fantastic ride.
Otherwise, if you try to stride aggressively you’re just going to slip and slide, and the snow will shear easily.
6) Bring a camera
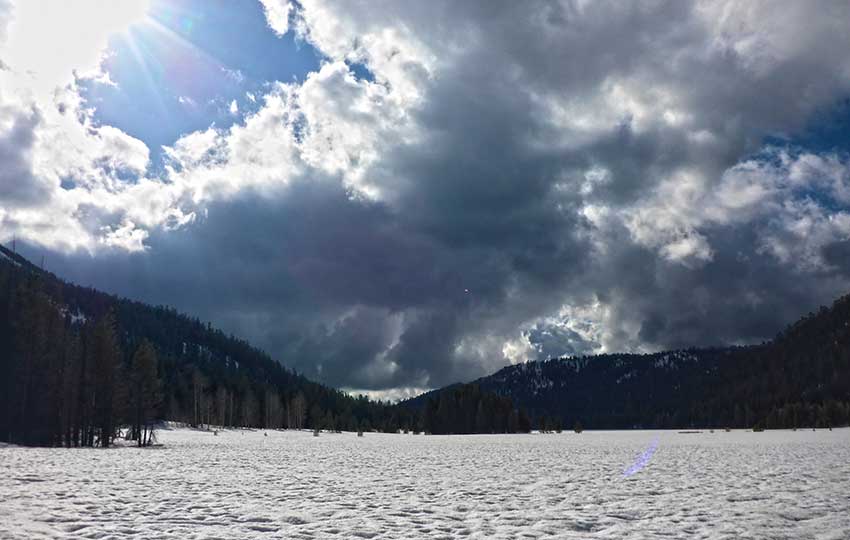
Spring cross-country skiing doesn’t yield the most majestic of landscape photographs. At least not compared to those you can capture mid-winter when the snow is pristine and covering the trees, meadows, and mountains.
However, wildlife becomes very active during the spring. For this reason alone, I always bring a camera. The other day I saw a Cooper’s Hawk. And the only reason I know it was a Cooper’s Hawk was because I actually managed to get a serviceable photograph of it (for identification purposes, at least).
Also, because the snow goes through a thaw/freeze cycle each day, prints from animals such as bear and coyote are often preserved exceptionally well in the snow.
7) Beware of rotten snow (and the terrain features it hides)
“Rotten” snow is a term people use for highly transformed snow (i.e. snow that’s underwent the freeze/thaw cycle for an extended period of time).
Usually I find that this type of snow is so saturated when it begins to melt each day that it maintains very little structure, meaning that it becomes sloppy and soupy. What I find most dangerous about this kind of snow is that it can quickly and unexpectedly give away under your weight (which can be dangerous, in and of itself) and reveal a terrain feature such as a rock or a log.
Usually you’ll find this type of snow during the hottest point of the day. That said, you should always be on the lookout for hazardous terrain features regardless of the snow conditions or time of year.
For more inspiring thoughts about the benefits of spring cross-country skiing,
read 5 Reasons to Love Spring Cross-Country Skiing.
Tree wells aren’t nearly as hazardous during spring as they’re no longer camouflaged by multiple feet of fresh snow. Therefore, they’re pretty easy to avoid.
On the other hand, wells that form around rocks, logs, and bushes become a legitimate hazard in the springtime. Often, rocks appear as icebergs in spring snow. Their tops are exposed, and, as the tip gets baked by the sun it transfers the heat below so that that the snow immediately around the rock melts.
The problem is that the surface snow above the rock may still be present, but it’s become unstable underneath because it’s melted. Basically, your skis or ski poles can easily break through that surface snow.
This same process happens with fallen trees, stumps, and dense bushes. So, steer clear of these types of terrain features if at all possible.
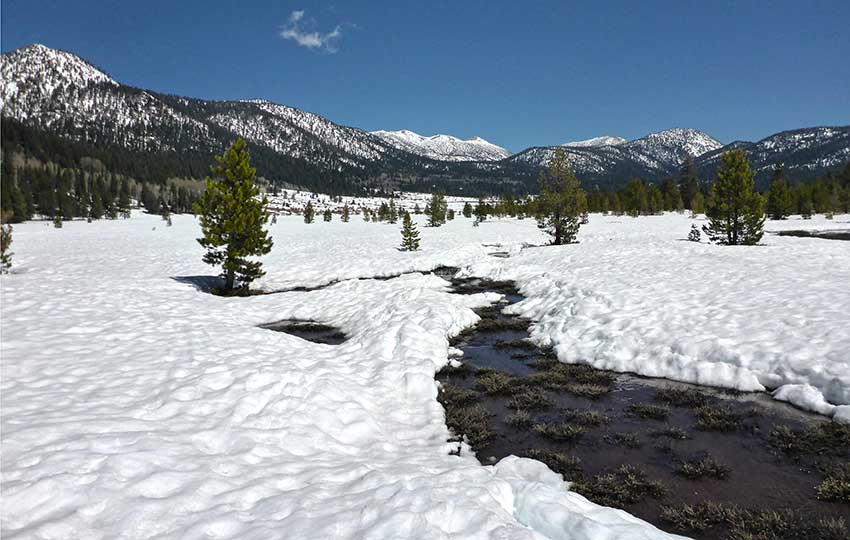
8) Beware of water features great and small
I never recommend cross-country skiing directly across any lake in the Tahoe region regardless of what time of year it is. We just don’t get the hard freezes like northern Minnesota, for example.
I know plenty of people do roll the dice, but I never feel confident enough about the ice to want to travel directly across a lake. With that said, I definitely don’t recommend crossing any large bodies of water once March, April, and May arrive.
Also be especially weary of traveling too close to rivers since the snow near the banks erodes rapidly and can cleave off under your weight.
Perhaps less fatal, but still dangerous are smaller water features such as streams, creeks, marshes, and runoff zones. They erode the snow from beneath the surface and can cause you to bury your skis, which often results in a stumble or fall (or broken ski if your momentum is great enough).
9) Wear appropriate protection from the sun
I know it’s tempting to just throw on a t-shirt and shorts when spring skiing. However, you’d be surprised at how quickly you’re going to burn if you do so without sunscreen and other protection (brimmed hats, gloves, etc…).
Not only will the sun bake you from the sky, but it’s going to provide a double whammy by reflecting up from the snow. Dress light, but be smart about it.
And use some sunscreen under your nose, chin, and ears to combat the rays reflecting from the ground up. Also consider wearing super dark sunglasses on the brightest of days. Snow blindness is no joke.

10) Stay hydrated
I shouldn’t have to tell you this, but I would be remiss for not explicitly stating it here. The sun is out and you’re aerobically exercising, so spring skiing and sweating profusely go hand-in-hand. Drink water. Lots of it.
I realize that many of these tips have more to do with safety than specific cross-country skiing technique. But returning home safely is of the utmost importance, no?
And spring skiing can be, depending on conditions and time of day you’re adventuring, very much like combat or survival skiing.
Don’t let this discourage you, though. Because as a friend recently told me, “I feel like a dog that’s been let off its leash when spring skiing.”
If you’re looking for some inspiration for learning downhilling technique with cross-country ski gear (in the backcountry), I recommend reading Cross-Country Downhill #ad. Although it’s dated (published c. 1987), it provides wonderful philosophy about cross-country skiing off the beaten path.
There’s also a lot of technical information regarding learning the Telemark turn on lighter cross-country touring gear. I highly recommend reading this book for those of you looking to cross-country ski in the backcountry.
Keep in mind, though, that this book is written with a more advanced mountain adventurer in mind. Follow the Amazon link and you should be able to find a used copy.
Cross-Country Skiing Explained Articles and Videos
Please note that I wrote and produced the Cross-Country Skiing Explained series of articles and videos with the beginner and intermediate cross-country skier in mind. This is the demographic for whom I most often serve(d) while working in the outdoor recreation industry at Lake Tahoe. I basically treat these articles and videos as extensions of the conversations that I have (had) with those customers.
That said, expert skiers probably could take away something of value from these resources. Just know that I don’t address race-oriented philosophy, technique, or gear selection.
Considerations for buying cross-country ski gear (new and beginner xc skiers)
- Intention, Types of XC Skis, and Whether to Buy New or Used (Part 1)
- How Much Gear to Acquire, Evaluate Your Commitment, Value of Taking XC Ski Lessons (Part 2)
- Can One Set of Classic Cross-Country Skis Work for Groomed and Off-Track XC Skiing? (Part 3)
- Can I Use One Set of XC Ski Boots for All of My Cross-Country Skiing Needs? (Part 4)
- Overview of Off-Track and Backcountry Cross-Country Ski Gear
- Invest in Technique More than Gear
Classic Cross-Country Ski Components
- Introduction to Classic Cross-Country Skis (Part 1)
- Geometry of Classic Cross-Country Skis (Part 2)
- The Grip Zone of Classic Cross-Country Skis (Part 3)
- Types of Bindings for Classic Cross-Country Skiing (Part 4)
- Ski Boots for Classic Cross-Country Skiing (Part 5)
- Classic Cross-Country Ski Poles (Part 6)
- FAQs about Classic Cross-Country Skiing
Waxing Your “Waxless” Cross-Country Skis (for beginner and intermediate xc skiers)
- Introduction to Waxing Your Waxless XC Skis
- Step-by-Step Waxing Tutorial
- FAQs About Waxing Your Waxless XC Skis
Cross-Country Skiing Techniques, Demonstrations, and Related Concepts
- Outdoor VLOG (emphasis on the cross-country skiing experience)
- Cross-Country Skiing in Challenging Conditions
- Considerations for Winter Adventure in Lake Tahoe’s Backcountry
- Using the Side-Step and Herringbone Techniques in the Backcountry
- 10 Tips for Spring Cross-Country Skiing in the Backcountry
- 5 Reasons to Love Spring Cross-Country Skiing
- Considerations for Cross-Country Skiing During the Fall and Early Winter
- Discussing the Goal of Becoming a Better Cross-Country Skier and Embracing Backcountry and Groomed Terrain in Pursuit of that Goal
- The Cross-Country Skiing Experience: Immersing Yourself in Winter