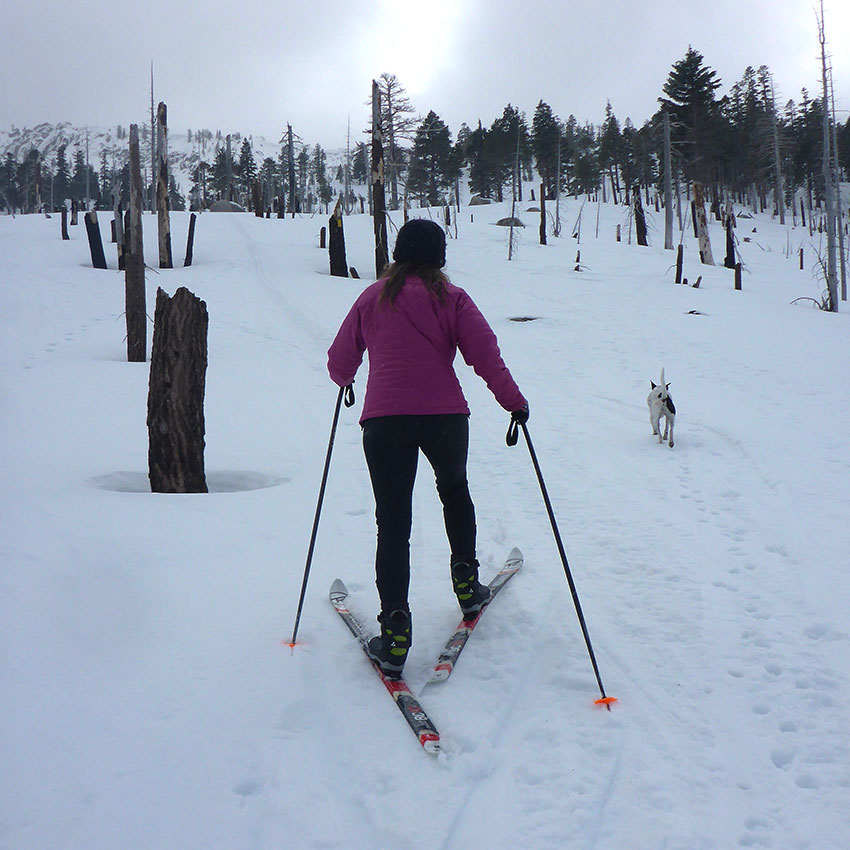
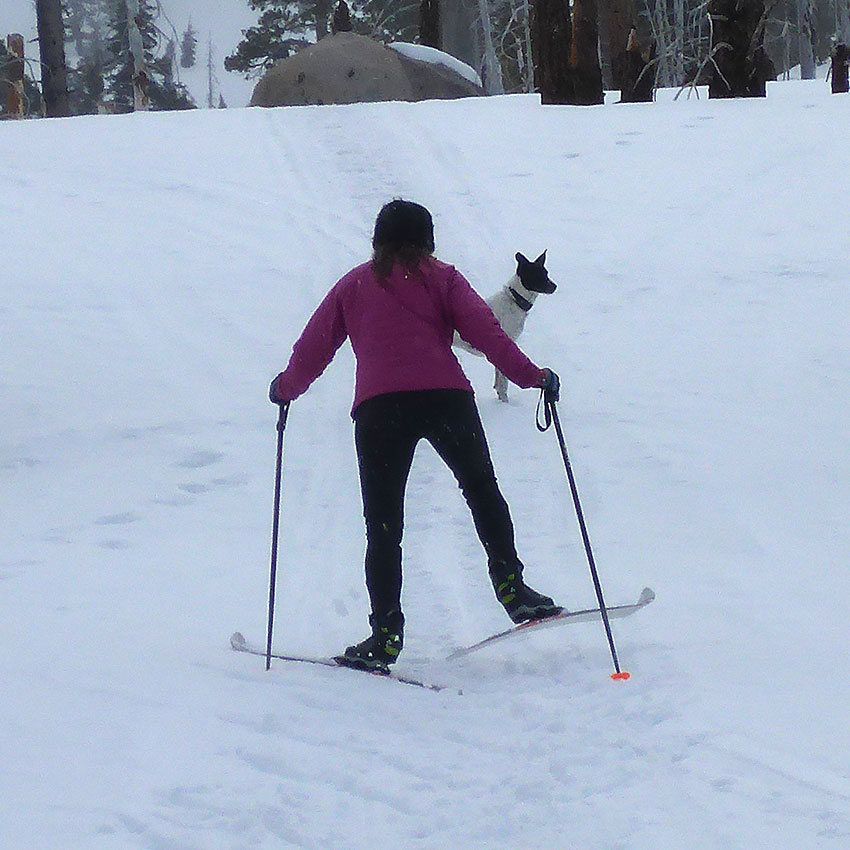
Safety is paramount when traveling in the backcountry no matter your mode of winter adventure. This is especially true for cross-country skiing in mountainous landscapes. Due to their long and lightweight design, cross-country skis are ideal for flat and rolling terrain.
Unfortunately, they can be difficult to control when it comes to dealing with the steep conditions associated with mountains. Therefore, appropriate route selection for xc skiing in such terrain is essential. But no matter where you travel in the backcountry, you’ll eventually find slope angles that’ll require you to be creative with those skinny skis.
Support Tahoe Trail Guide with a financial contribution via PayPal (single contribution) or Patreon (reoccurring contributions). Your support of Tahoe Trail Guide is very much appreciated!

My advice is to come prepared with the technical skills necessary to negotiate challenging backcountry conditions.
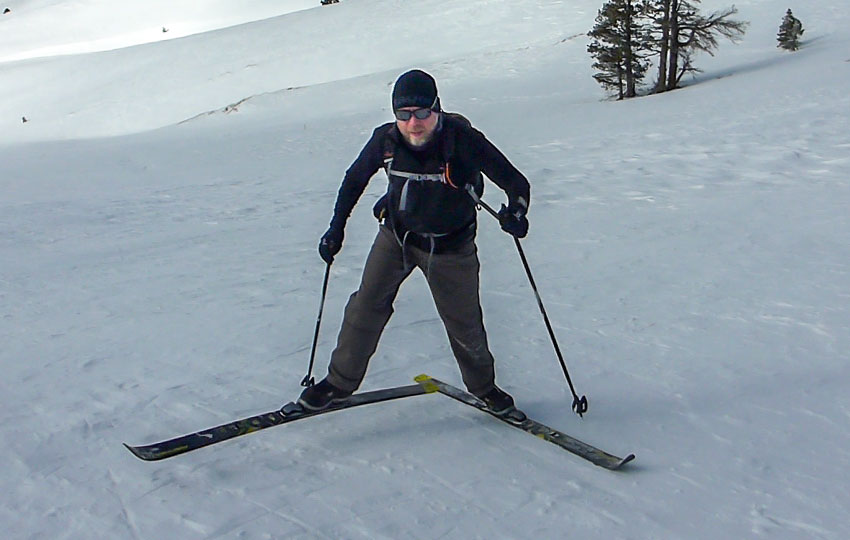
In other words, know how to perform the side-step and herringbone which are two classic cross-country skiing techniques that are essential for safe travel in the backcountry.
These two modes of travel are critical to know because they are non-gliding techniques. So, this means that you can use them for climbing and descending steeper angles of terrain without fear of sliding.
Basically, you should be able to incorporate the side-step and herringbone techniques (and their myriad variations) seamlessly into your diagonal stride.
For the visual learners, here’s a demonstration of side-stepping, the herringbone, and transitioning between the two techniques. And, please subscribe to my YouTube channel while you’re at it 🙂
Embracing Non-Gliding XC Ski Technique
There are five core techniques used in classic cross-country skiing:
- Diagonal stride (gliding)
- Kick double pole (gliding)
- Double pole (gliding)
- Side-step (non-gliding)
- Herringbone (non-gliding)
The side-step and herringbone are often overlooked and underrated because they’re non-gliding techniques.
They’re not sexy.
They’re not fast.
You’ll never see a World Cup skier side-step during a race. You’ll only see classic ski racers use the herringbone on the steepest sections of a hill. Otherwise, many racers just sprint up the hills as if they were running (and happened to be wearing skis). There’s nothing wrong with this. They’re skiing for speed, after all. And they’re skiing on a uniform and predictable surface.
As with most industries, however, everything ranging from technique to gear trickles down from the pros. So if the professionals aren’t using it, it’s probably not going to be discussed very often.
I’d also say that most accomplished xc skiers take the two techniques for granted. The side-step and herringbone are relatively easy to learn. And most skiers usually train to become faster skiers. Since non-gliding equates to slow travel, it’s logical that those skiers would focus more on developing their gliding techniques.
But skiing on a groomed track with some steep hills is not the same as traveling across variable terrain featuring countless obstacles.
The side-step and herringbone techniques are slow and methodical.
But that’s the whole point now, isn’t it?
You need to be able to control your speed and rate of travel to be safe in the backcountry. So the fact that neither the side-step nor herringbone are fast or designed for gliding is exactly what you want.
Cross-Country Skis Have Edges
Wait, what? Edges on cross-country skis? No way. They don’t have edges!
Yes. All cross-country skis have edges.
Most cross-country skis don’t have metal edges. However, all cross-country skis feature a 90 degree corner where the base of the ski meets its sidewall (i.e. an edge).
Look closer. Those aren’t rounded corners.
Knowing how to set the skis’ edges is the key factor to effectively side-step or herringbone. This applies whether or not your cross-country skis have metal edges.
That said, many backcountry and off-track cross-country skis do actually feature metal edges. This doesn’t necessarily make them a better ski. It simply makes them a different ski designed for different terrain.
For the backcountry, I do prefer metal-edged cross-country skis. The metal edge makes for a more durable ski and better downhill turning capabilities. Additionally, a metal edge will bite more effectively into angled terrain that’s icy and hard-packed.
At a groomed cross-country ski area, however, I would never bring my backcountry xc skis. Long and skinny classic track and skate skis are ideal for groomed terrain. They’re faster and more responsive. And, believe it or not, it’s easier to utilize their edges on flat groomed surfaces.
Pardon my ranting for a moment…
It’s a myth that wide cross-country skis with metal edges provide more control on groomed terrain.
Backcountry cross-country skis often slip and slide when run across firm flat surfaces. They have more sidecut which is good for making downhill turns. But, this also means that the skis won’t track nearly as straight as a skinny ski (no sidecut).
Also, because they’re wider, they’re actually more difficult to engage their edges for gaining purchase during push-off when diagonal striding on slightly angled surfaces.
Unless the snow is soft enough, I don’t even like to run my wide backcountry cross-country skis on snowmobile packed trails or service roads.
Instead, I prefer to ski along those trails where the snow is often softer. Then, I can edge and compress the skis in ways that enable me to make them track straight.
OK, back to the regularly scheduled program…
In order to effectively run your cross-country skis on the flats or the hills, it’s important to understand how to use their edges.
Nearly always you’re going to want to set the uphill edge of your skis into the snow. This is particularly true for side-stepping and performing the herringbone.
Don’t be timid about setting those edges. Be deliberate about it.
When side-stepping or using the herringbone, I “slap” the snow with my skis. This ensures that I make positive contact between the skis’ edges (and grip zones if I’m just walking up a hill) and the snow.
When teaching children to ski uphill, instructors will often encourage their students to walk like a monster. The point is for the kids to stomp their grip zones or ski edges into the snow in order to be able to push-off confidently to the next ski.
Another important piece of information to understand when using your ski edges is the concept of platform angle.
Platform Angle
Platform angle is the angle of your ski’s base when standing perpendicular to the hill (fall line) in relation to the force of gravity.
This is important because knowing how to control that angle will keep you from sliding down a hill while side-stepping. Or, through angle manipulation, you can intentionally initiate a slide which is called side-slipping.
So long as you create a platform angle of 90 degrees, regardless of slope angle, you should stop. I use the word “should” because nothing is guaranteed in the backcountry. If you’re trying to stand still on a steep sheet of ice, good luck.
In most situations, maintaining a 90 degree platform angle while side-stepping will enable you to stop from sliding while going up or down the hill.
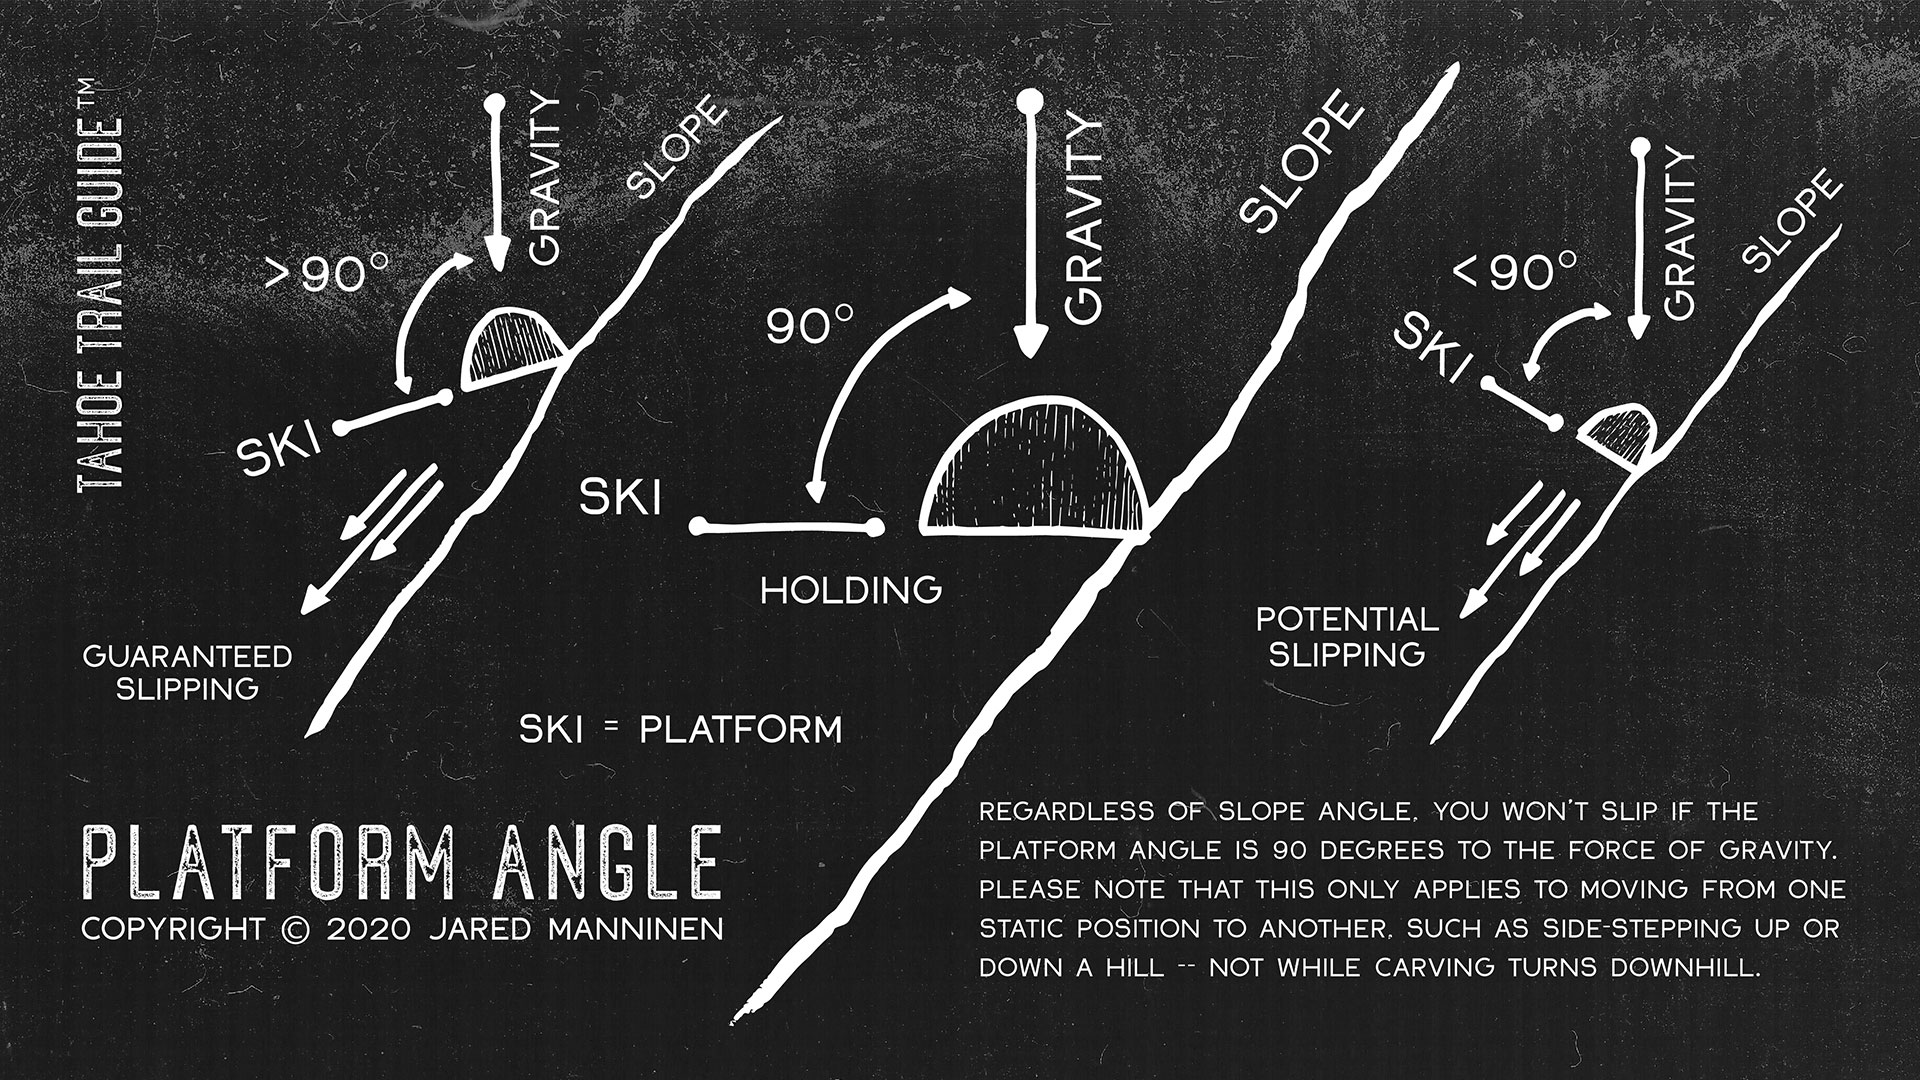
A platform angle greater than 90 degrees will cause you to slip down the hill. Again, this is known as side-slipping. And, it can actually be an effective way of safely skiing down a hard-packed hill. Keep in mind that side-slipping will most likely occur in firm snow conditions. When the snow is soft, you can normally deviate slightly from a 90 degree angle and still succeed at climbing or descending a hill without sliding.
A platform angle of less than 90 degrees may cause you to slide downhill. Slipping while maintaining a lesser platform angle will most likely occur on firm snow. Again, though, when the snow is soft a slight deviation from 90 degrees won’t always cause you to slip.
To recap … in most conditions you’ll be able to stand still on the side of a hill while keeping your skis perpendicular (to the hill) and maintaining a platform angle of 90 degrees.
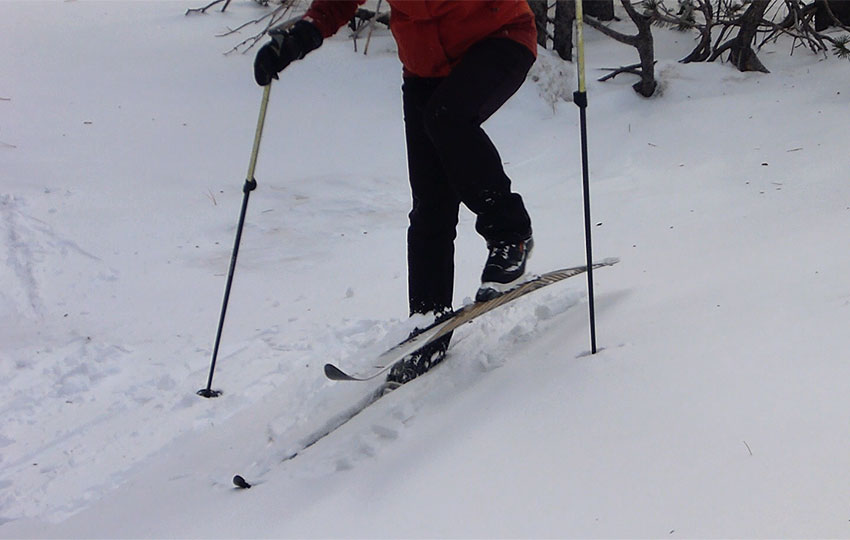
Side-Step Technique
The side-step technique in cross-country skiing is a basic, yet effective, method of negotiating steep terrain. And, the main reasons I side-step are:
- I’ve reached an angle of terrain that’s too steep for me to climb by diagonal striding or using the herringbone technique.
- Or, the angle of terrain is too steep for my comfort level to ascend or descend in any other fashion.
- Sometimes the hill’s angle that I’m trying to negotiate features natural obstacles that I must navigate around.
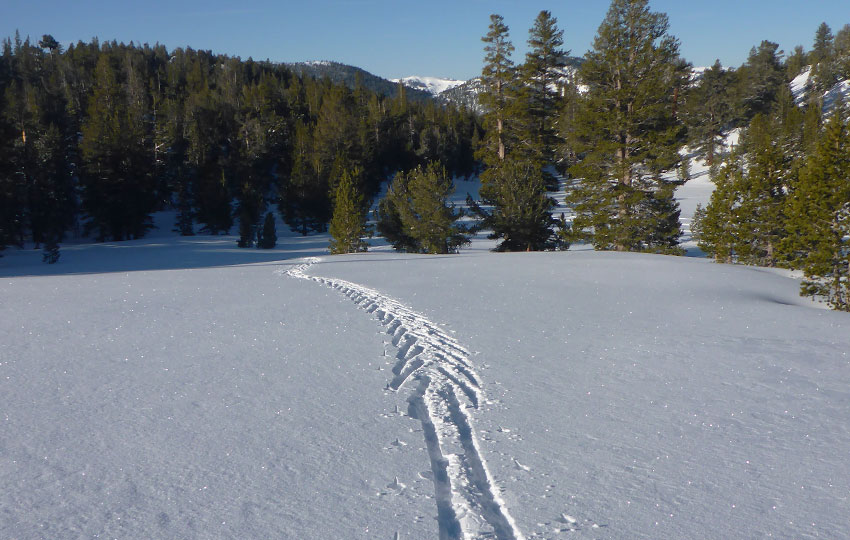
- Side-stepping, in combination with diagonal striding, allows me to quickly and easily ascend or descend while traversing a hill.
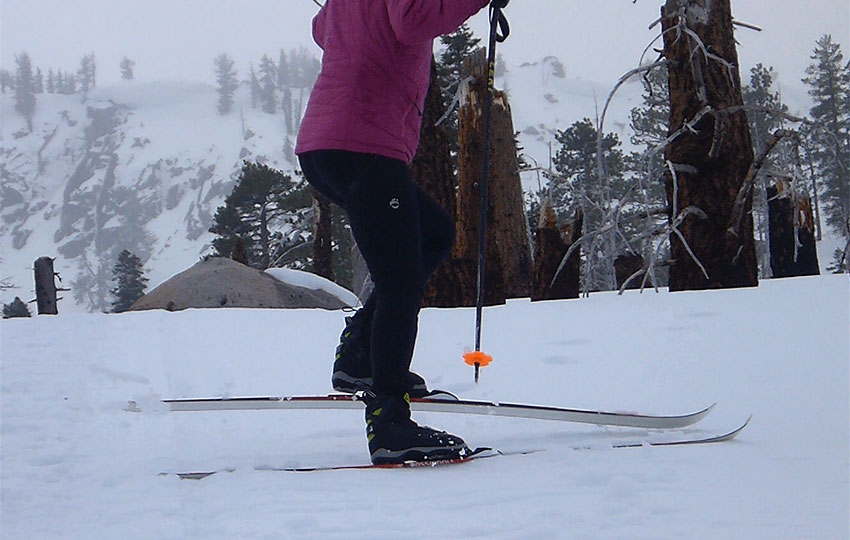
To effectively side-step up or down the hill, literally step to the side while keeping your skis perpendicular to the hill and maintaining a 90 degree platform angle.
Clearly, side-stepping is not rocket science. However, it’s an effective way of safely negotiating steep terrain.
And, in variable snow conditions, side-stepping can be challenging.
When the snow is icy, maintaining that 90 degree platform angle is critical to prevent yourself from slipping.
In deep snow situations, you have to be mindful of setting the skis perpendicular to the hill. Often, due to the free heel nature inherent to cross-country skiing, the tails will lag behind in deep snow. So, you end up angling your skis less than perpendicular to the fall line (tips higher than the tails) and sliding backwards.
Herringbone Technique
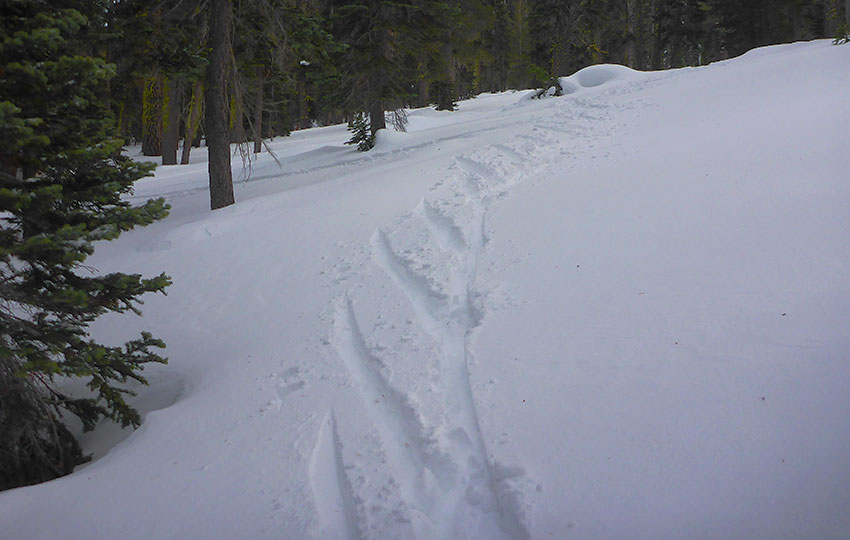
The herringbone is a quintessential cross-country ski technique. And, when you perform it cleanly, it makes a distinct and lovely design in the snow. This, in spite of it being named after the skeleton of a fish!
Bear in mind that the herringbone technique is used only for going uphill. It’s not like side-stepping where you can use it to go up and down a hill.
Also note that the herringbone technique works great on moderately steep terrain. However, it’s not ideal on very steep slopes.
For steep hills I prefer to use the side-step technique.
The main reasons I use the herringbone technique are:
- The hill has become too steep to continue diagonal striding, but not steep enough to require side-stepping
- I’ll use a “half” herringbone to traverse uphill, which means I point the uphill ski in the direction of travel while I angle the downhill ski perpendicular to the hill
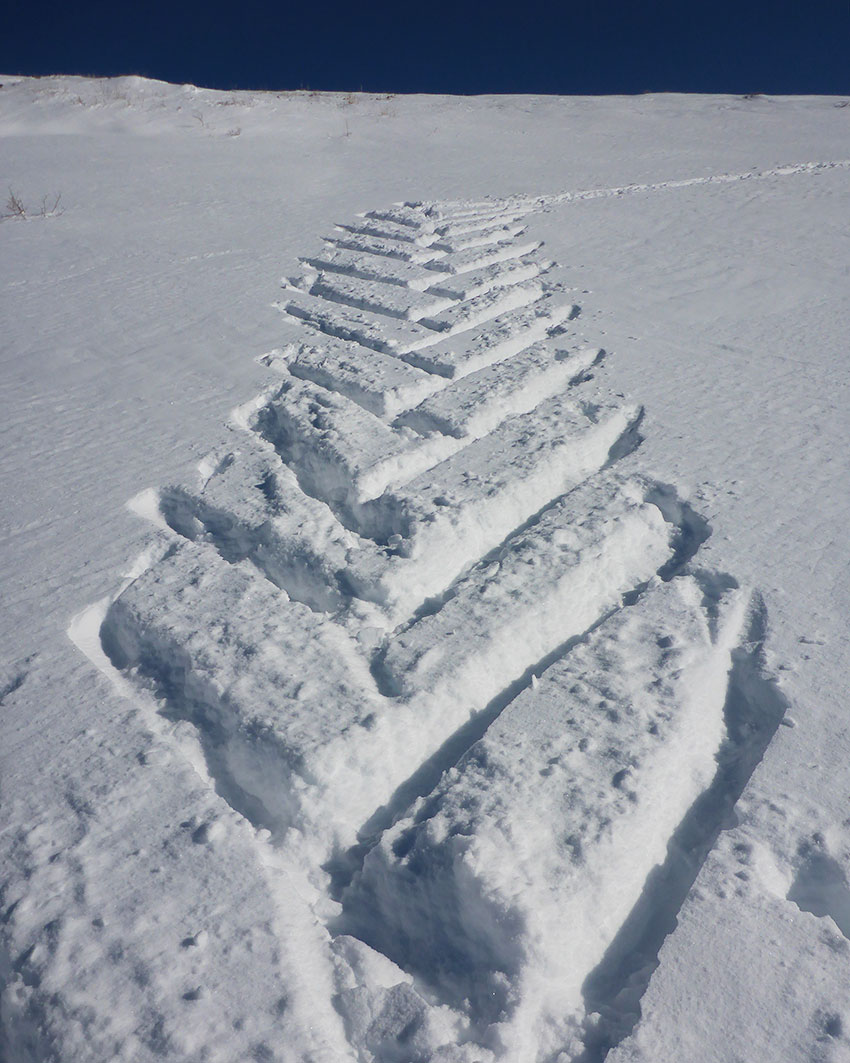
When performing the herringbone technique, create a V-shape with your skis while facing uphill. Then, walk uphill while setting the inside edges of your skis into the snow.
The width of the V-shape you create and the edge angle of your skis will determine whether or not you’ll slip backwards.
Unfortunately, the platform angle “rule” applicable when side-stepping doesn’t correlate to use of the herringbone. You’ll just have to play with the angles as you begin your ascent of the hill.
Also note that for lower angled hills, the V-shape created by your skis will be narrow. Then, as you climb steeper, you’ll have to widen the V-shape (tips out) to prevent yourself from sliding backwards.
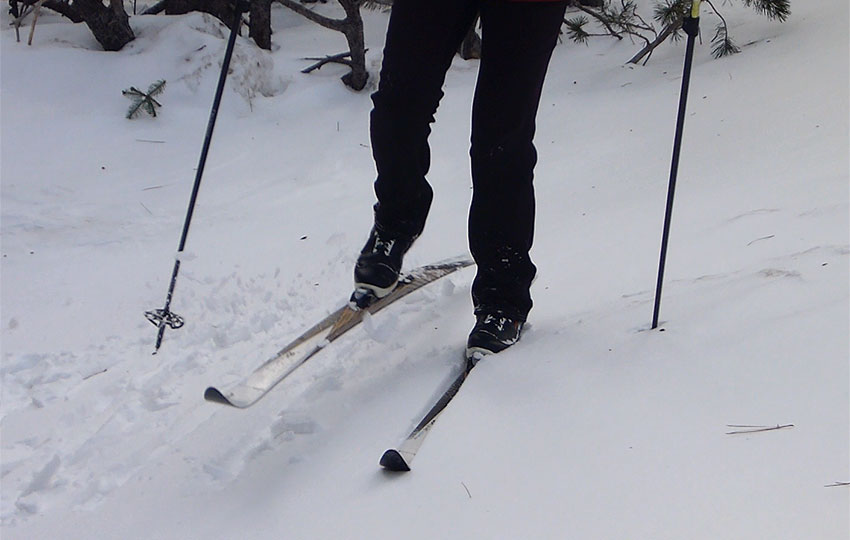
Transitioning Between Techniques
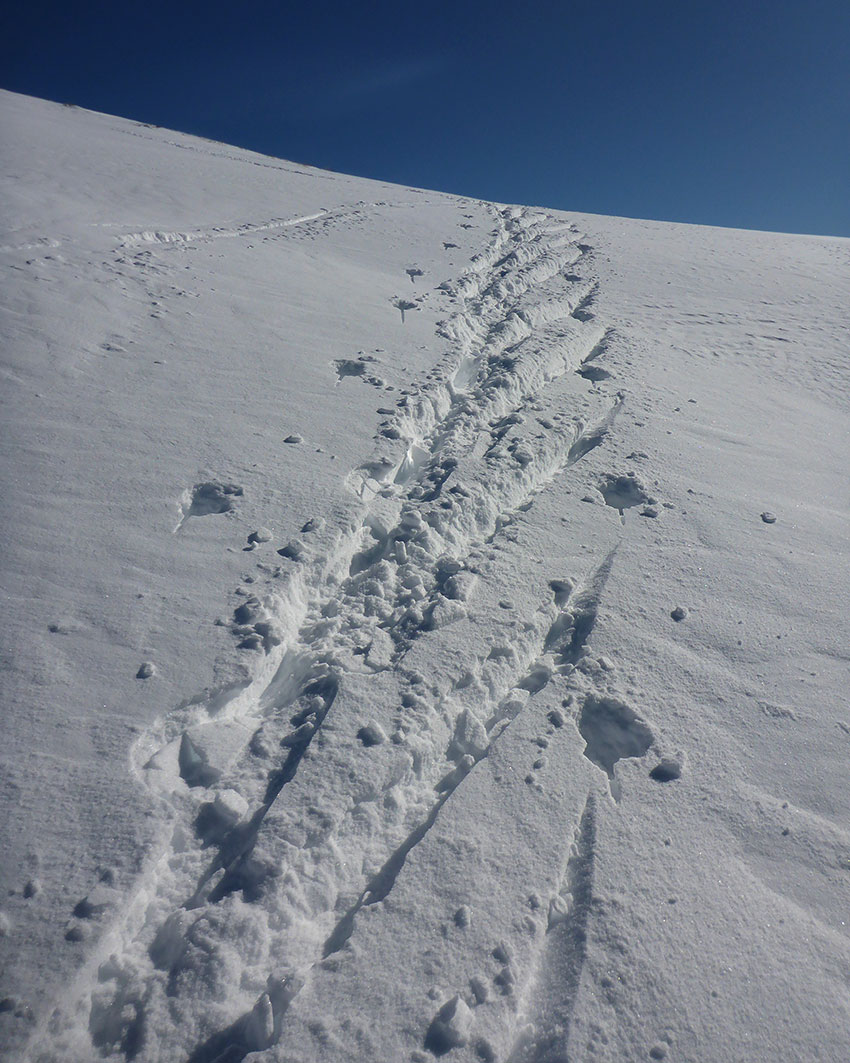
Based on the steepness of the hill, you may need to transition from the herringbone into side-stepping (or vice versa).
The reason for transitioning between the herringbone and side-stepping is because the hill increases in steepness.
When you make the transition from the herringbone to the side-step, swing one of the skis around to the uphill side. In order to do this efficiently, you’ll need to balance your weight on the stationary ski.
Ensure that you immediately set the uphill edge of that uphill ski.
The remaining ski when making this transition will be left in its original V position. The uphill ski, on the other hand, will now be perpendicular to the hill. So, if you don’t set that uphill edge of that uphill ski, you could slip backwards (on the ski still angled in the V position).
When you’re ready to bring that second ski parallel to the uphill ski (and perpendicular to the hill), weight the uphill ski and take the small step with the downhill ski.
Now you can side-step up the steep embankment.
The reason you would want transition from side-stepping to the herringbone is because the steepness of the hill decreases.
To perform this transition, you’ll need to reposition the uphill ski. To accomplish this, swing wide the uphill ski so that you create that V-shape associated with the herringbone.
And, again, set the uphill (and now inside) edge of that V positioned ski.
Then, you need to bring the other ski, which is still perpendicular to the hill, into the second leg of the V. Most of the time I’ll just treat that repositioning of the second ski as my next step uphill.
Both of these transitions take balance and athleticism, so be sure to practice them often.
Final Thoughts about Side-Stepping and the Herringbone
Although I like to cruise along in the backcountry whenever time and conditions permit, every choice I make is with purpose and a mandate to return home safely. Therefore, I travel confidently yet cautiously when encountering angles of terrain that could prove dangerous to my health.
Side-stepping and using the herringbone technique are essential skills that allow me to travel safely in a backcountry environment. So, I encourage you to embrace them as safety measures and practice them often. Additionally, I highly recommend developing your transitional skills between the techniques.
Few aspects in the backcountry will fit neatly in a box. You need to be creative with running your cross-country skis. They are, after all, just tools for adventure. And if you don’t know how to operate your tools, how will you have a good time and return home safely?
Lastly, always keep in mind that often the most challenging part of your cross-country skiing adventure may simply be the snowbank between your vehicle and the trail on which you’ll be skiing!
Cross-Country Downhill is a bit dated (published c. 1987), but it provides wonderful philosophy about cross-country skiing off the beaten path.
There’s also a lot of technical information regarding learning the Telemark turn on lighter cross-country touring gear. I highly recommend reading this book for those of you looking to cross-country ski in the backcountry.
Keep in mind, however, that this book is written with a more advanced mountain adventurer in mind. Follow the Amazon link and you should be able to find a used copy.
Cross-Country Skiing Explained Articles and Videos
Please note that I wrote and produced the Cross-Country Skiing Explained series of articles and videos with the beginner and intermediate cross-country skier in mind. This is the demographic for whom I most often serve(d) while working in the outdoor recreation industry at Lake Tahoe. I basically treat these articles and videos as extensions of the conversations that I have (had) with those customers.
That said, expert skiers probably could take away something of value from these resources. Just know that I don’t address race-oriented philosophy, technique, or gear selection.
Considerations for buying cross-country ski gear (new and beginner xc skiers)
- Intention, Types of XC Skis, and Whether to Buy New or Used (Part 1)
- How Much Gear to Acquire, Evaluate Your Commitment, Value of Taking XC Ski Lessons (Part 2)
- Can One Set of Classic Cross-Country Skis Work for Groomed and Off-Track XC Skiing? (Part 3)
- Can I Use One Set of XC Ski Boots for All of My Cross-Country Skiing Needs? (Part 4)
- Overview of Off-Track and Backcountry Cross-Country Ski Gear
- Invest in Technique More than Gear
Classic Cross-Country Ski Components
- Introduction to Classic Cross-Country Skis (Part 1)
- Geometry of Classic Cross-Country Skis (Part 2)
- The Grip Zone of Classic Cross-Country Skis (Part 3)
- Types of Bindings for Classic Cross-Country Skiing (Part 4)
- Ski Boots for Classic Cross-Country Skiing (Part 5)
- Classic Cross-Country Ski Poles (Part 6)
- FAQs about Classic Cross-Country Skiing
Waxing Your “Waxless” Cross-Country Skis (for beginner and intermediate xc skiers)
- Introduction to Waxing Your Waxless XC Skis
- Step-by-Step Waxing Tutorial
- FAQs About Waxing Your Waxless XC Skis
Cross-Country Skiing Techniques, Demonstrations, and Related Concepts
- Outdoor VLOG (emphasis on the cross-country skiing experience)
- Cross-Country Skiing in Challenging Conditions
- Considerations for Winter Adventure in Lake Tahoe’s Backcountry
- Using the Side-Step and Herringbone Techniques in the Backcountry
- 10 Tips for Spring Cross-Country Skiing in the Backcountry
- 5 Reasons to Love Spring Cross-Country Skiing
- Considerations for Cross-Country Skiing During the Fall and Early Winter
- Discussing the Goal of Becoming a Better Cross-Country Skier and Embracing Backcountry and Groomed Terrain in Pursuit of that Goal
- The Cross-Country Skiing Experience: Immersing Yourself in Winter
Very informative and entertaining, too! Thanks you for the post and even your dubbing over wind.
Thank you for the kind words, Bridget! Glad you’re finding the articles helpful.
And, it was a fun video to make in spite of all the wind 🙂