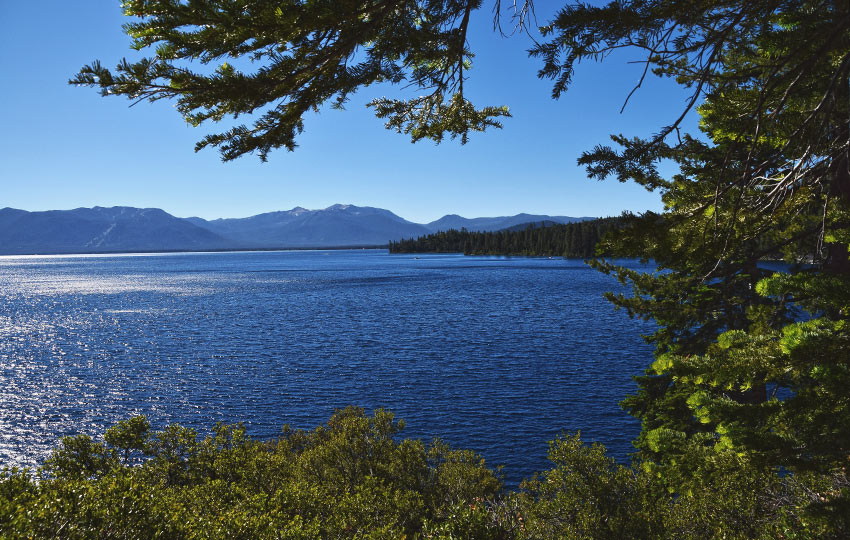
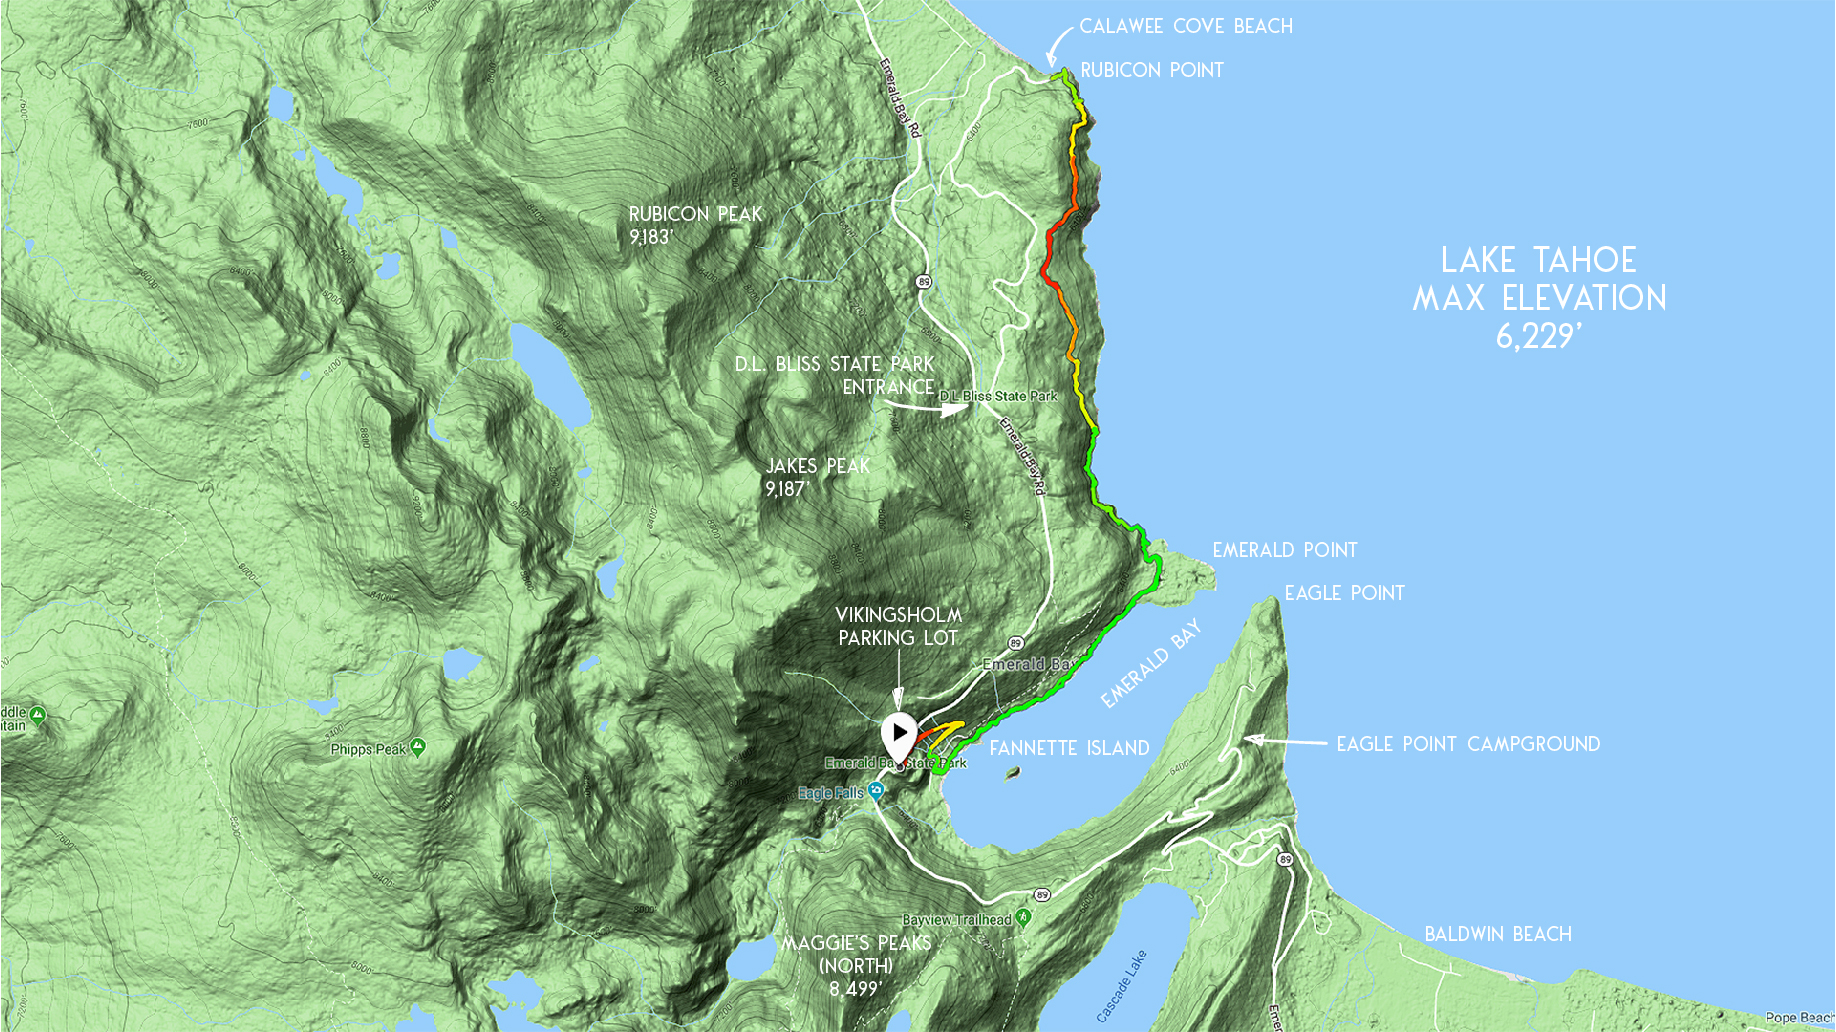
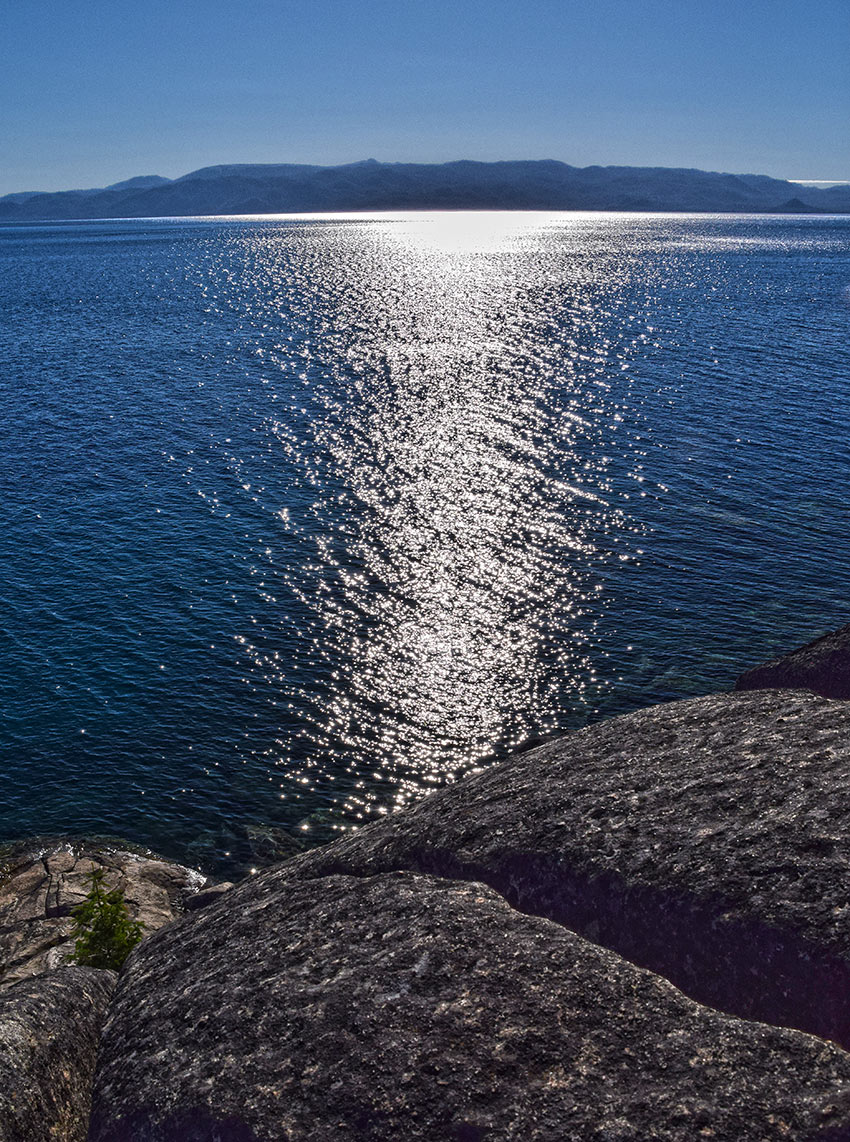
The Rubicon Trail is a picturesque hiking trail located on the southwest corner of Lake Tahoe. It contours the shoreline from Emerald Bay to D.L. Bliss State Park and boasts long, continuous panoramic views of Lake Tahoe.
From aspects of the trail you can see many prominent locations of South Tahoe, such as:
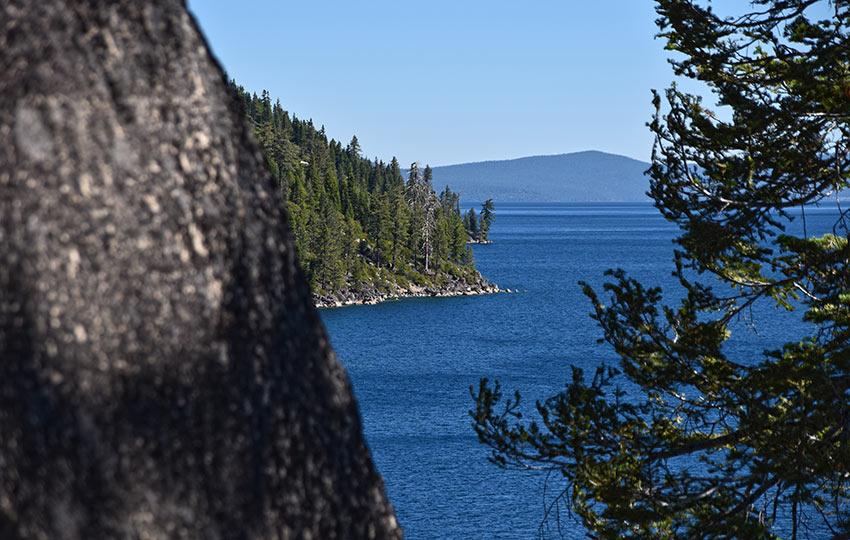
- Fannette Island
- Maggie’s Peaks
- Mount Tallac
- Luther Pass
- Freel Peak
- Jobs Sister
- Monument Peak
*Please note that D.L. Bliss State Park will be closed for repairs all of 2025. So, you’re best bet for hiking the Rubicon Trail is to hike it as an out-and-back excursion starting and ending at Emerald Bay. Fortunately, that’s the exact hike I wrote for this article!
**Also note that in 2025, there are major parking restrictions at Emerald Bay in an effort to mitigate the non-stop congestion, as well as address safety concerns. Here’s the article from the Tahoe Daily Tribune (June 19, 2025) discussing the details. There’s a shuttle service that’s running in conjunction with the parking restrictions.
Support Tahoe Trail Guide with a financial contribution via PayPal (single contribution) or Patreon (reoccurring contributions). Your support of Tahoe Trail Guide is very much appreciated!

If you’re paying attention, you might also see…
- Osprey, Eagles, or Peregrine Falcons flying overhead
- Common Mergansers diving under water to catch their next meal
- Sooty Grouse foraging for food along the trail
Always keep one eye on the actual trail, however. This is because many of its sections feature tripping hazards (rocks, roots, and granite steps) juxtaposed next to steep drop-offs.
If you hike the Rubicon Trail with your kids, definitely keep them on a tight leash through its steeper sections.
Please note that this article is about the Rubicon hiking trail. This foot trail travels alongside Lake Tahoe between Emerald Bay and D.L. Bliss State Parks. This article is not about the legendary 22-mile, 4×4 trail of the same name. That one travels from the Loon Lake Trailhead (west slope) to Lake Tahoe (near Tahoma). For a detailed and succinct article about the 4×4 vehicle trail, visit OverlandSite.com.
Rubicon Hiking Trail Data (approximations):
- Location: South Tahoe – Emerald Bay
- Category of Hike: Day Hike
- Total Mileage: 11 miles (out-and-back)
- Total Elevation Gain: 1,400 feet
- Highest Point: 6,600 feet (Vikingsholm parking lot)
- Trail Conditions: Packed dirt, granite steps, steep drop-offs, and some asphalt (the trail travels briefly through Emerald Bay State Park)
- The map I prefer for this trail is the Tom Harrison Desolation Wilderness Map. This is because it provides the largest view of the Emerald Bay area compared to other recreational maps.
Considerations for Hiking the Rubicon Trail:
- Emerald Bay becomes excessively crowded, especially on the weekends during the summer. So plan to visit on weekdays and/or arrive before 10 a.m.
- Emerald Bay is highly trafficked (i.e. being loved to death), so create as little impact as possible. For example, pack out your trash, use the park’s toilets, don’t remove naturally occurring objects (i.e. pine cones, sticks, stones), and don’t disturb the wildlife.
- Bring at least $10 cash to pay for parking.
- Adhere to all Leave No Trace principles.
- There are few trail signs and markers on public lands in the Tahoe region. So unless there are tracks to follow, the correct route may be difficult to identify. When in doubt, turn back.
- Be prepared for inclement weather and carry plenty of warm clothes, food, and water.
- Leave an itinerary of your plans with someone who’ll call emergency services if you don’t return by your prescribed time.
- Dogs are not allowed on any of the trails or roads in Emerald Bay.
- Drones are not allowed in Emerald Bay or any other State Parks in the Sierra District.
Parking Directions for the Rubicon Hiking Trail:
The variations on hiking the Rubicon Trail, as I briefly mentioned above, dictate where you’re going to park. However, no matter the route you hike you’re either going to park at Emerald Bay or D.L. Bliss State Park (or both).
The route I advocate in this article begins and ends at the Vikingsholm parking lot at Emerald Bay. So, this out-and-back hike is approximately 11 miles long.
That said, the obvious and most convenient option is to park at the Vikingsholm parking lot.
This is the big lot on the lake side of SR 89 that overlooks Emerald Bay. This is a self-pay parking lot that costs $10, but you can pay with cash or credit card.
The second parking option is located on the mountain side of SR 89. It’s in the parking lot used for accessing the Eagle Lake Trail. This is a self-pay lot that costs $5 and only accepts cash or check.
The third option, and my preferred choice, is to park in one of the spots directly off of SR 89. These spots are located between the Eagle Lake parking lot and Vikingsholm parking lot. There are about a dozen and a half spots that are oriented perpendicular to SR 89, and they’re free. Not surprising, they fill up fast. So arrive at Emerald Bay early enough to secure a free spot.
I’ve already discussed ad nauseum the pitfalls of parking at Emerald Bay (Emerald Point & Eagle Point). So I won’t get into it here. Just know, however, that other than those three options mentioned above, parking anywhere else in or around Emerald Bay is at your own risk, both physically and financially.
The key to finding a great parking spot in Emerald Bay is to simply arrive before 10am.
The trailhead for this article is near the self-pay station at the back of the Vikingsholm parking lot.
The other options for hiking and parking are:
- Begin and end at D.L. Bliss State Park ($10 for day-use parking) instead of Emerald Bay. There is a parking lot at the northern terminus of the Rubicon Trail in D.L. Bliss State Park. Hiking from here enables you to avoid having to hike out of Emerald Bay.
- Park vehicles at both locations (Emerald Bay and D.L. Bliss State Park) and hike the Rubicon Trail in one direction only (about 5 total miles). Then shuttle you and your hiking partners back to the first vehicle. This option could cost you a total of $20 for having to pay at both locations. Or, you could pay nothing by parking in one of the free spots at Emerald Bay and then choosing to park outside of D.L. Bliss State Park along SR 89. The one caveat to this option is that it’s about two miles from the entrance to the park from the Rubicon Trail (and vice versa).
Here’s a map to help you find the Vikingsholm parking lot. The marker for “Emerald Bay State Park” on this map is essentially the spot.
Travel along the Rubicon Hiking Trail:
Sticking to the route I recommend (out-and-back from the Vikingsholm parking lot) is probably the least expensive. It’s also the simplest option as far as logistics go.
The second option of beginning and ending at the northern endpoint (D.L. Bliss State Park) is just as easy logistically. However, it costs money and means that if you’re driving from South Tahoe you’ll be spending more time in your vehicle commuting to the trailhead.
The shuttling option is fine, too. But unless you secure free spots at both locations you have parking costs to consider.
Also, there’s always the potential when coordinating with multiple people at multiple locations that your inspiring hike can wind up turning into a fiasco.
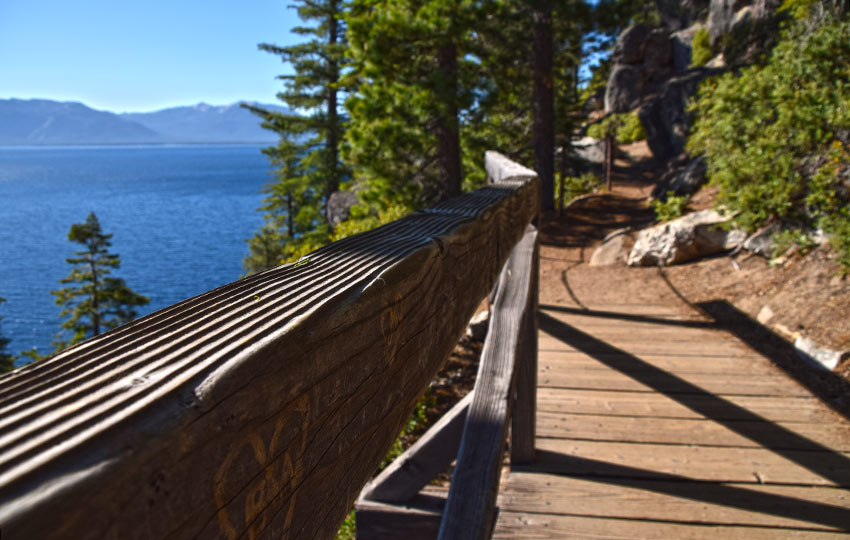
As far as the actual trail conditions are concerned, the Rubicon Trail is maintained as well as any trail in the Lake Tahoe region.
The only real challenge to the trail itself is the fact that it’s very close to some steep drop-offs in multiple sections. Coupled with the rocks, roots, and stone steps on the trail, you could be in grave danger if you don’t pay attention to where you’re walking.
As I mentioned in the intro, be especially mindful of your children through the steep sections.
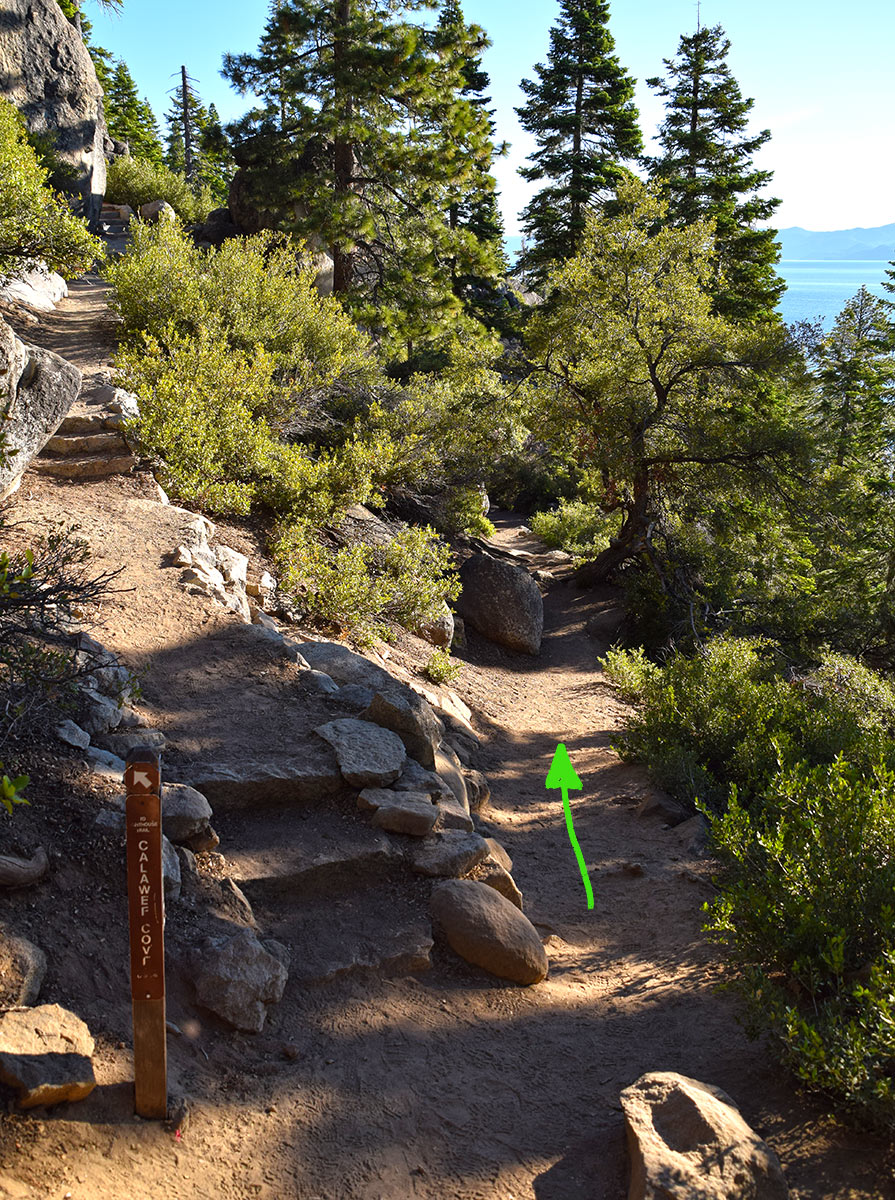
The trail is easy to follow. However, there is one fork about a half mile south of Rubicon Point that might give you pause. When you reach this fork (while hiking north), you could either take the left trail and go up to the Old Lighthouse (via the Lighthouse Trail) or take the trail to the right which is the Rubicon Trail. Both trails eventually lead to Calawee Cove Beach, but the trail on the right (that slightly descends from this fork) is the actual Rubicon Trail and goes right past Rubicon Point.
Rubicon Point is not identified with any actual signs. That said, you’ll know it because it’s a massive rock formation at the corner of the trail just before you reach the parking lot at the northern terminus.
Definitely go and take a look from Rubicon Point. Be careful, however, because there is some rock scrambling required to reach the top of the formation.
At the parking lot you’ll find some restrooms equipped with flush toilets.
Take a moment to reflect and then turn around and head back the way you came.
Additional Notes about Hiking the Rubicon Trail
Technically, the Rubicon Trail’s southern terminus is on the south side of Emerald Bay, near Eagle Point.
People do hike the entire trail from Eagle Point Campground to Rubicon Point. However, this adds approximately six miles (out-and-back) to your hike. So this gives you a grand total of somewhere between 16-18 miles for the day.
The shuttling option would clearly shorten this distance, but again there’s parking costs and logistics to consider.
The real reason I don’t hike the entire length of the Rubicon Trail in one shot is because Emerald Bay can turn into a people zoo any time after 10 A.M.
By starting and finishing at Eagle Point Campground, you increase your chances of having to deal with hordes of people because you’ll now have to hike all around Emerald Bay.
I wouldn’t call myself a misanthrope. I just prefer to minimize my contact with people while out hiking. This is also why I often do sunrise and sunset hikes. There’s usually less people around at either times.
So, by leaving really early and beginning and ending at the Vikingsholm parking lot, I only have to deal with crowds during the last half mile (as I’m finishing up my hike).
Then on another day, I take the same approach and hike to Eagle Point.
Do you have other insight, feedback, or trail updates about hiking Rubicon Trail?
If so, please post it in the comment section below for the benefit of everybody 🙂
I was wondering if you’ve ever taken the TART shuttle 30 or 50 from DL Bliss/Emerald bay?
Thanks for reaching out, Analogj. I haven’t actually taken the TART shuttle (I’ve always had my own vehicle while living in Tahoe). I’ve heard they’re dependable. But if you’re looking to take a shuttle back from DL Bliss to Emerald Bay, one doesn’t actually exist. TART doesn’t travel south of Sugar Pine Point State Park (which is relatively far north of DL Bliss). So if you’re looking to do a one-way hike of the Rubicon Trail, you’ll need to find an alternate form of transportation to make your way back down to Emerald Bay (taxi, ride sharing, hitchhiking etc.). Sorry I couldn’t be more help, but that’s all I can think of. Usually I just do the full out-and-back 11 miles because I often hike by myself. Honestly, though, you could probably get an easy hitch/ride from someone if you had a small sign that said “Emerald Bay.” It’s only about 5 miles distance and most people up here wouldn’t mind lending a hand to a hiker. Anyway, hope that helps. Good Luck!