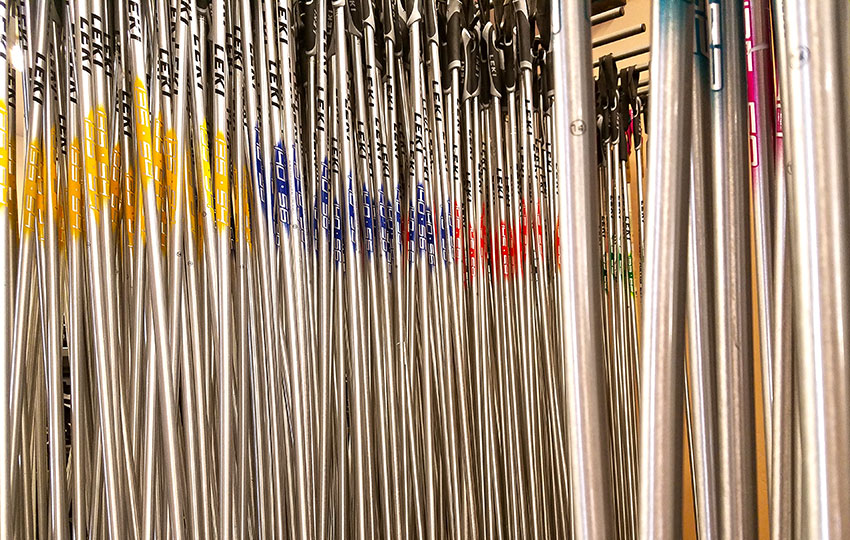
I’m often met with disbelief after handing first-time cross-country skiers their ski poles at the rental shop where I seasonally work. Those same customers then ask, “These are so much longer than my alpine ski poles. Are they supposed to be so long?” Or, they make some related statement about the length of the cross-country ski poles.
They are a lot longer than those alpine ski poles, and for good reason. Poling is an integral part of classic cross-country skiing. Whether you’re double poling across the flats, diagonal striding up a hill, or cresting a steep pitch while executing the herringbone technique, cross-country ski poles are absolutely necessary to keep your momentum up.
The effective use of poles provides you the necessary power to propel yourself forward no matter the angle of terrain.
Support Tahoe Trail Guide with a financial contribution via PayPal (single contribution) or Patreon (reoccurring contributions). Your support of Tahoe Trail Guide is very much appreciated!

I honestly don’t know the percentage of effort that you should use when poling (in conjunction with lower body movement) when classic cross-country skiing. However, I suspect those percentages ultimately vary based on terrain, conditions of the snow, and your technique.
The bottom line is that you’re not going to ski very far without correctly sized poles and the knowledge to use them.
To effectively use classic cross-country ski poles you first need to start with a ski pole that’s the correct length for your body height. It’s also in your best interest to understand some of the other aspects to classic ski poles, such as the type of material of which it’s constructed and the style of handle/strap and basket/tip that are fixed to the pole.
Determining the Correct Length of Your Classic Cross-Country Ski Poles
The old method of determining the appropriate length for your classic cross-country ski poles was to choose a pole that you could fit under your armpit.
Basically, a person stood next to the ski pole, raised their arm, then stuck the ski pole (which was standing upright) under their armpit. Apparently, if the person could (mostly?) fold their arm back down they would’ve found the correct length.
The trend, however, has been to use slightly taller classic ski poles. This has mostly been the result of World Cup racers using longer ski poles on classic race courses. They do this so that they can more effectively double pole. Double poling is faster than diagonal striding, at least on the flats.
In some cases, for example, racers will literally double pole entire courses rather than perform any diagonal striding. In response, the International Ski Federation (FIS) imposed an 83% rule on racers for the 2016/2017 season when choosing a length of ski pole for use in classic races.
The point of this rule was to “preserve” classic diagonal striding technique. Although, simply including more hills on classic race courses would accomplish the same goal.
Many racers feared having to cut down in size their ski poles as a result of this 83% standard. However, most of them measured and found that they were already in compliance. This tells me that through the process of experimentation and innovation, the professionals had already determined the ideal length that struck a balance between double poling and diagonal striding (i.e. classic cross-country ski technique).
There are few industries, if any, that don’t evolve based on the experience and experimentation of its highest level practitioners. So, the reason I get annoyed with people who still use the armpit trick is that they essentially aren’t acknowledging that the sport has evolved.
While standing and wearing ski boots, the length of the classic ski pole (from its tip to where the strap is fixed to the handle) cannot exceed 83% of a skier’s body length (in centimeters).
I’m approximately 169 centimeters tall when wearing ski boots: 169cms x 83% (.83) = 140.27 centimeters. Therefore, I use 140cm ski poles when classic cross-country skiing.
The 83% rule means that a classic ski pole (where the strap is fixed to the handle) should measure up to a point somewhere between your armpit and the top of your shoulder. In my case, the top of the ski pole handle (140cm) nearly reaches the top of my shoulder. And, the location of where the strap is fixed to the pole is a couple centimeters below that.

We’re only talking about a few centimeters, at most, difference between the old method of measurement (in the armpit) and the contemporary standard (83% of body length). But that extra length enables you to double pole more naturally. This is because you won’t have to bend at the waist quite so far in order to get a full “stroke.”
Also, the extra length provides a more effective push when diagonal striding. This is due to the fact that the angle of the longer ski pole, as it strikes the snow, is more in line with the direction of travel. For example, it’s directed more forward and across the snow rather than straight up.
Too short of a pole will be angled more upright. This potentially causes you to push your body upward rather than forward. And, you’ll compromise your posture by bending lower in order to accommodate the shorter ski pole. I also suspect that a shorter length pole more easily allows a person to plant their poles in front of themselves. This, however, is an indicator that the person lacks an understanding of proper technique.
You shouldn’t be planting your ski poles in front of your feet. Pole tips landing in front of your feet means that you’re pulling yourself with the poles.
Instead, those poles should be landing at your feet or just behind them so that you can push off with them. And if you’re using the ski poles to stop yourself (by sticking them in the snow in front of you), do yourself a huge favor and learn how to properly stop yourself through the use of the edges of your skis. Otherwise, you run the risk of impaling yourself on your ski pole(s)!
On the other hand, classic ski poles that are taller than your shoulders will be a nuisance to deal with when diagonal striding. This is because they’d be too long for your arm swing. Therefore, they’d yield too shallow of an angle (of ski pole) for you to effectively set the tip into the snow.
With all of that said, I understand that there are always exceptions to the rules. Certain conditions, such as injury or physical limitations, may require you to use shorter ski poles. Or, when breaking trail through deep snow, you may need a shorter length classic pole. This is because you need to be able to raise the ski pole (tip) out of the snow.
Materials Used for Classic Cross-Country Ski Poles
Over the years, there have been countless materials and combinations of materials used in the construction of cross-country ski poles. I imagine this also goes for bicycles, tennis rackets, golf clubs, and microwave ovens.
I’m not going to waste your time or mine by listing every possible option in existence. Just know that there will never be one perfect material or combination of materials that will serve everyone’s need.
Instead, learn the pros and cons of the more common materials used for the construction of cross-country ski poles. And base your selection on your intended use.
First things, first. If you’re using an old ski pole made from bamboo, fiberglass, or extruded plastic, get rid of it. Take solace in the fact that it’s lived a long life and can now retire comfortably somewhere in a landfill. ‘Nuff said about that.
Contemporary cross-country ski poles fall into two basic categories:
- Aluminum
- Composite/carbon fiber-based
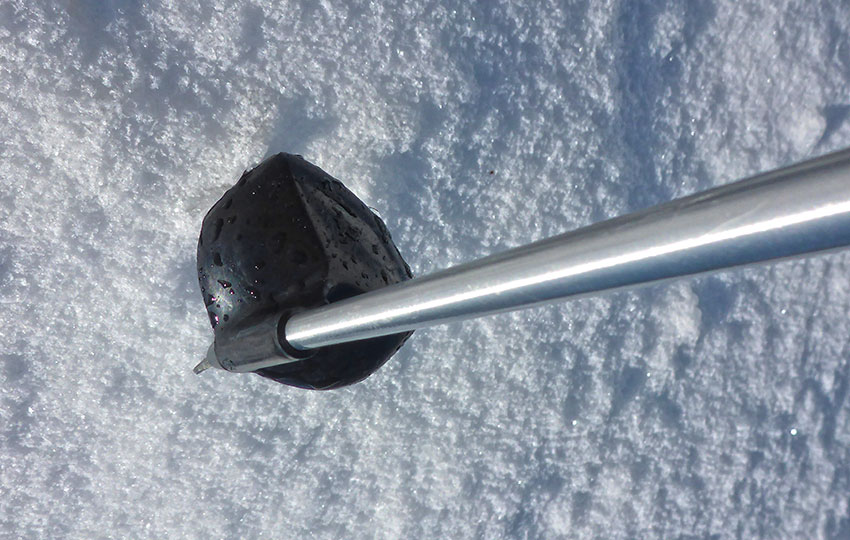
Aluminum Cross-Country Ski Poles
I prefer an aluminum pole for an all-around ski pole. They’re inexpensive, durable, and dependable. An aluminum pole that’s 10 years old will perform about the same today as it did when it was first purchased. This assumes that you haven’t bent or bruised it too much over the years.
Realistically, for most bent aluminum poles you can often just bend them back into shape relatively easy.
Also, replacing the handles and baskets on an aluminum pole is a cinch. At least it is when compared to the irritating (and sometimes stressful) process of replacing either element on an expensive pair of carbon fiber poles with cork handles.
That’s not to say I don’t love those expensive carbon fiber poles, but aluminum works just fine for most applications.
Sure, the weight of an aluminum pole is more than that of a composite or carbon fiber-based ski pole.
However, years ago I thru-hiked the Appalachian Trail (2,200+ miles) using a pair of aluminum Leki brand hiking poles. Never once did I experience arm fatigue because the poles were too heavy. Nor did the “swing weight” of said poles cause me to hike wonky or herky-jerky.
Aluminum poles are stiffer than, and not as responsive as, composite or carbon fiber-based poles. This is what I consider to be their main drawback.
With aluminum poles, you lose a lot of the potential energy and springy-ness or liveliness that comes with a more flexible pole. I would argue that this is more important for racers, however.
So if you’re a recreational skier I wouldn’t worry about this loss of potential energy. The tradeoff is durability.
Other reasons I appreciate standard aluminum poles are because you can use them for emergency purposes. For example, you could use them to construct a splint, an improvised stretcher (for smaller objects or beings, obviously), a framework for a shelter, or a dead man’s anchor. You can also re-purpose an aluminum pole when it does actually break or you’re done trying to straightening it out after multiple bends. Just cut pieces from it to use as tent pole splints or parts for a wind chime.
I’m an artist who does a lot off off-trail and backcountry cross-country skiing, mind you 🙂
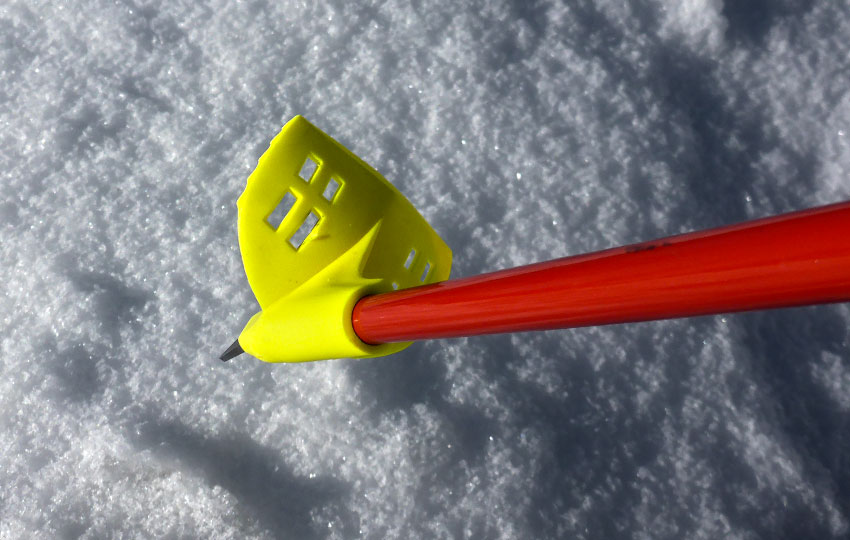
Composite and Carbon Fiber Cross-Country Ski Poles
Composite and carbon fiber-based ski poles are performance-oriented compared to basic aluminum poles. They’re lighter and more responsive. Their lightweight nature means you’ll experience less arm fatigue (groan), and their swing weight will have less of an impact on your technique. This last bit has some merit.
To illustrate “swing weight,” just try to run while carrying in each hand a 10 lbs. weight. You’ll be flying all over the trail. In fact, this is how Thor flies with his hammer. He throws it into the air (while his hand is secured to it by the strap or thong) and rides along its trajectory!
As much as it might sound great, you don’t actually want to be Thor when it comes to your cross-country skiing technique!
By the same token, the difference in weight between composite and carbon fiber poles and those made from aluminum is still negligible. The average person will notice that the carbon poles are lighter. However, they’ll not necessarily notice that the “heavy” aluminum ones affect their motion and technique.
What an average person will notice about a performance pole, however, is that because it’s lighter, any deviation from an ideal hand position (while holding the pole) will cause the ski pole to flinch.
Basically, it just takes less effort to move the lightweight ski pole. So if you’re still developing your technique and body position, you may have trouble consistently landing that tip of the lightweight ski pole in the correct location.
One more important note about composite and carbon fiber-based poles is that they’re expensive and can snap and splinter with very little effort.
You can only replace them, not repair them, so once a pole breaks it’s garbage. Harvest the tip and handle for the future and buy another set. I’ve seen more than one set of $300+ poles rendered useless because the skier poled too aggressively for the conditions (i.e. the terrain was too firm either because there wasn’t a base layer of snow and the tips sank to the dirt or the top layer of snow was a sheet of ice).
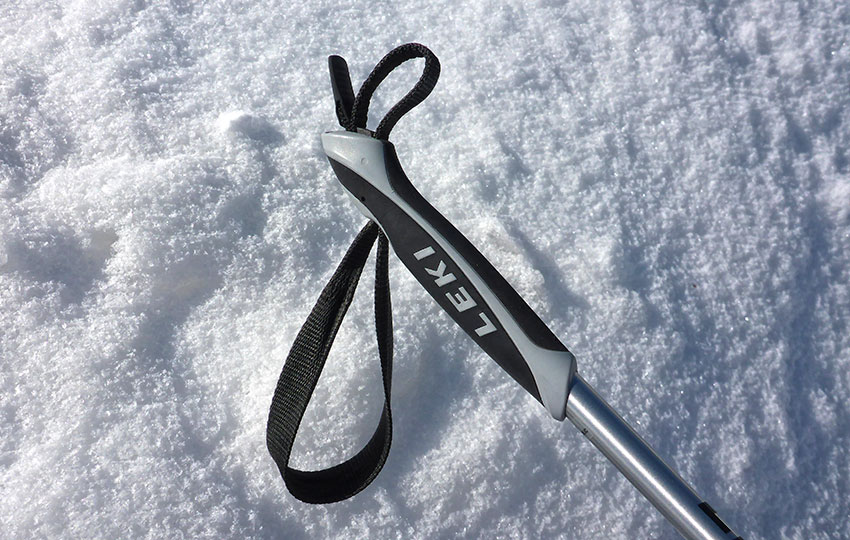
Handles and Straps of Classic Cross-Country Ski Poles
Another big difference between aluminum poles and more expensive composite or carbon fiber ski poles is the types of handles and wrist straps that come fixed to the poles.
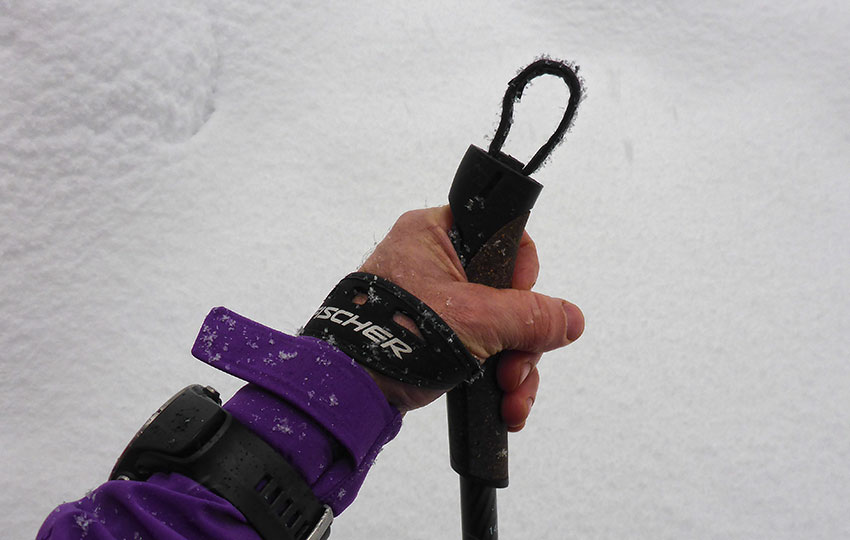
Usually you’ll just find a rubber or plastic handle with a basic wrist strap (and locking mechanism) on an aluminum pole.
I would consider the lack of a quality grip and strap system to be another drawback for aluminum poles.
That said, a basic handle and strap is easy to fix, replace, or deal with if it breaks. And they are adjustable so that you can have a relatively tight connection to an aluminum pole. You do have to keep fishing your hand in and out of the strap when you want to, for example, eat a snack, drink some water, or take a photograph while skiing.
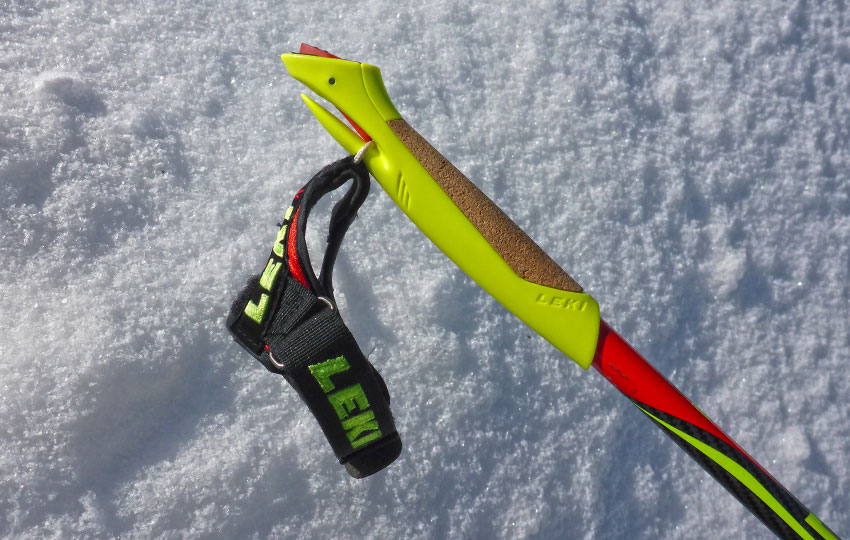
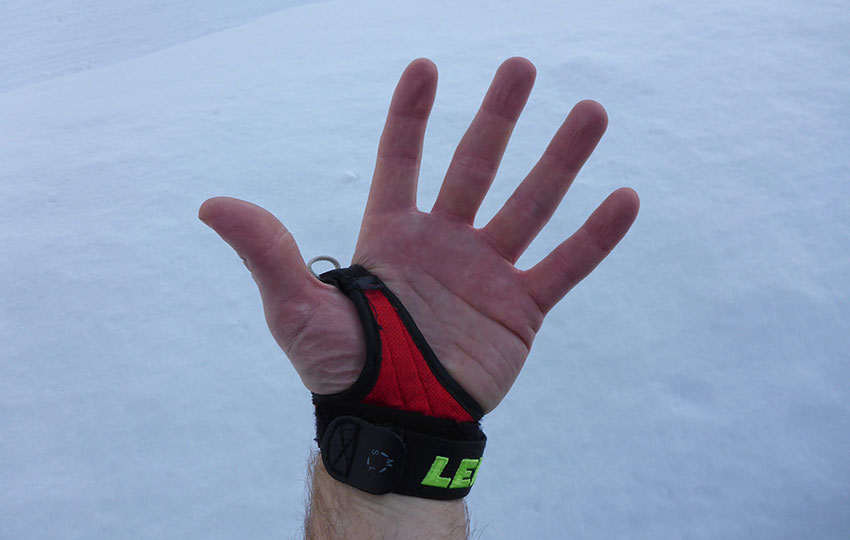
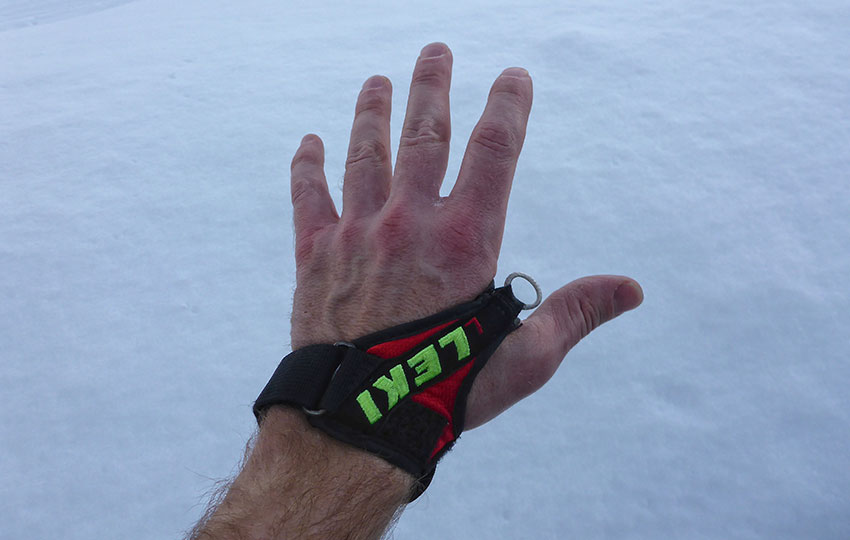
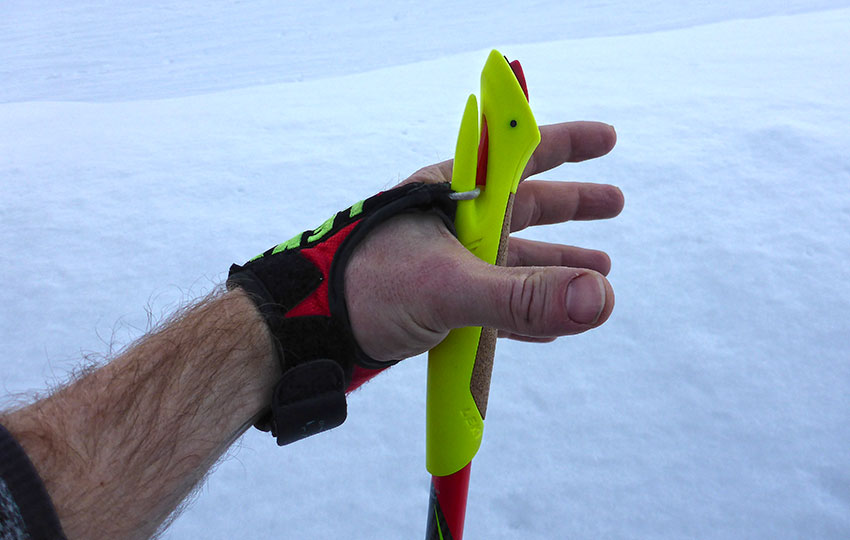
With higher end cross-country ski poles, you’re more likely to find a better grip and strap system. Even moderately priced composite poles will have a nice setup designed to provide a more positive connection to the ski pole handle (compared to a simple strap).
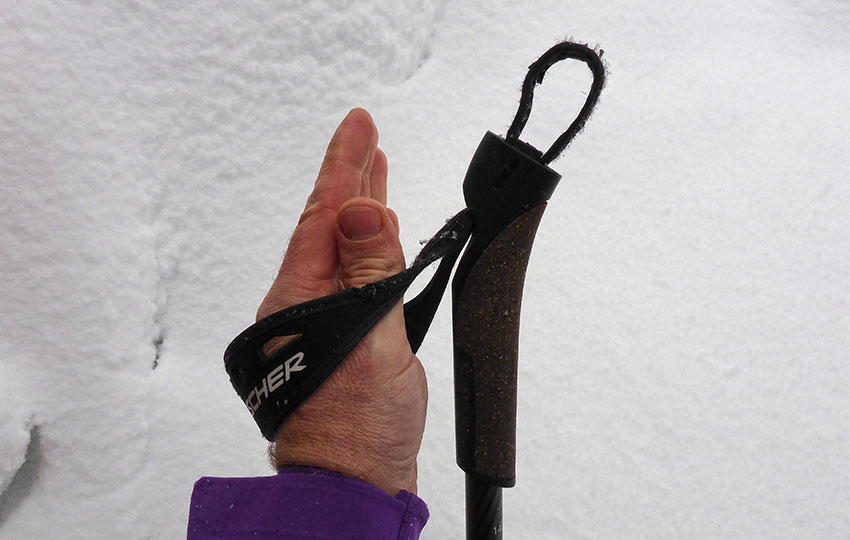
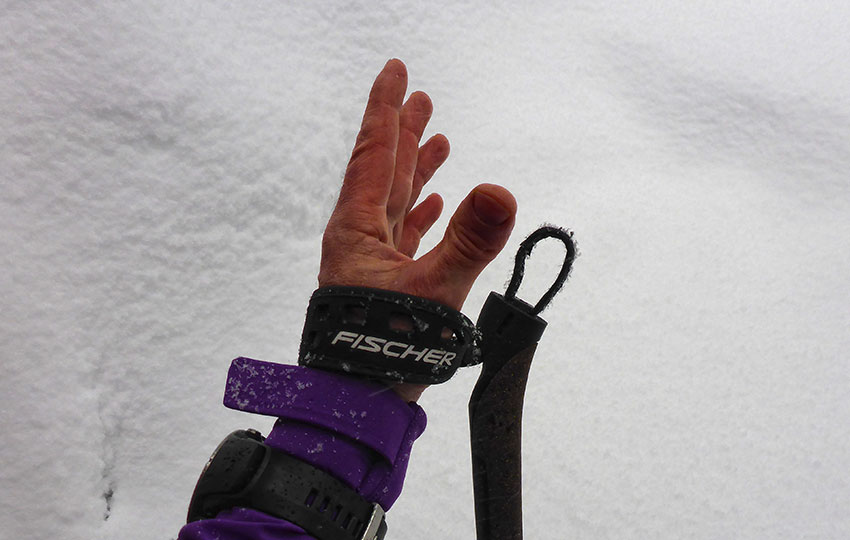
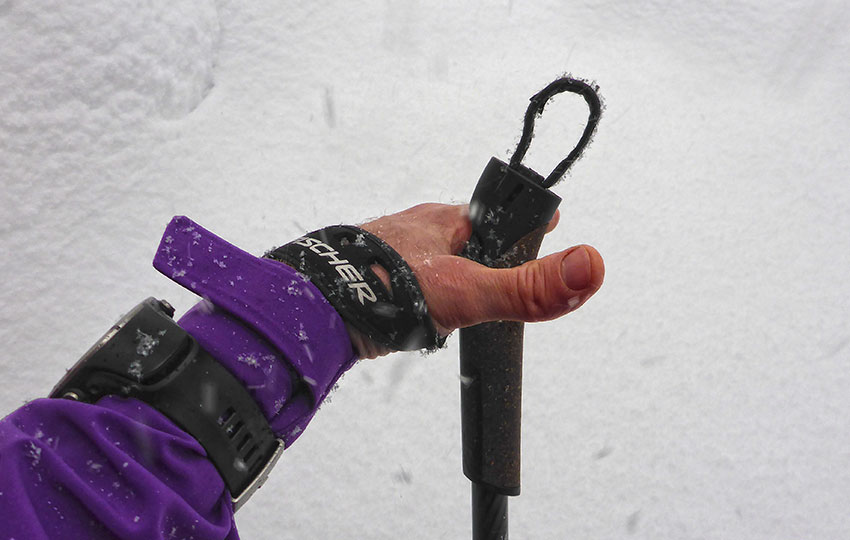
My personal favorite type of handle and grip system is the type that enables you to wear the strap, but through the use of a quick release feature, remove your hand completely from the ski pole handle. You do pay for this type of feature, though, and it’s not the norm on most poles.
On the other hand, I’ve met many people who prefer a standard webbing-type strap because it’s simple, accommodates larger gloves or mittens, and isn’t as claustrophobic as a system that “locks” you to the pole.
Handles on many expensive poles feature cork, which is ideal for sweaty and/or wet hands.
Again, these composite and carbon fiber poles are more performance-oriented, so the manufacturers have racers in mind when designing them.
For backcountry use, you’re going to want something made of a more durable material like plastic or rubber.
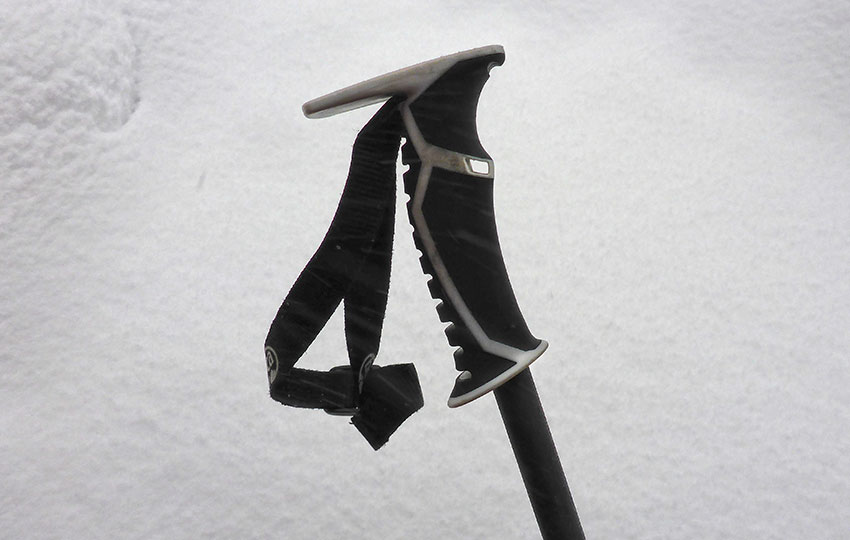
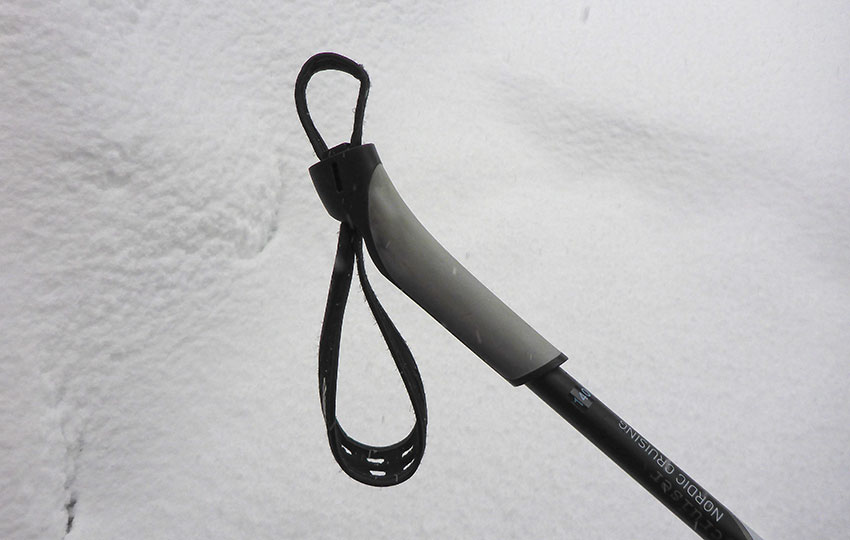
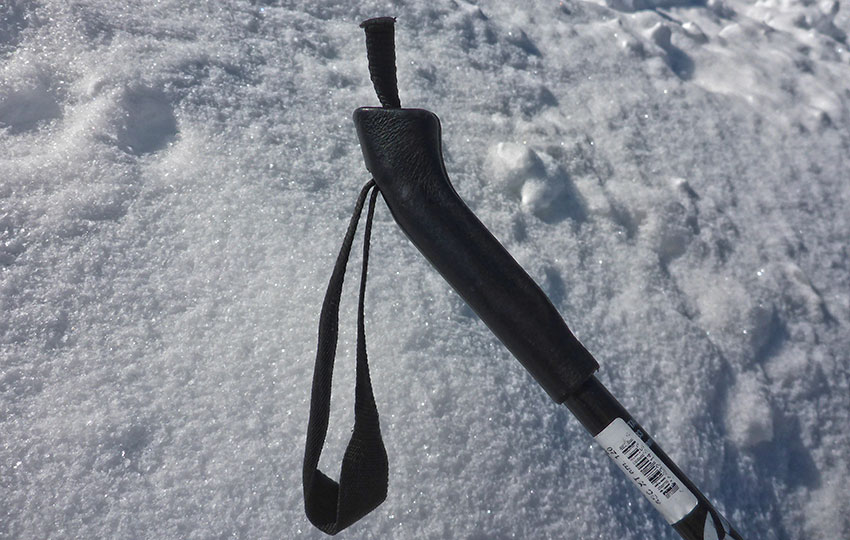
I will save the tutorial on how to change ski pole handles for another day. However, just know that you can change the handles on any type of pole.
As I mentioned, though, aluminum poles are easier to deal with because both the handles and the shaft are so durable.
As much as I prefer cork handles, they’re a pain in the butt to replace due to their delicate nature. You have to exercise a lot of restraint when warming up the handles of expensive poles and then attempting to remove the handle from the shafts.
Baskets and Tips of Classic Cross-Country Ski Poles
Again, you’ll find a million-and-one different types of baskets and ski pole tips on cross-country ski poles. However, the main concept is that smaller baskets are designed for use on packed or consolidated snow. The kind of snow that you’ll find on machine-groomed trails.
Larger baskets, on the other hand, are more desirable when the snow is soft and deep because the bigger basket will prevent the tip from sinking (too far) into the snow.
I usually use a backcountry-oriented set of ski poles for off-trail skiing. These types of ski poles typically feature a full basket, which prevent the pole from sinking into deeper snow.
Baskets for use on groomed terrain should only be half baskets. The half basket enables the ski pole tip to dig into the snow. A full loop type of a basket will often prevent the ski pole tip from actually driving into the snow on groomed terrain because the loop itself tends to make first contact with the snow. Then the pole goes skidding backwards without gaining any purchase. Very annoying to say the least. You could still make it work, but you’d have to angle the ski pole upwards more than normal.
The actual tips of a ski pole are either carbide or made from steel. They angle down toward the snow in order to set properly when you’re ready to push off.
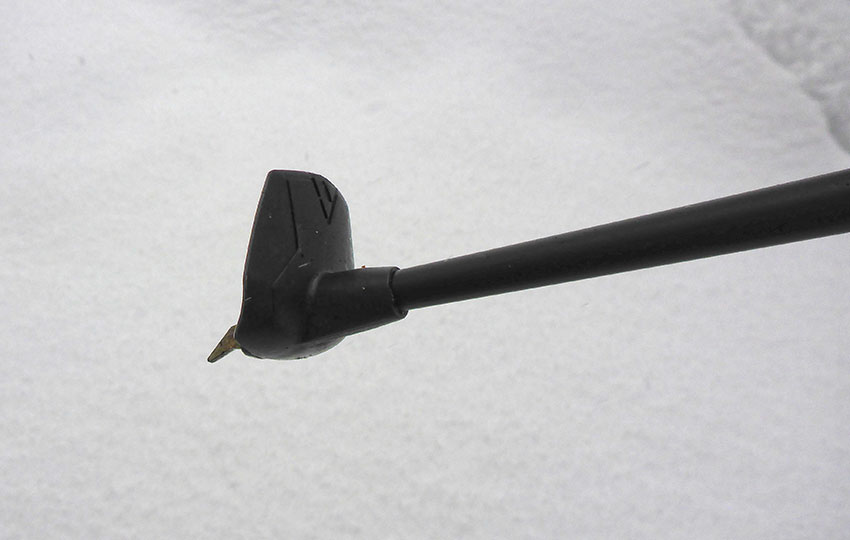
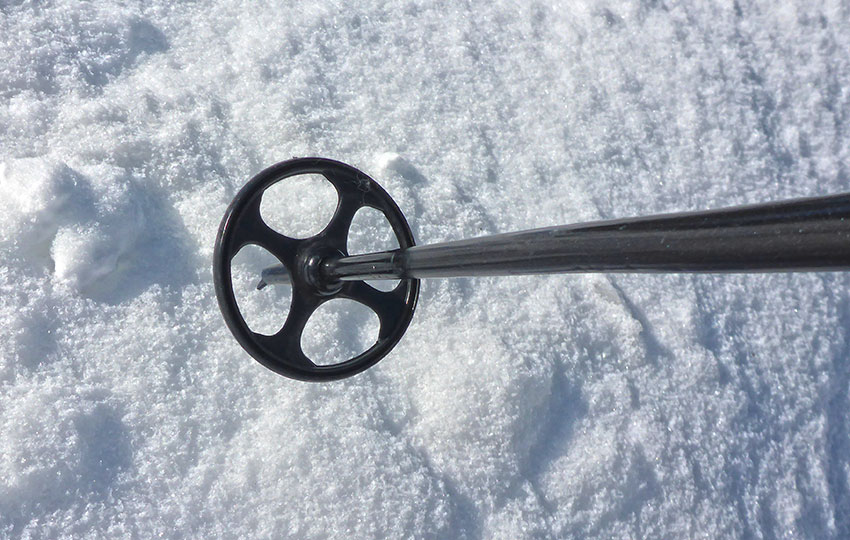
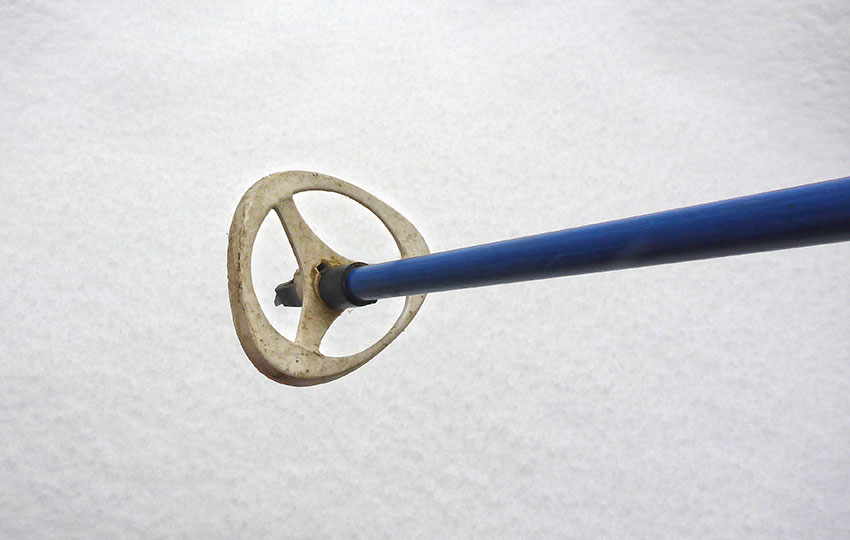
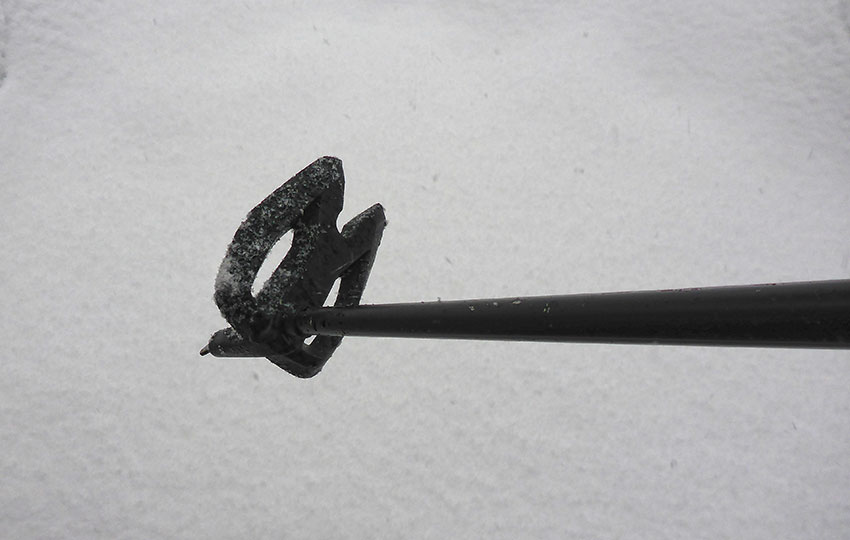
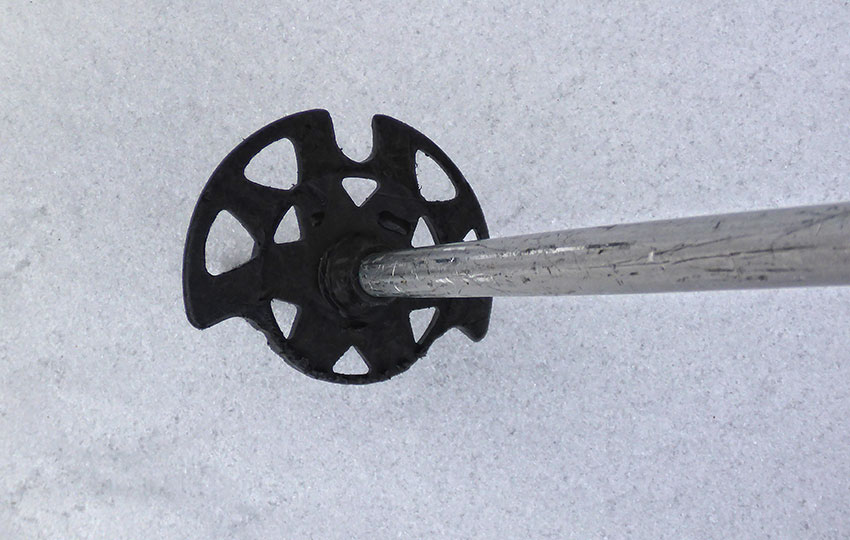
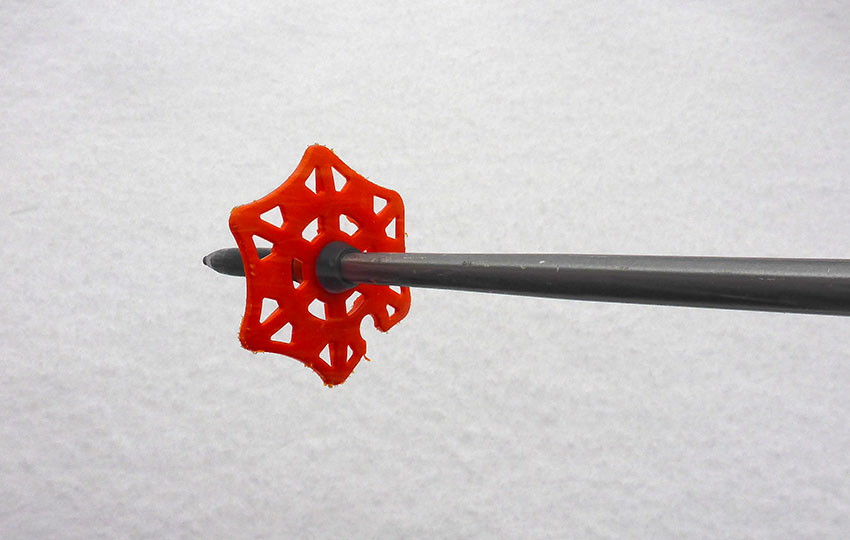
If either the basket or the tip breaks on a standard basket (i.e. the whole thing is one piece), you should replace it.
Again, I’ll save this tutorial for later. But these things are easily replaceable. Just know that the taper at the end of a ski pole is unique to its manufacturer. For example, you wouldn’t want to replace a Leki basket/tip with one made by Swix or vice versa.
Sure, you could make something work between the two if you’re life depended on it. However, the fix won’t be a permanent solution and won’t work as effectively as if you used the correct combination.
There’s a lot of information here, so I hope it’s relatively easy for you to understand and assimilate. I try to stick to generalities and let you discover on your own the finer points.
Ultimately, the lesson here is to use poles that are the correct length for your height and to not spend a lot of money on expensive poles (if you aren’t planning to race any time soon). A better use of your money is to invest it on cross-country ski lessons.
Cross-Country Skiing Explained Articles and Videos
Please note that I wrote and produced the Cross-Country Skiing Explained series of articles and videos with the beginner and intermediate cross-country skier in mind. This is the demographic for whom I most often serve(d) while working in the outdoor recreation industry at Lake Tahoe. I basically treat these articles and videos as extensions of the conversations that I have (had) with those customers.
That said, expert skiers probably could take away something of value from these resources. Just know that I don’t address race-oriented philosophy, technique, or gear selection.
Considerations for buying cross-country ski gear (new and beginner xc skiers)
- Intention, Types of XC Skis, and Whether to Buy New or Used (Part 1)
- How Much Gear to Acquire, Evaluate Your Commitment, Value of Taking XC Ski Lessons (Part 2)
- Can One Set of Classic Cross-Country Skis Work for Groomed and Off-Track XC Skiing? (Part 3)
- Can I Use One Set of XC Ski Boots for All of My Cross-Country Skiing Needs? (Part 4)
- Overview of Off-Track and Backcountry Cross-Country Ski Gear
- Invest in Technique More than Gear
Classic Cross-Country Ski Components
- Introduction to Classic Cross-Country Skis (Part 1)
- Geometry of Classic Cross-Country Skis (Part 2)
- The Grip Zone of Classic Cross-Country Skis (Part 3)
- Types of Bindings for Classic Cross-Country Skiing (Part 4)
- Ski Boots for Classic Cross-Country Skiing (Part 5)
- Classic Cross-Country Ski Poles (Part 6)
- FAQs about Classic Cross-Country Skiing
Waxing Your “Waxless” Cross-Country Skis (for beginner and intermediate xc skiers)
- Introduction to Waxing Your Waxless XC Skis
- Step-by-Step Waxing Tutorial
- FAQs About Waxing Your Waxless XC Skis
Cross-Country Skiing Techniques, Demonstrations, and Related Concepts
- Outdoor VLOG (emphasis on the cross-country skiing experience)
- Cross-Country Skiing in Challenging Conditions
- Considerations for Winter Adventure in Lake Tahoe’s Backcountry
- Using the Side-Step and Herringbone Techniques in the Backcountry
- 10 Tips for Spring Cross-Country Skiing in the Backcountry
- 5 Reasons to Love Spring Cross-Country Skiing
- Considerations for Cross-Country Skiing During the Fall and Early Winter
- Discussing the Goal of Becoming a Better Cross-Country Skier and Embracing Backcountry and Groomed Terrain in Pursuit of that Goal
- The Cross-Country Skiing Experience: Immersing Yourself in Winter
Thanks for the info again. I ask because in the past I have generally been an AT skier, but this winter I have doing a bunch of nordic classic track skiing. I started out slow, less then an hour a day, increasing a little more with each workout with my max. duration at two hours, with only a brief break, mostly pushing hard the whole time. But my shoulders, or actually, the muscles between my elbow and shoulders are killing me at the end. My poles at just barely above my armpit, but I wonder if that is still too long and is causing the pain. Or maybe just bad form 🙂
No problem, Richard!
I’m glad to hear that you’ve been xc skiing so much, by the way! Very cool 🙂 Since I haven’t actually seen you ski before, my feedback is limited. But it sounds like, to me, that you might be using your arms too much. Honestly, other than the occasional fall I don’t know that I’ve ever had sore arms from xc skiing before. You should be performing the majority of propulsion from the lower body (legs/hips) and the arms (pole swing/strike) adds to that momentum, but it only adds to it and does not replace it. Again, I haven’t seen you ski so I’m not 100% sure of what’s going on. However, I have made a video about basic diagonal stride poling that may be of use to you ( https://youtu.be/UZGHhU1hDUE ). It may provide some options for you to compare what you’re doing with your arms in relation to how I teach xc ski poling.
Let me know if you have other questions, or want some more feedback. Thanks again for the question. I appreciate it 🙂
You mention “While standing and wearing ski boots, the length of the classic ski pole (from its tip to where the strap is fixed to the handle) cannot exceed 83% of a skier’s body length (in centimeters).” For this measurement, are standing on concrete or on snow with the pointed end into the snow so the basket is on the snow?
Hey Richard!
Thanks for reading, and for reaching out 🙂
For a straightforward measurement, just go with your standard height (cms) x 83% to find your basic classic ski pole length (cms) as this equation gets you in the ballpark. For example, I’m roughly 5’6″ (167.64cm), so 167.64 x .83 = 139.14cm. Therefore, I just use a standard cut pole length of 140cm, and it’s just fine.
On the other hand, if I were to wear my boots while being on my skis on the snow with poles up to their baskets (in the snow) and aiming for a location between my armpit and top of shoulder (where the top of the ski pole grip measures), I could probably use a pole length of 142-143cm. But this isn’t a standard pole length so I’d have to cut a 145cm down which, to be honest, is not something I’m interested in doing. In my mind it’s more work than it’s worth because I don’t find that I’m ever lacking in anything when using 140s. I have used 145cm poles before, just to try them out, and it was not a great experience. They were too long for me and, as a result, challenging to manage because they caused me to move outside of my normal range of motion while diagonal striding.
And keep in mind that being in your boots and on your skis, etc., is a relative measurement and may or may not accurately correlate to that standard 83%. As far as official FIS World Cup race rules, I don’t know if they measure a person’s height with or without wearing ski boots. Either way, however, wearing boots won’t have a huge impact on the overall measurement. For example, if I were wearing boots and performed the basic calculation, the result would just put me marginally closer to that 140cm pole length.
Anyway, I hope that helps to clarify things. If not, get back in touch. And, again, I appreciate you tuning in and adding to the conversation 🙂
Love your site!
I have a torn rotator cuff which I’ve chosen not to not repair at this time. I’ve been able to ski (classic only) and wonder if you have any suggestions for pole technique to prevent rotator cuff pain.
Thanks!
Hey Pat,
I am so sorry that I didn’t see your comment and, therefore, hadn’t gotten back to you! I have no idea why I neglected to respond to you other than we were in the middle of another Snowpocalypse storm back on 2/28/23 (and maybe I was preoccupied with shoveling and snow blowing?). Regardless, I apologize.
I’m sure you’re way further along in the healing process at this time, and seeing that it’s the middle of April your xc ski season might have already come to a close. And, of course, I’m not a doctor so take whatever I offer with a grain of salt. But I wanted to respond with some feedback just the same.
My initial thought was to eliminate the use of poles altogether and ski strictly using lower body/legs. I actually do this often to develop lower body strength and stability. Going uphill can be challenging for obvious reasons, though. But after considering that option, I realized that it’s probably important to understand the cause of the tear (one-time accident or repetitive wear?). If it was a one-time accident I would consider skiing without the poles, as I mentioned, avoiding placing pressure on that shoulder (through the use of poles). But this assumes that you have some range of motion and can swing your arms safely. But if the tear was caused through repetitive motion, it seems like swinging your arms would actually exacerbate the problem. So then you’d most likely need to immobilize that arm/shoulder, and that could make skiing really awkward. If you can swing your arms, perhaps using telescoping poles (like backcountry poles or trekking poles) and shortening them so that you don’t have to swing your arm as high as with a full-sized classic length pole might limit that range of motion and the amount of pressure you’d be placing on the poles.
The bottom line is that the longer poles used for cross-country skiing and the correct application of them require a pretty big range of motion and they place the arms/shoulders under constant pressure (when pushing off with them) which seems like it’s exactly opposite of what that injured shoulder needs. And then there’s always the risk of falling and landing on the injured shoulder or having the shoulder become indirectly affected by your pole in a fall (by being attached to it at the wrist).
So other than those couple of ideas (not using poles at all or using shorter poles), I don’t know that I could really offer anything else directly related to pole use or modifying your use of xc ski poles. I could think of a list of different no-pole drills to offer, as well as to just ski with the intention of running no-pole drills. The experience wouldn’t necessarily be about touring, but it would still be xc skiing. Although, I don’t know your situation and whether or not you have access to groomed terrain or flat and stable snow conditions on which to practice agility drills, etc. But this last bit is probably what I’d work on more than trying to modify my poling technique. Just avoid the poles and work on lower body stability until the shoulder heals and you can go back to using poles in a normal setting.
I know this all comes too late in the season, so I do apologize again. But you asked a great question (what if I have an injury and can’t ski under ideal circumstances?), so I wanted to at least give some of my thoughts about it. As morbid as it sounds, I often consider these types of “what if” questions such as … What if I lose my sight or hearing or the use of a limb? Could I still do the things that I love by modifying my approach, or would I have to abandon it/them altogether and do something else? As I get older and realize that my eyesight is not quite as it once was, I do start to consider how I could navigate life circumstances so that I can continue to do things that bring me joy.
I’ve never personally experienced a torn rotator cuff, but I know that particular injury takes a long time to heal. So I hope, at this point, you are a lot further along in that process. Anyway, thanks again for the support and for reaching out. I really appreciate it 🙂 Let me know if you have other questions, or if you have any feedback regarding your experience (since it’s been well over a month since you asked the question).
Take care 🙂
“When measuring people for classic cross-country ski poles, I often choose one where the strap (coming out of the handle) is around mid-shoulder height.”
Yes, this is the bio-mechanical ideal, I think. Start with the strap slot and aim at the shoulder joint.