So far in this series of backcountry trip planning articles we’ve established a goal for our adventure (which is to thru-hike the Tahoe Rim Trail), put it to the SMART goals test, and used the decision-making process to guide our research.
We’ve gathered relevant information, evaluated it, and hopefully have chosen the best option(s) for achieving our goal.
However, we still have to create an actual plan or itinerary for our trip. Since the devil is in the details, we must be meticulous when developing this itinerary in order to give ourselves the best chances of success.
Support Tahoe Trail Guide with a financial contribution via PayPal (single contribution) or Patreon (reoccurring contributions). Your support of Tahoe Trail Guide is very much appreciated!

So, for part 6 of this series, we’re going to nail down those details and create an itinerary for our trip along the Tahoe Rim Trail.
We’ll also look at ways in which to physically prepare for the adventure.
We all have stories about that one trip where we miscalculated one or more logistical aspects, such as when to gas up the vehicle, how much cash to bring with us, or how many pairs of underwear to pack.
Perhaps this occurred while traveling along a desolate rural highway, backpacking through Europe, or on an ocean cruise. As inconvenient and frustrating as it can be to not pack the right clothes or be stuck on the side of the road, at least you’re in some form of civilization. Someone who’s willing to lend a hand will eventually come along.
This is not necessarily the case when traveling in the backcountry. Even on the Tahoe Rim Trail you could find yourself alone and 10-20 miles away from civilization, so let’s get this plan right the first time.
I don’t mean to belabor the point but, again, all of our planning and logistics will be based on our goal. For the purpose of this series of articles, our goal is to thru-hike the Tahoe Rim Trail in two weeks (or less) during the summer.
And, for the purpose of this exercise, let’s imagine that you and a hiking partner are driving up from the Bay Area to Lake Tahoe.
Let’s also imagine that you connected with a person on a Tahoe Rim Trail Facebook group, for example, who lives in South Lake Tahoe and is willing to deliver one food resupply to you somewhere on the south shore (i.e. they’re not going to drive all the way to Kings Beach or Incline Village to deliver your supplies).
One last note about this exercise is that instead of identifying a specific course of action for you (and your fictional hiking partner), I’m going to walk you through the process I use when creating a hiking itinerary.
Route Planning
During your research, there are a few key elements you should’ve determined. The most important, and obvious thing, is that the Tahoe Rim Trail is essentially a circle.
This means that the beginning and ending points of your trip will be the exact same location, which is great. You’ll only need to familiarize yourself with the one location in order to arrive and depart from the trail.
Considering the two factors (arriving from the Bay Area and having support personnel in South Lake Tahoe), the most logical beginning and ending to your hike would be the transit center in Tahoe City.
It’s easy to reach via HWY 80 and SR 89. Parking is abundant and town is close by. Just be sure to confirm with the transit center that you can park for an extended period of time in their lot.
This location is the traditional starting and ending point for many Tahoe Rim Trail thru-hikers, so you’re in good company.
During your research, you should’ve also determined the length of the Tahoe Rim Trail to be approximately 180 miles and that it’s best hiked during the summer months.
Another aspect you should’ve addressed is to determine an approximate number of miles that you could realistically hike each day during the summer (i.e. longest days of the year). Let’s say that you went on a couple of preparation hikes and discovered that 14 miles per day is a solid average for you, with 12 miles per day representing a slower pace and 16 miles constituting a longer day.
Taking those figures into account you calculated:
- 180 miles / 12 miles per day = approximately 15 days
- 180 miles / 14 miles per day = approximately 13 days
- 180 miles / 16 miles per day = approximately 11 days
Based on those rough estimates, you’re clearly going to have to consistently maintain about a 14 mile per day pace in order to complete the Tahoe Rim Trail by your target goal of two weeks.
This 14-mile figure is a great place to start, but the reality is that you won’t be hiking that exact amount every day.
In fact, I recommend building into your plan a gradual work-up to longer miles. For example, you don’t want to start your trip 6 miles behind schedule because you attempted a 16-miler on the first day, but only covered 10 miles.
There are plenty of reasons why this would happen, but most often it’s because you got to the trailhead too late in the day and/or didn’t realize how slow you’d be hiking due to carrying a fully loaded backpack.
Depending on your fitness level, it can take a few days to get into “trail” shape. So, the bottom line is that you should schedule a couple of shorter days at the beginning of your trip to acclimate to the new lifestyle.
I also like scheduling shorter distances for the first couple of days just in case I have to turn back for one reason or another. Often you’ll find out right away if you’re going to run into any problems.
For example, that first night out you might find that your tent suffered a catastrophic tear when you initially packed your backpack, or you discover that your water filter never actually made it into the backpack. It’s better to have to only hike out 10 miles, for example, to reconcile the situation, rather than 20 or more.
I mentioned it in the last article, but be sure you obtain in advance any necessary permits required to camp in the areas in which you’ll be traveling. Specifically for the Tahoe Rim Trail, you’ll need a camp stove permit and a permit for camping in Desolation Wilderness from the Lake Tahoe Basin Management Unit (Forest Service).
For safety’s sake, you’ve decided to hike in a clockwise direction. From Tahoe City traveling in a clockwise direction, it’s less than 20 miles to SR 267.
If something happened in those first couple of days you could at least make it out of the backcountry relatively easy. If you traveled in a counter clockwise direction from Tahoe City, on the other hand, you’d be heading toward Desolation Wilderness early on in your trip and there are few easy evacuation points from this area.
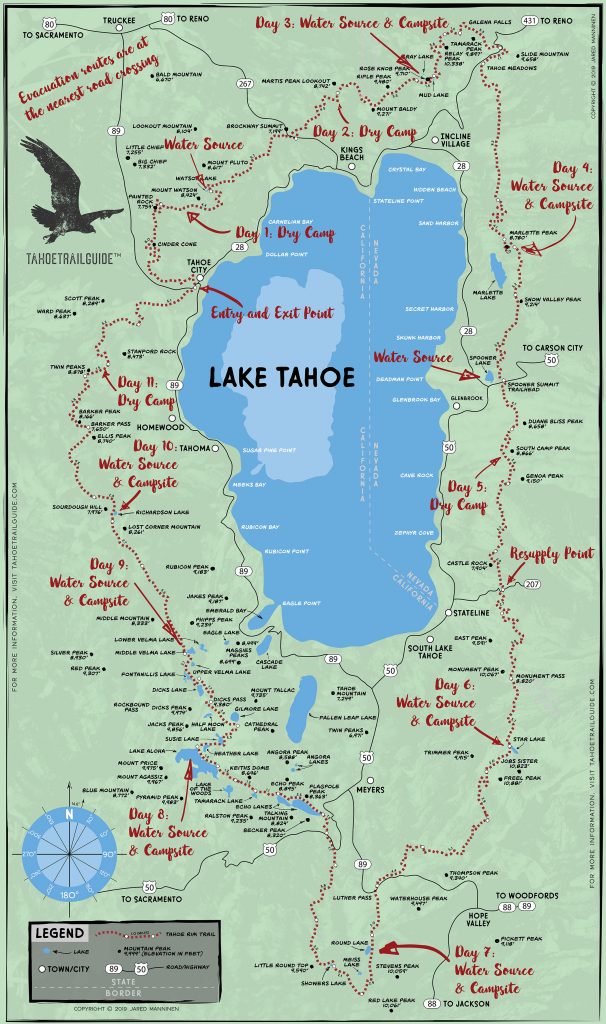
Locations of importance that you’ll need to identify when looking at the map and planning your route:
- Entry point
- Exit point
- Direction of travel
- Average miles per day you want to maintain (except for the first couple of days)
- Water sources
- Campsites
- Resupply points
- Evacuation routes
The notes I’ve scribbled on the following map illustrate a possible plan based on the criteria discussed above. Since you and I are different people with different priorities and interests, your itinerary will look slightly different than mine.
Again, I’m just trying to show you how I approach planning a backcountry adventure. Also know that for all of my talk about being detailed-oriented with regard to planning my route, usually I just leave a photocopy of the map, complete with the locations of where I’ll stay, with my support people.
It seems like a waste of time to transfer the information onto a blank piece of paper. The map is the only visual a person would need to find me in the case of an accident or if I went missing.
Please note that this map is not exactly to scale, probably inaccurate with regard to mileage, and missing contour lines. I created this map to use as a learning tool while avoiding any copyright infringement issues. For your thru-hike of the Tahoe Rim Trail, I highly recommend consulting Tom Harrison’s Lake Tahoe and Tahoe Rim Trail Map.
Support Personnel:
When choosing support personnel, select dependable people who know your abilities and limitations. They need to be someone who won’t automatically go into panic mode a minute after you’ve missed your checkpoint. But they do need to be someone willing to make the hard call (to notify search and rescue, for example) when it’s appropriate.
Keep in mind, however, that your support personnel may not actually be your best friend or loved one. I’m not saying that your support personnel should be on-call and ready to act on a moment’s notice when you’re just out backpacking for the weekend.
However, if there’s enough risk involved with your expedition you don’t want to depend on someone who’s already preoccupied with a career lifestyle, large family, or other major life commitments.
Your trip is a big deal and your safety and survival may depend on those people to help, so choose wisely.
Have a thorough question and answer session about your trip with your support people and discuss your route, schedule, contingency plans, resupply points, and other relevant logistics.
Always be sure to leave a copy of the map and your schedule with them.
I mentioned earlier that you have found a fictional person to deliver your resupply box. However, because this person would essentially be a stranger, I personally wouldn’t depend upon them for providing any other support than delivering that resupply.
That said, always be prepared to contact emergency medical services and/or search and rescue when needed, and to have someone back home that you can call upon in case of such emergencies.
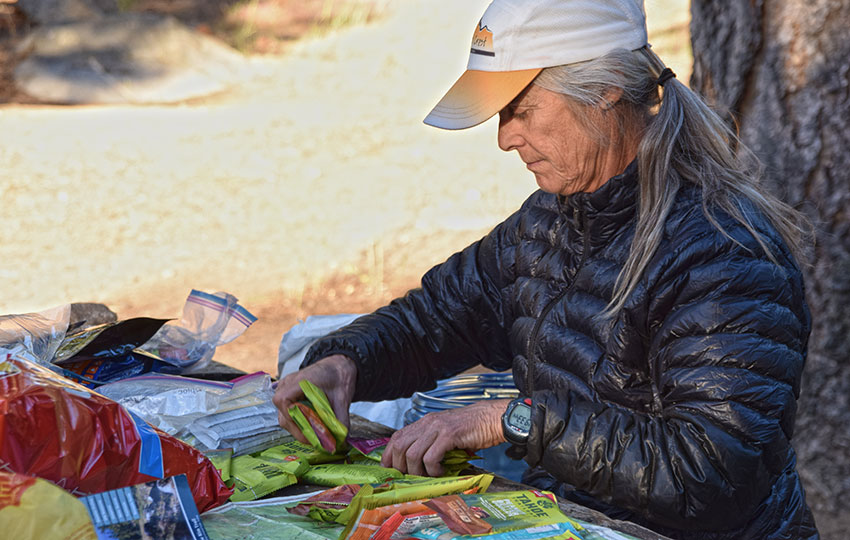
Gear and Physical Preparation:
Barring some exceptions, the irony about packing for a weekend adventure versus a month-long excursion is that you’re mostly going to carry the same gear.
The only real difference is that for the longer trip you’ll probably carry more food. With that said, your gear selection will be driven by your goal (two weeks of hiking the Tahoe Rim Trail), the type of geography you’ll have to negotiate, and the type of weather you’ll encounter.
Please note that I’m fiercely independent and have always preferred to be self-sufficient. So, even when I do backpack with other people, I prefer that we each have our own kit rather than sharing common gear (i.e. stove or tent).
I realize this sounds like extra work for everyone, but ultimately, everyone must be prepared to hike alone (in the event of an emergency).
Also, this ensures among the group that there will be redundancy in critical gear. What are you going to do when the only water filter that your group is carrying doesn’t work? Maybe you’ll use the chemical tabs or iodine pills you have in your emergency kit.
Or, possibly you’ll just boil the water with your camp stove. This is fine. However, the point I’m trying to make is that if you only have a communal system (i.e. water filtration, camp stove, or shelter) to accomplish a critical task, you place a lot of stress on that one system by not carrying any redundant options.
For the purposes of this exercise, however, I would say that you and your fictional hiking partner could just share a tent.
I do recommend each of you individually carry all other necessary gear. My rationale for this logic is that most people don’t own a single person tent or bivy (unless they’re like me and do a lot of solo backpacking trips).
So, chances are that you know someone with a standard two-person tent. All of the other gear, on the other hand, is something that everyone interested in backpacking should own anyway.
I don’t know your specific needs or experience, so your gear selection will be unique to you. However, the following are the general categories of gear from which you’ll need to select.
Listed under each category is my personal inventory. I’ve worked in the outdoor recreation industry for many years, so I’ve acquired a lot of gear during that time. I also have the credit card debt to prove it.
Please note that I pick and choose from this list of gear depending on circumstances, particularly with regard to the shelter, sleeping bag. and sleeping pad.
Most everything else is interchangeable. For example, it would probably be overkill if I carried a large pot and my white gas-based MSR Whisperlite stove on an overnight backpacking trip considering how short of a trip I’d be taking and how little food I’d be cooking.
However, it wouldn’t be a travesty. On the other hand, if I only packed my warm weather sleeping bag for a multi-day excursion in October, that would be an error in judgment and lead to a cold and potentially hazardous (to my health) situation.
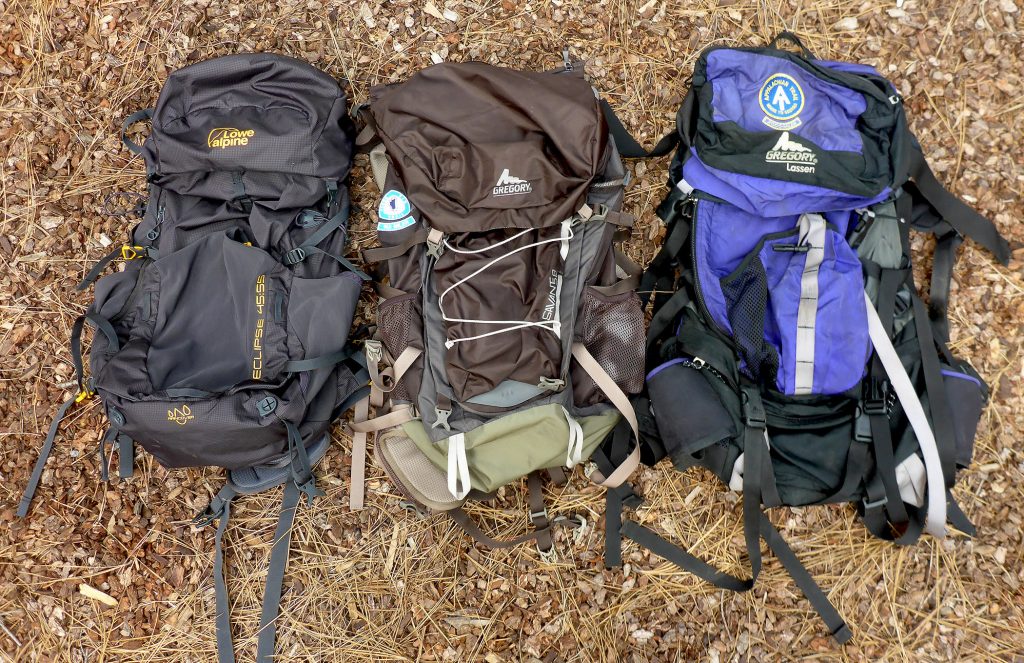
Backpack:
- Gregory Lassen (large volume)
- Gregory Savant (medium volume)
- Lowe Alpine Eclipse (small volume)
On Your Person (or within arm’s reach):
- Long-sleeve shirt (button)
- Pants
- Underwear
- Socks
- Belt
- Hat
- Sunglasses
- GPS watch
- Map/compass
- Camera (extra batteries/SD cards)
- ID/campfire permit
- Hiking poles
- Personal Locator Beacon
- Journal/pen
- Whistle
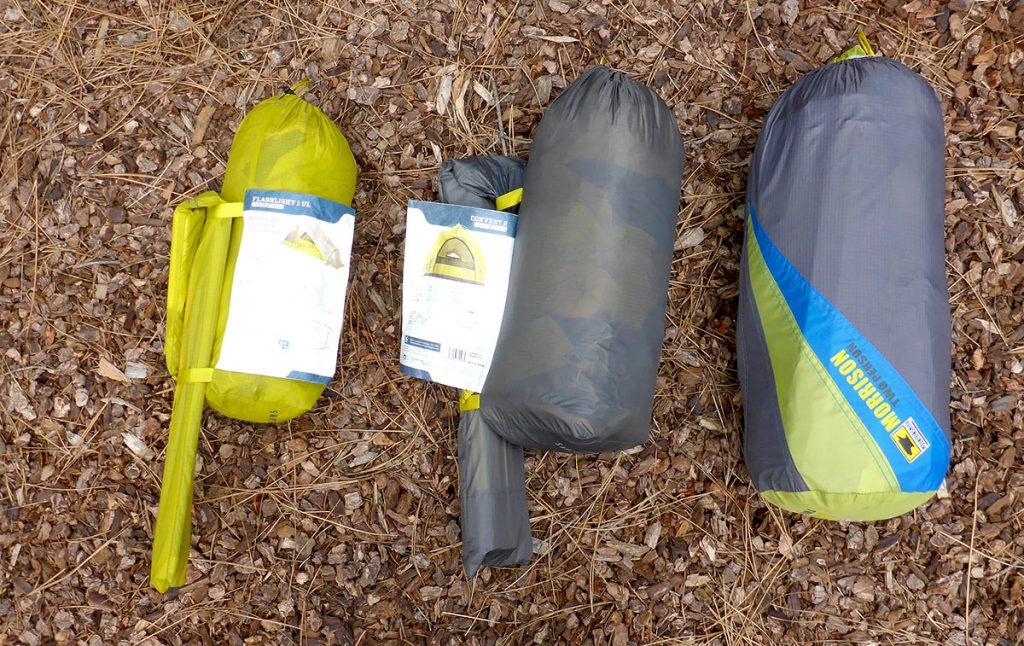
Shelter, Sleeping Bag, and Sleeping Pad:
- Sierra Designs Flashlight tent (three-season, single person, non-free standing)
- Mountainsmith Morrison tent (three-season, two person, free standing)
- Sierra Designs Convert tent (four-season, two person, free standing)
- Black Diamond Twilight bivy (need to also carry tarp if any indication of inclement weather)
- Outdoor Research Helium Bivy (three-season, hoop structure)
- Outdoor Research Alpine Bivy (four-season, hoop structure)
- 5×7 foot tarp
- 8×10 foot tarp
- Tent stakes (snow, sand, or traditional)
- Guylines/paracord
- Sierra Designs Mummy sleeping bag (down, very cold weather)
- Mountain Hardware sleeping bag (synthetic, cold weather)
- Kelty sleeping bag (down, warm weather)
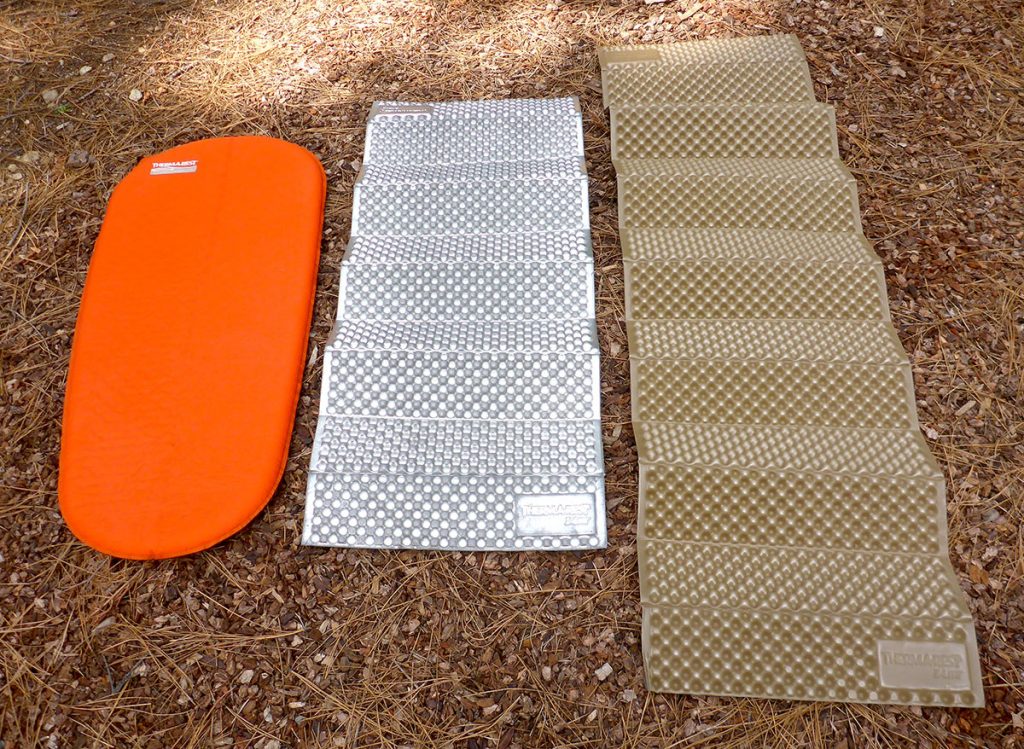
- Therm-a-Rest Pro-Lite self-inflating sleeping pad (three-quarters length)
- Therm-a-Rest Z Lite Sol sleeping pad (three-quarters length)
- Therm-a-Rest Ridgerest sleeping pad (full length)
- Pillow case and stuff sacks
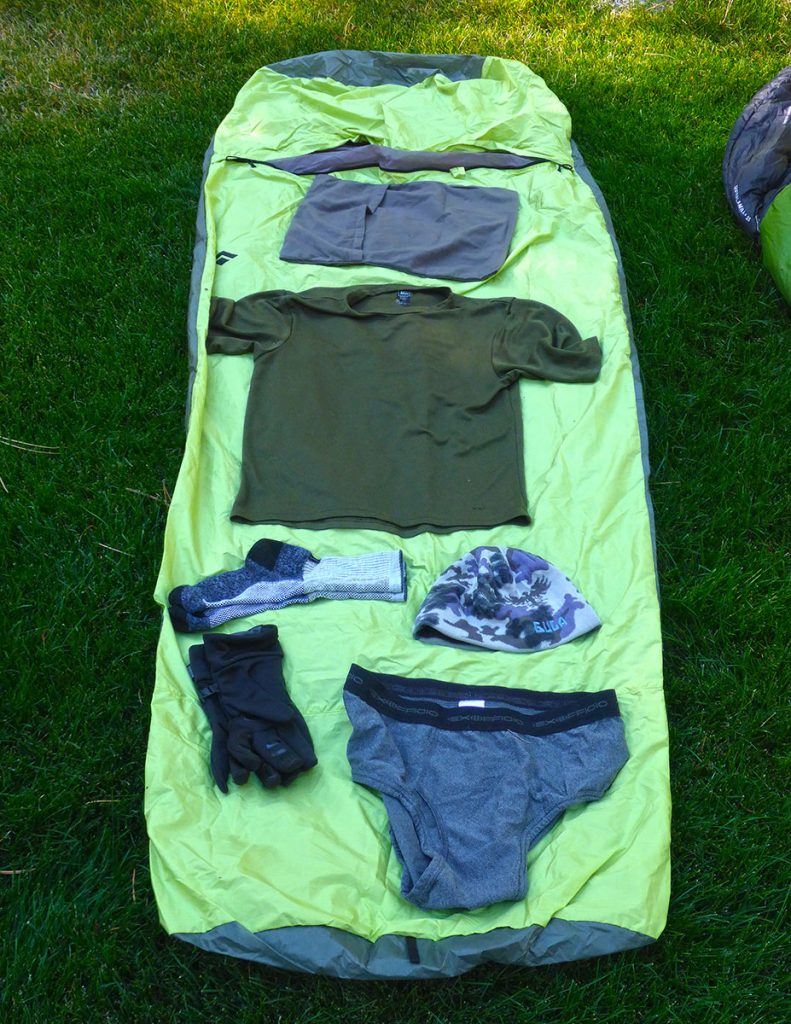
Clothing (in backpack):
- Underwear
- Long underwear top & bottom
- Short sleeve shirt
- Socks
- Beanie
- Gloves
- Rain jacket
- Puffy jacket
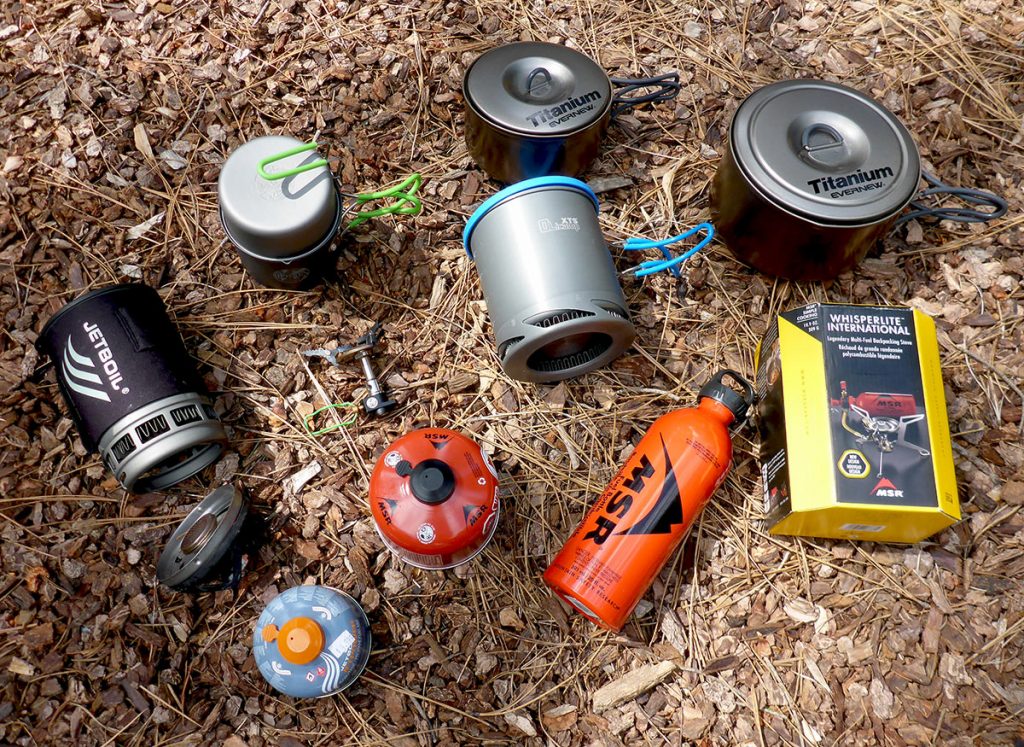
Cook Set and Food Storage:
- Jetboil Zip stove and pot (canister fuel)
- Optimus Crux Lite stove and pot (canister fuel)
- MSR Whisperlite stove (white gas)
- Evernew .5 liter titanium pot
- Evernew 1 liter titanium pot
- Evernew 2 liter titatium pot
- Olicamp XTS cook pot
- Mont Bell double-walled titanium mug
- Bear Vault BV500 (large canister)
- Bear Vault BV450 (small canister)
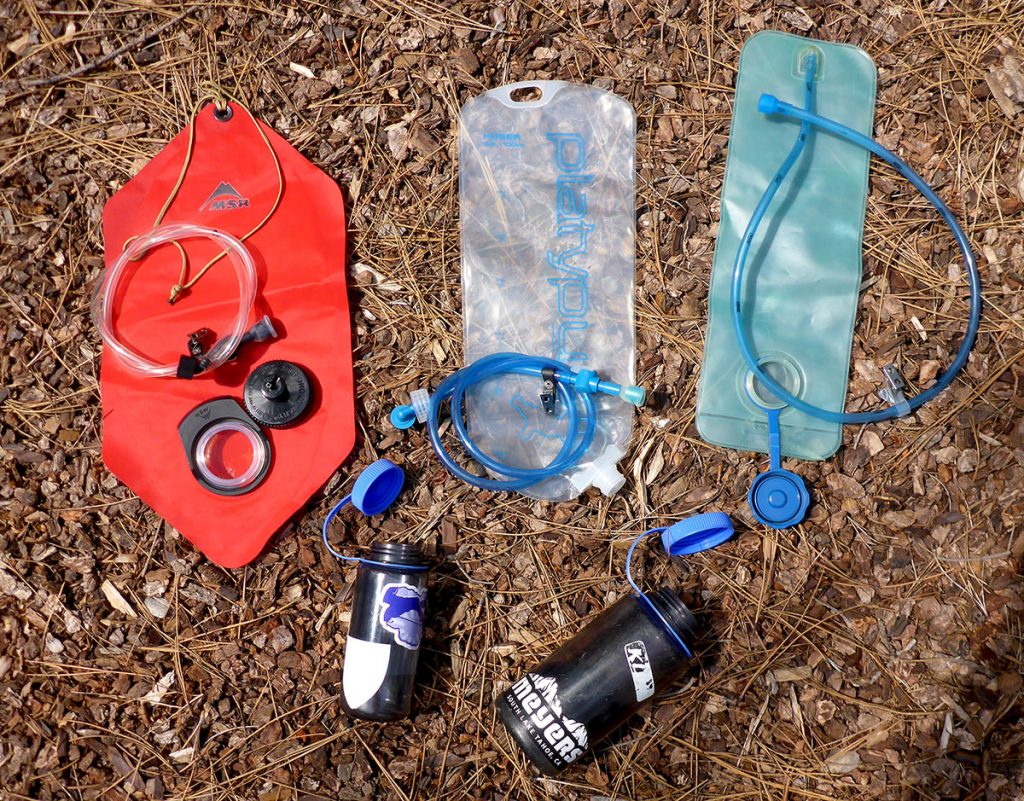
Water Capacity and Filtration:
- 16 ounce Nalgene bottle
- 1 liter Nalgene bottle
- 2 liter Camelbak bladder
- 2 liter MSR Dromlite bladder
- 3 liter Platypus bladder
- 4 liter MSR Dromlite bladder
- 6 liter MSR Dromlite bladder
- Sawyer Squeeze water filter
- Sawyer Mini water filter
- Pur pump water filter
- Collapsible water bucket
Personal Hygiene and Emergency Gear:
- Toilet paper
- Trowel
- Hand sanitizer/soap
- Towel
- Toothbrush/toothpaste/floss
- Matches
- Lip balm
- Sunscreen
- Ibuprofen
- Athletic tape
- Duct tape
- Gauze
- Antiseptic pads
- Sewing kit
- Headlamp
Additional notes that might help you to determine the appropriate gear to carry:
Some of these are similar to those listed in the last article but they’re important, which is why I’m rephrasing them here.
- Acquire only the gear that you need by starting with what you already own and acquiring and upgrading as needed
- Test your gear
out prior to your trip in order to learn how to use it and to make sure that it
functions properly
- Don’t assume that camp stove, for example, is going to immediately work after being in storage for 20 years.
- It’s easier to learn how to use a new piece of gear under controlled conditions, like your backyard, instead of waiting until you’re in the backcountry.
- You may discover that latest and greatest gizmo isn’t so good after all (and better to figure this out prior to leaving for your trip).
- The type of
weather and time of year determines general gear selection
- Thicker and bulkier gear will be more appropriate for cold and wet environments and require a backpack that’s larger and sturdier.
- Thinner and lighter gear will be more ideal when traveling in favorable conditions and fit easily in a lighter weight backpack.
- Make sure
everything fits in your backpack
- Everything you bring will have to be carried on your back, so only pack what you need.
- Choose a backpack that provides a little extra space rather than packing one to the seams (like George Costanza’s exploding wallet). The extra space will get filled, but it’ll get filled on the trail when you’re pack job isn’t as perfect as when you packed you bag at home. And with the extra room, you can afford to pack in a hasty manner during an emergency.
- Except for first aid gear, a general rule of thumb is that if you don’t use it every day, don’t bring it
- The more stuff you have, the more stuff you have to lose.
- The more stuff you have, the harder it will be to find the important stuff when you need it most.
- The more stuff you have, the more pressure you’ll put on the backpack’s seams, zippers, and buckles (the aspects most likely to fail on your backpack).
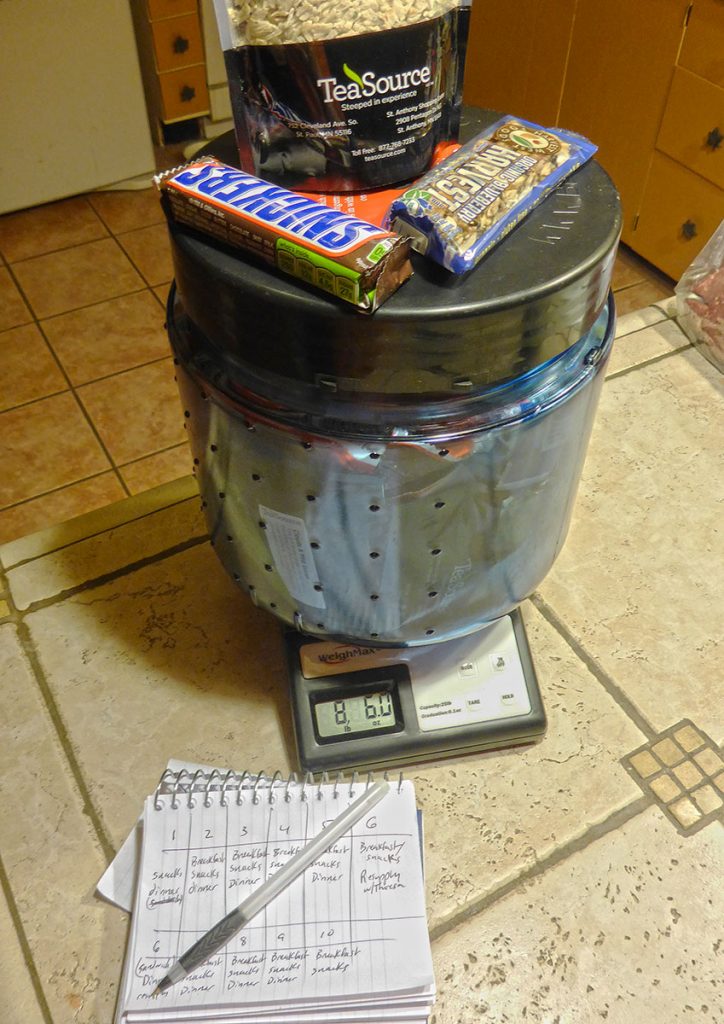
- For longer trips you’ll probably wind up carrying more food, which means you’ll need a larger bear canister (if required), which will affect the size of backpack you’ll wear.
On a metaphorical note … by bringing only what you need for your specific trip, you’ll reduce the distractions in your life and on the trail.
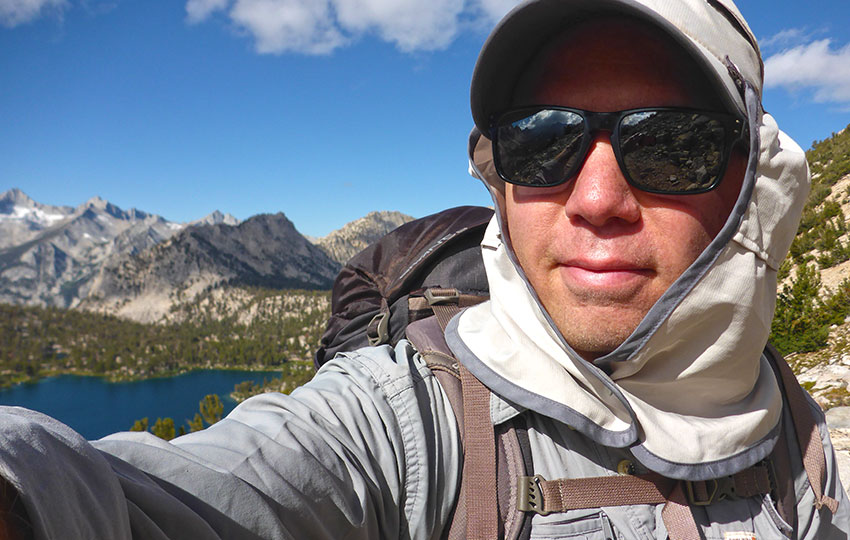
It should be obvious at this point that you need to be hiking with a loaded backpack in order to prepare your muscles and joints for the additional stress. Hiking with a weighted backpack will also help to condition your feet and reduce the likelihood or getting any blisters.
If you decide to just come off the couch and knock out 20-milers for your first couple of days, you can almost guarantee that you’ll wreck your feet one way or another.
You don’t need to hike dozens of miles day after day, just make sure you log a few days in a row of at least a few miles with that backpack.
Planning Your Backcountry Trip Core Series of Articles:
- The Importance of Establishing a Goal for Your Backcountry Trip
- SMART Goals and Your Backcountry Trip
- The Decision-Making Process and Your Backcountry Trip
- Gathering Information for Your Backcountry Trip
- Evaluating Information and Choosing the Best Option for Your Backcountry Trip
- Planning and Preparing for Your Backcountry Trip
- Executing Your Backcountry Trip Plan
- Returning Home and Post-Backcountry Trip Analysis