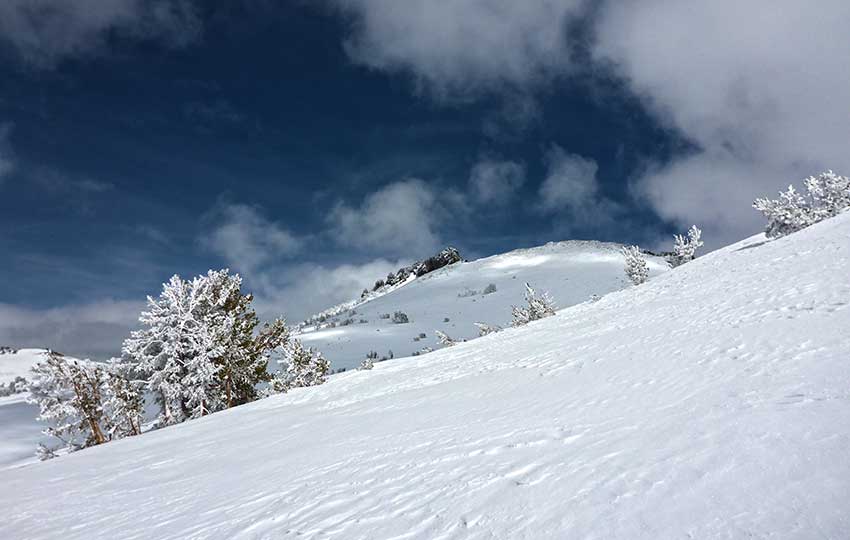
For similar reasons that I enjoy hiking to Red Lake Peak during the warmer months, I love cross-country skiing to Red Lake Peak in the winter.
Those reasons include: ease of access via the north lot of the Carson Pass Sno-Park; line-of-sight travel thanks to the wide open terrain you’ll cover; sweeping panoramic views (again, thanks to the open terrain); relatively lower angle terrain (except for the final push to the summit of Red Lake Peak); and the short round-trip distance of 5-6 miles (depending on your specific route selection).
Support Tahoe Trail Guide with a financial contribution via PayPal (single contribution) or Patreon (reoccurring contributions). Your support of Tahoe Trail Guide is very much appreciated!

Please note, however, that regardless of how glorious this adventure sounds, I consider the full route to the top of Red Lake Peak only appropriate for advanced cross-country skiers. You’ll be traveling off-trail and through mountainous terrain during the winter, after all. And, with this, always comes considerable risk.
That said, beginner and intermediate cross-country skiers can modify this route to accommodate their technical abilities and fitness level.
As far as snowshoers are concerned, mostly you’ll just be restricted by your level of fitness as climbing and descending steeper terrain isn’t nearly as challenging in snowshoes (compared to cross-country skis).
Trail Data for Cross-Country Skiing and Snowshoeing to Red Lake Peak (approximations):
- Location: South Tahoe – Carson Pass
- Category of XC Ski/Snowshoe Route: Intermediate, Advanced
- Total Mileage: 5-6 miles (depending on specific route selection)
- Total Elevation Gain: 1,900 feet
- Highest Point: 10,063 feet (the top of Red Lake Peak but not recommended to climb because the volcanic rock outcropping that constitutes the actual peak is very dangerous)
- Trail Conditions: Variable conditions ranging from deep, untracked powder to wind-scoured and icy snow
Considerations for Cross-Country Skiing and Snowshoeing to Red Lake Peak:
- Carson Pass is year-round paid parking at either lot (north or south), so during the winter arrive with a Sno-Park permit since you can’t buy them at the parking lot
- Although the majority of the route to Red Lake Peak covers lower angle terrain, always be avalanche aware and monitoring the snowpack conditions for instability
- Climbing to the actual top of Red Lake Peak is not recommended since the volcanic rock of which its formed is dangerous and can crumble underfoot – hike around its base and call it “good”
- Adhere to all Leave No Trace principles
- There are few trail signs and markers on public lands in the Tahoe region, so unless there are tracks to follow, the correct route may be difficult to identify–when in doubt, turn back
- Be prepared for inclement weather and carry plenty of warm clothes, food, and water
- Leave an itinerary of your plans with someone who’ll call emergency services if you don’t return by your prescribed time
- Dogs are allowed, but keep them on leash and pick up after them
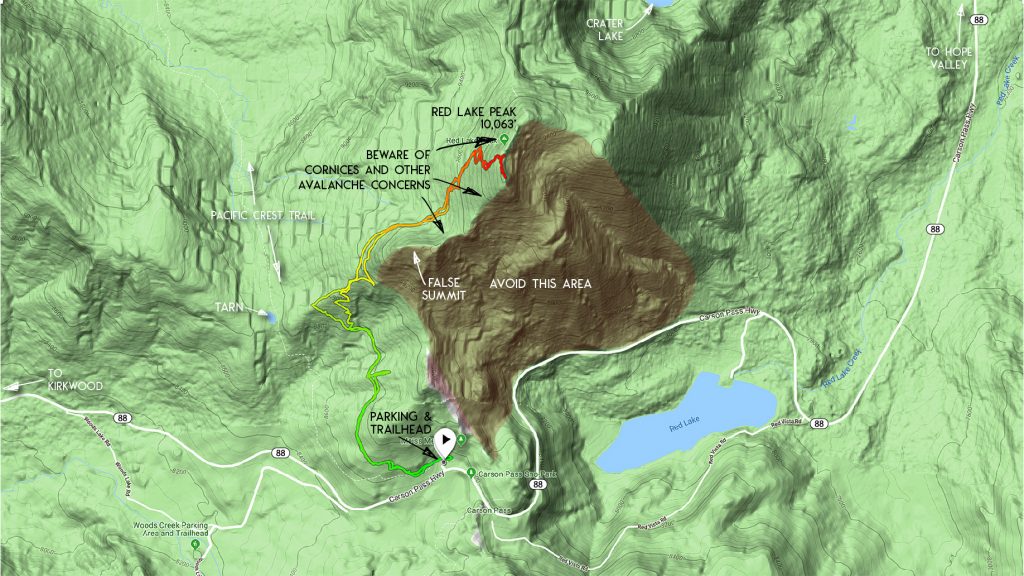
Parking Directions for the Carson Pass Sno-Park:
Park in one of the lots at Carson Pass in order to cross-country ski or snowshoe to Red Lake Peak. I recommend parking in the north lot to avoid having to cross SR 88.
The trailhead is located on the north side of this parking lot anyway, so save yourself the hassle by just parking there.
Besides, there will most likely be more available parking spots in the north lot because more people who backcountry ski out of Carson Pass head toward Round Top and Winnemucca Lake (which is more easily accessible via the south lot).
During the winter months (November 1-May 30) you’ll need a Sno-Park permit ($5/day, $25/season). The permits need to be purchased elsewhere, such as online or in Meyers or South Lake Tahoe. There are no options to purchase Sno-Park permits at any of the Sno-Parks around the Lake Tahoe Basin, so come prepared.
The trailhead for the route to Red Lake Peak is located in the northwest corner of the north parking lot on Carson Pass.
Here’s a map to help you find the parking area and trailhead for cross-country skiing or snowshoeing to Red Lake Peak.
Travel Directions for Cross-Country Skiing and Snowshoeing to Red Lake Peak:
You’ll begin your cross-country ski or snowshoe tour to Red Lake Peak from the north parking lot at Carson Pass. The trailhead is in the northeast corner of the lot but, depending on snowpack levels, you may need to be creative as to how you negotiate the snowbanks just to reach the actual trail.
For the most part when traveling to Red Lake Peak, you’re going to parallel the Pacific Crest Trail. However, when the snow is plentiful at Carson Pass, you can meander or travel as directly as you prefer with one major exception.
Do not attempt to travel along the ridge that runs in a north to northeast direction directly to Red Lake Peak or on its eastern side. Hazardous cornices form along the ridge and the terrain off to the east is steep and treacherous.
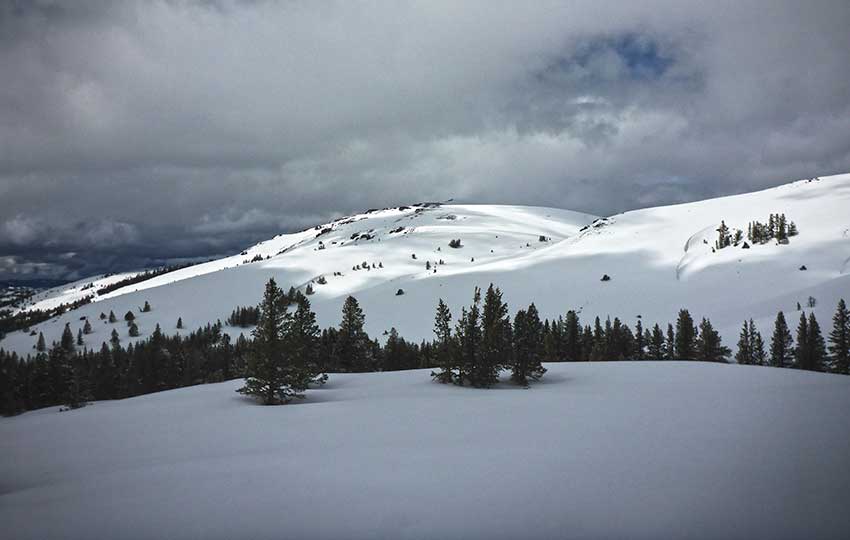
You’ll always want to approach Red Lake Peak from the west.
Again, you don’t need to specifically be on the Pacific Crest Trail. In fact, I usually branch off from it about .25 miles from the north parking lot at Carson Pass.
I prefer to travel higher up the first hill so that I can see as many panoramic views as possible. And then I like to contour the terrain until I reach the base of the false summit to the southwest of Red Lake Peak.
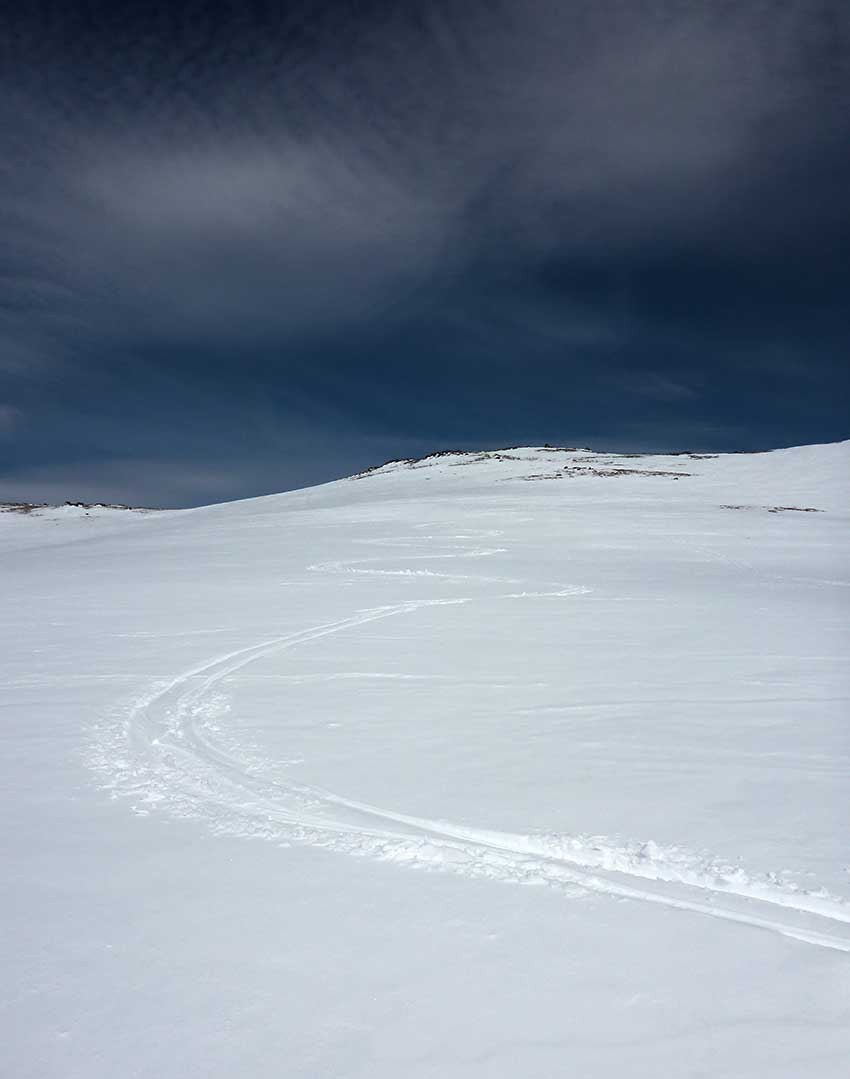
Once you reach the base of the false summit, continue traveling around its western side. You’ll be able to see Red Lake Peak upon reaching the northern aspect of the false summit (see the featured image at the top of this page).
The top of Red Lake Peak looks like a fin sticking out of the mountain (left of center of the mountain and directly in front of you).
As you begin the stretch of terrain between you and the actual base of Red Lake Peak, be particularly mindful of any cornices that may be waiting to ambush you from above. There’s a tendency for snow to accumulate on the north (leeward) side of the short ridge between the false summit and the southwest base of Red Lake Peak.
Give the cornice a wide birth and travel quickly across the bowl/draw directly below this area.
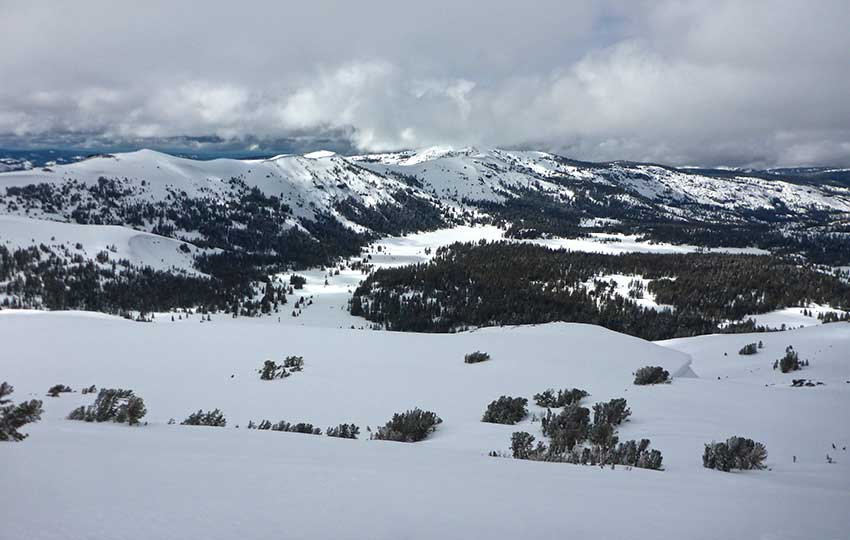
Once you reach the base of the western side of Red Lake Peak, travel uphill however you prefer.
Whether uphill travel for you involves making long traversing switchbacks or using herringbone or side-stepping techniques to go straight uphill is your call. But always be avalanche aware.
The angle of this terrain is prime time for avalanches. Thankfully, this aspect of Red Lake Peak is primarily on the windward side so most of the danger lies on its eastern side.
On the other hand, since this side of the mountain is constantly pounded by wind the snow can become wind-scoured and icy, making it equally treacherous to negotiate. Your safety is your responsibility, so choose wisely if you do decide to make the final push to the summit.
Remember that if you go all the way to the top, you’re going to have to come back down. And, the western aspect of Red Lake Peak is quite steep for cross-country skis. In the right conditions, it’s not as difficult to get up and down.
If the snow is either unstable or sheer ice, seriously consider turning back and saving the peak for another day.
If you reach the summit of Red Lake Peak (not actually climbing up the rock outcropping, mind you), keep to the western side of it. Huge cornices form on the eastern (leeward) side of this ridge, and it’s a long, rocky way down to the bottom (i.e you’re going to die if you fall).
Lastly, I hope this would be obvious but, if it’s not, be sure to secure your skis if you decide to take them off once you reach the top. There are no breaks on cross-country skis so if they go shooting down the mountain on either side, you’re SOL.
Remember that when there’s doubt, there is no doubt. So, turn back. The summit is optional, but the descent is mandatory. Make good choices and be safe out there.
If, for whatever reason, you choose not to cross-country ski or snowshoe to the actual top of Red Lake Peak, it’s all good. The terrain en route to it is so much fun that often I don’t even bother skiing the full route (especially if it’s during a snowstorm).
Instead, I’ll just pick one of the many fingers or angles of terrain on the way to the false summit to practice my downhill turning and stopping skills. I’ll just go up and down the hills a bunch of times and then call it a day.
The beauty of off-trail cross-country skiing is that there aren’t many rules and, most importantly, there aren’t any lift lines!
For advanced backcountry travelers using alpine gear such as Randonee, Alpine Touring, Telemark, split boards, and snowboards, look elsewhere for information about backcountry skiing down Red Lake Peak. This is not my forte, and there are other websites that can provide much more accurate and relevant information.
Do you have other insight, feedback, or trail updates about cross-country skiing and snowshoeing Red Lake Peak?
If so, please post it in the comment section below for the benefit of everybody 🙂
Jared – Thank you so much for the detailed response. The explanation of widths was a breakthrough for me. Looking forward to watching your videos, doing a bit more research and find the perfect ski for what I want to do. Best, Stacia
Glad I could be of service, Stacia 🙂
Thanks for tuning in, and I hope you let me know how your search goes!
Hi Jared – I just found your site and I am loving all of your amazing advice for hiking in this area. My folks retired to Pioneer a few years back so I have been spending time exploring/hiking around Carson Pass when I visit them. This winter I would really like to get out in this area and do some cross country skiing. I’ve been downhill skiing since I was 3, and have been cross country skiing on groomed track trails for about 5 years, using REI brand skis. I tried to take these on un-groomed areas, and they just don’t cut it. Do you have any advice on what type of skis I should be looking for for more off track skiing? Thanks!
Hey Stacia,
Thanks so much for the kind words! And thanks for reaching out 🙂
Yeah, the Carson Pass area is super fun and accessible for all skill levels. But backcountry cross-country skiing is definitely a different breed of xc skiing than groomed terrain. I would say though in this situation gear definitely is a contributing factor to fun and safety. XC skis designed for groomed terrain is generally going to be longer and skinnier (to help you go faster for longer sessions). Generally, when it comes to off-track and backcountry xc skiing, a shorter and wider xc ski (with a more pronounced sidecut) is preferable so long as you’ll be in more mountainous terrain.
All of that said, nearly all of the major xc ski manufacturers offer a pretty good selection of off-track/backcountry xc skis. I prefer to run Fischer brand skis because they tend to be slightly stiffer which allows me to diagonal stride/classic xc ski more efficiently off-track (Spider 62, Excursion 88, S-bound 98, and S-bound 112). I’m a bit of a gear collector, hence the number of off-track skis. You don’t necessarily need all of those. But essentially, I recommend skis that are wider than 70mm, which is pretty standard for off-track skis. The Spider 62 (62mm) skis that I use are when there’s very little fresh snow on the ground. The 112s I use when it’s deep, fresh snow. And then then other two (88 and 98) are in-between. Unfortunately, there aren’t any one-size-fits-all backcountry xc skis. And I’m sure you’re familiar with this concept from your alpine skiing background. But skis that are between 70-90mm wide (usually this is the width of the tip/shovel area) will get you going in nearly all conditions except for the deepest, freshest snow conditions. But in reality, even my 112s are outmatched in such deep snow.
It’s hard for me to give a specific brand or style because it’s all so personal. But, I’d definitely recommend something between 70-90mm, with an aggressive grip zone/scale pattern, and an NNN BC binding system (I prefer the manual/magnum style versus auto/step-in version for the backcountry). You could also go with a very basic Rottefella 3-pin binding system as well, but I use these on my widest skis as the binding will hang over too far on either of my 62s or 88s.
I plan to write a thorough article on backcountry xc skis this coming fall (September 2020), so you’ll have to excuse me for this abridged version. That said, some relevant links out of mine (here on Tahoe Trail Guide and my YouTube channel) that you could check out include:
https://tahoetrailguide.com/tag/cross-country-skiing-explained/
http://youtu.be/Dak-G7E0JKc (Buying One Set of Classic Cross-Country Skis for Groomed and Off-Track Skiing)
http://youtu.be/qKQBWccbNd8 (Cross-Country Skiing in the Lake Tahoe Backcountry (2018/19))
http://youtu.be/RbaFneTc2Ks (Side-Step and Herringbone Techniques for Backcountry Cross-Country Skiing)
And if you like my videos, please subscribe to my YouTube channel. I tend to produce more xc skiing videos than anything else at the moment. So, you may find them of use.
Thanks again for the comments, and I hope to see you out on the trails this winter!
Let me know if you have any other questions 🙂