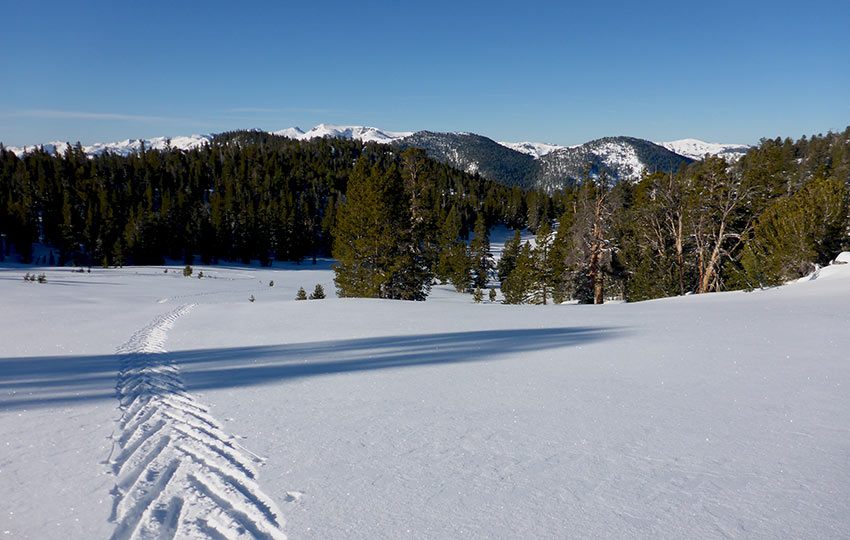
Traveling through Lake Tahoe’s backcountry is always rewarding. The experience never fails to offer stunning views and plenty of character building opportunities. However, winter adventuring in the Lake Tahoe region presents additional obstacles you must overcome in order to return home safely. And, these obstacles come in the literal and figurative variety.
The following considerations may seem excessive. At least to people just looking for snow play at Luther Pass or Hope Valley. Or, those planning to stop by any one of the Sno-Parks in the Lake Tahoe region. However, it’s a list worth reading since many of the concepts could easily apply to winter driving.
Support Tahoe Trail Guide with a financial contribution via PayPal (single contribution) or Patreon (reoccurring contributions). Your support of Tahoe Trail Guide is very much appreciated!

Considerations for Winter Travel in the Lake Tahoe Backcountry:
Plan for the Worst Case Scenario
Regardless of the conditions (summer or winter), always plan for worst case scenarios when traveling in the backcountry. This does not mean target-fixating on catastrophe, but rather to understand that things can and will eventually go wrong.
Plan to improvise and address accidents and unplanned situations. You can lesson the shock of something bad happening by embracing this approach. And, you’re able to act quicker, as well as more decisively and effectively.
Always be conscious of your decisions (sometimes on a step-by-step basis!) by weighing their consequences before taking further action.
As the saying goes… life is what happens while you’re busy making plans.
Thoroughly Research Your Planned Route Before Stepping Foot in the Backcountry
The lack of trail markers and signs presents one of the most challenging aspects of winter travel through Tahoe’s backcountry. Locating the correct route may be difficult or even impossible. That is, unless you’ve thoroughly prepared for the journey by studying the appropriate maps and asking the relevant questions.
Sometimes you can get away with simply following the tracks of those who have gone before. However, this is based on the assumption that those people knew where they were going! Many people travel this way. However, it’s not a safe bet.
Always do your own homework and take with you a map and compass and the knowledge to use them. Your cell phone’s GPS system is not enough. Your phone will fail you when you need it most.
When in doubt, turn back.
Leave Your Adventure Itinerary with a Friend
Always leave your itinerary, regardless of length of trip, with someone who’ll notify emergency services if you don’t return home. To rephrase that… leave your itinerary with a responsible and calm-under-pressure person who will take appropriate action if something goes wrong.
Know that this person might not actually be your spouse, loved one, or roommate. Ideally, this person would possess some backcountry experience. But, at the least they should know your strengths and weaknesses. They should also have an understanding of the area in which you’re traveling.
Again, plan for the worst case scenario. But be aware that there are many benign reasons that could prevent you from contacting your support person in time.
You want someone who is willing to make the tough call. However, you don’t want somebody who’s going to immediately go into panic mode and hit the Oh Shit! button if you don’t return or contact them within 30 seconds after your prescribed return time.
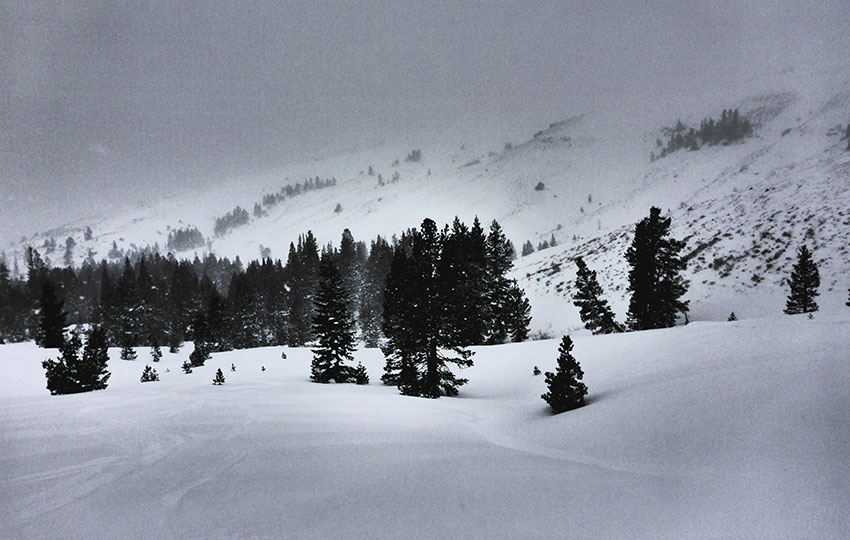
Be Prepared for Hazardous Conditions
The majority of trails featured on Tahoe Trail Guide are not technical. This means that you don’t need to possess specialized mountaineering or climbing skills and equipment.
However, all bets are off with winter travel.
For example, a beautifully carved trail leading through a boulder field can be a nightmare in the winter. You may be able to navigate it easily in the warmer months. However, you’ll be in a dangerous situation when that same trail is covered in snow and ice.
Crossing a seasonal stream in the summer is usually relatively easy. A couple of rock hops and you’re across. But that stream may transform into a 20 foot sheet of ice with a hazardous landing zone in the winter.
Many Tahoe trails are demanding due to steep inclines and significant elevation gain. But during the winter they put you at risk for prolonged exposure and avalanche hazards.
Assess the risks and know your limits.
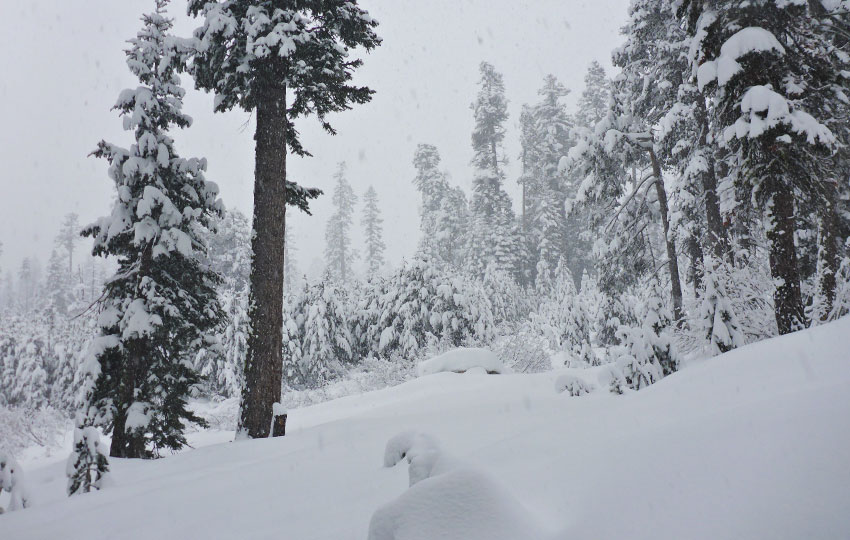
Dress Properly for Conditions, as well as Your Mode of Winter Travel
Winter travel in just about any form can be highly aerobic. Even maintaining a slow, yet consistent pace on snowshoes or cross-country skis can cause you to sweat profusely. Wearing one layer of clothing too many will often exacerbate this situation. Or, the air temperature may be warmer than you expected.
The body is designed to regulate its temperature through the function of sweating. But, you never want to find yourself and your clothes sopping wet while traveling through snow country. This is a recipe for disaster once the sun sets and the temperature drops.
Generally, you don’t want to wear big and bulky jackets, pants, hats, or gloves during winter travel. That is, unless you just plan to go outside and sit in a snowbank.
On the other hand, I do recommend always packing a puffy jacket. You’ll want to put that on if you decide to take an extended break. I’ve just always found that no matter how slow I move, wearing a puffy jacket causes me to overheat.
Dress in layers so that you can shed or add on articles of clothing as needed.
Wear Appropriate Footwear for Your Unique Winter Adventure
The use of proper footwear is a must while traveling in Lake Tahoe’s backcountry during the winter.
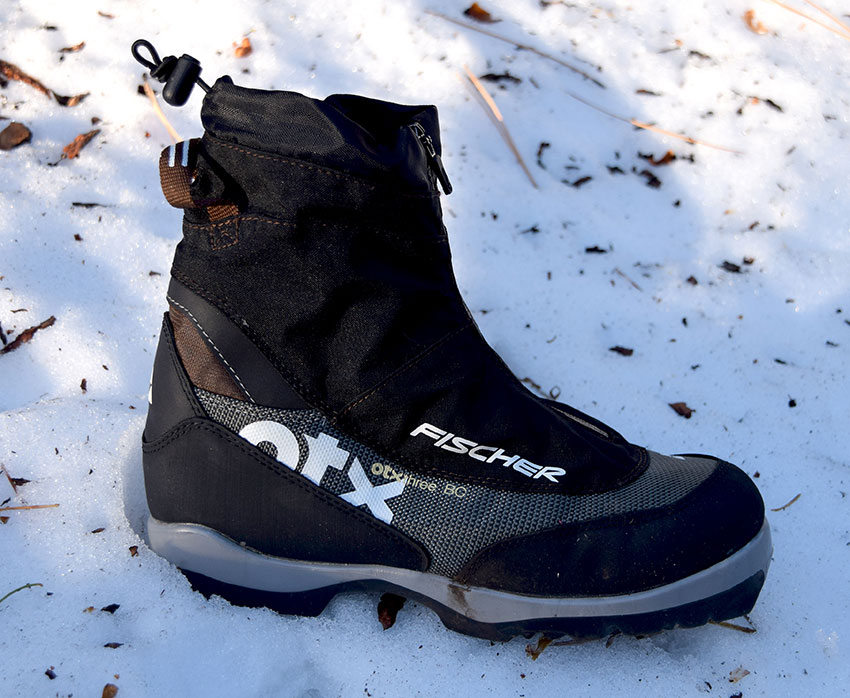
With cross-country skiing, most likely you’re footwear will be determined based on your ski binding setup. That said, the quality of cross-country ski boots have increased by leaps and bounds over the years. Gone are the days of plain leather shoes.
Many contemporary xc ski boots, particularly of the backcountry variety, feature high-quality materials. These materials include appropriate insulation and often a gaiter system. All of these upgrades contribute to maintaining warmer and drier feet. So, if your cross-country ski boots are decades old and/or deteriorating, it’s time for an upgrade.
Footwear for snowshoeing can be a bit more problematic. Many people, for obvious reasons, invest their time and money in finding the best snowshoe. Unfortunately, they often neglect to obtain appropriate footwear for when they actually snowshoe.
You’ll mostly stay on top of the snow when snowshoeing. But you’ll still sink in deeper and softer snow. This will expose your feet to that cold snow. So, I don’t recommend wearing low-top, light hiking shoes made of breathable mesh for snowshoeing. Those shoes are great for a 75 degree day hike in the summer. But they generally don’t cut it in a winter environment. I don’t recommend wearing anything less than a heavier duty hiking boot. I prefer a stiffer boot that extends above the ankle. The reason being is that it can reduce muscle fatigue and provide a good platform for use with snowshoe bindings.
Also, your boots should include some type of waterproofing component. This can be a laminate such as GORE-TEX® or an external coating such as ReviveX® or SNO-SEAL®.
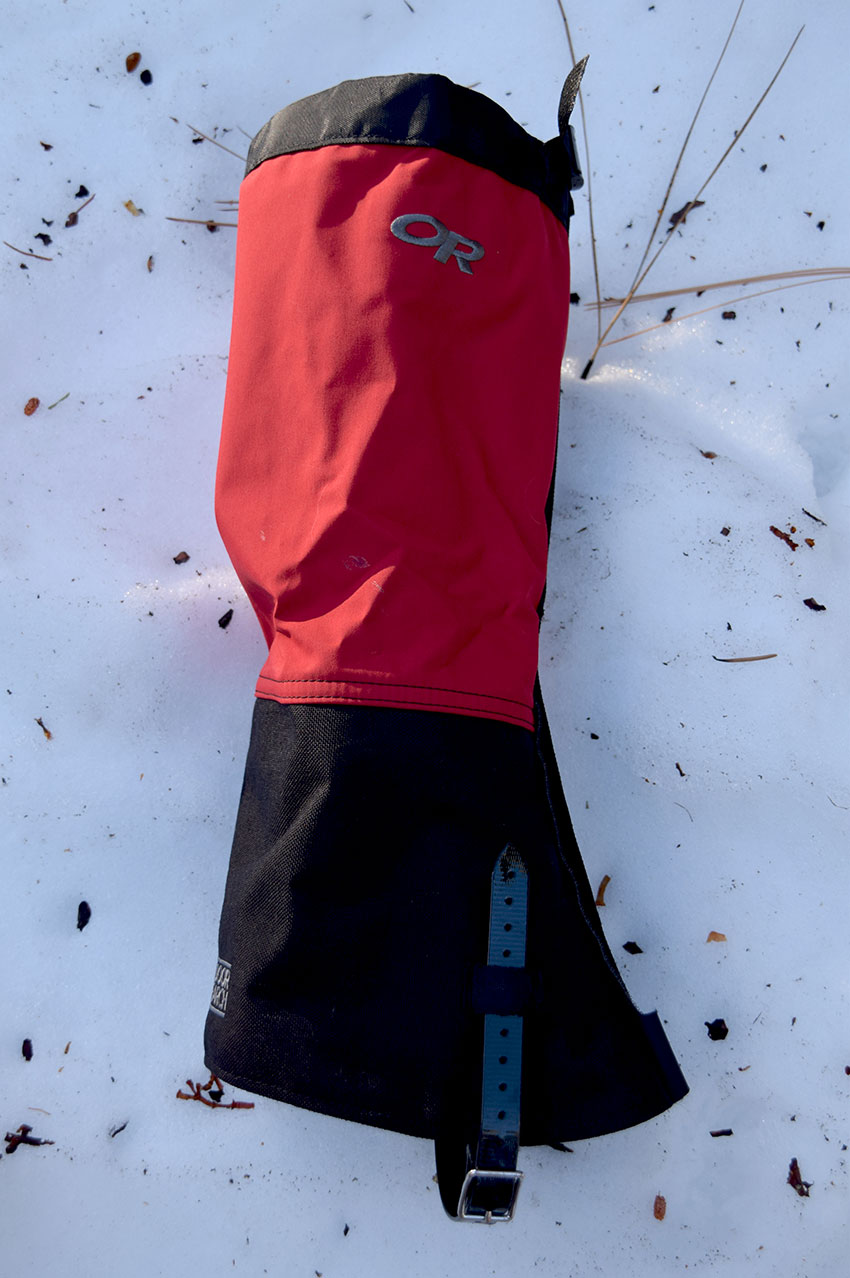
Depending on the size of the binding incorporated onto the snowshoe, you could wear a pair of snowboard boots. Full-length gaiters also help you to be safer while traveling through the snow as they keep snow from collecting around the cuffs of your pants and creeping down into your boots.
Carry Appropriate Safety Gear for Your Winter Adventure
There’s additional gear you should consider taking with you, even on shorter trips, into the backcountry during winter.
Trekking poles equipped with larger “snow” baskets provide stability. You can use these either with snowshoeing or cross-country skiing in deep snow and up steep terrain. The poles can also provide the structure for an improvised shelter, stretcher, or splint. For most recreational needs, trekking poles will suffice.
Carry an ice axe when traveling across hard-packed and icy, angled terrain. This tool will enable you to self-arrest far superior than any trekking pole.
The same goes for foot traction. Kahtoola makes a convenient and effective set of MICROspikes®. These accommodate most recreational needs. Bring a full set of crampons for more serious terrain, however.
When traveling through avalanche territory, each member of your group should have with them an avalanche beacon, probe, and shovel.
That gear won’t help you much when traveling alone and you get caught in an avalanche. However, somebody nearby may have witnessed the event. So, there’s always a snowball’s chance that they may be able to rescue you. That’s assuming your beacon is on and that stranger is also wearing one. You should always carry avalanche gear, regardless, in the off-hand chance you witness somebody else trigger an avalanche.
During winter, don’t travel alone in the backcountry.
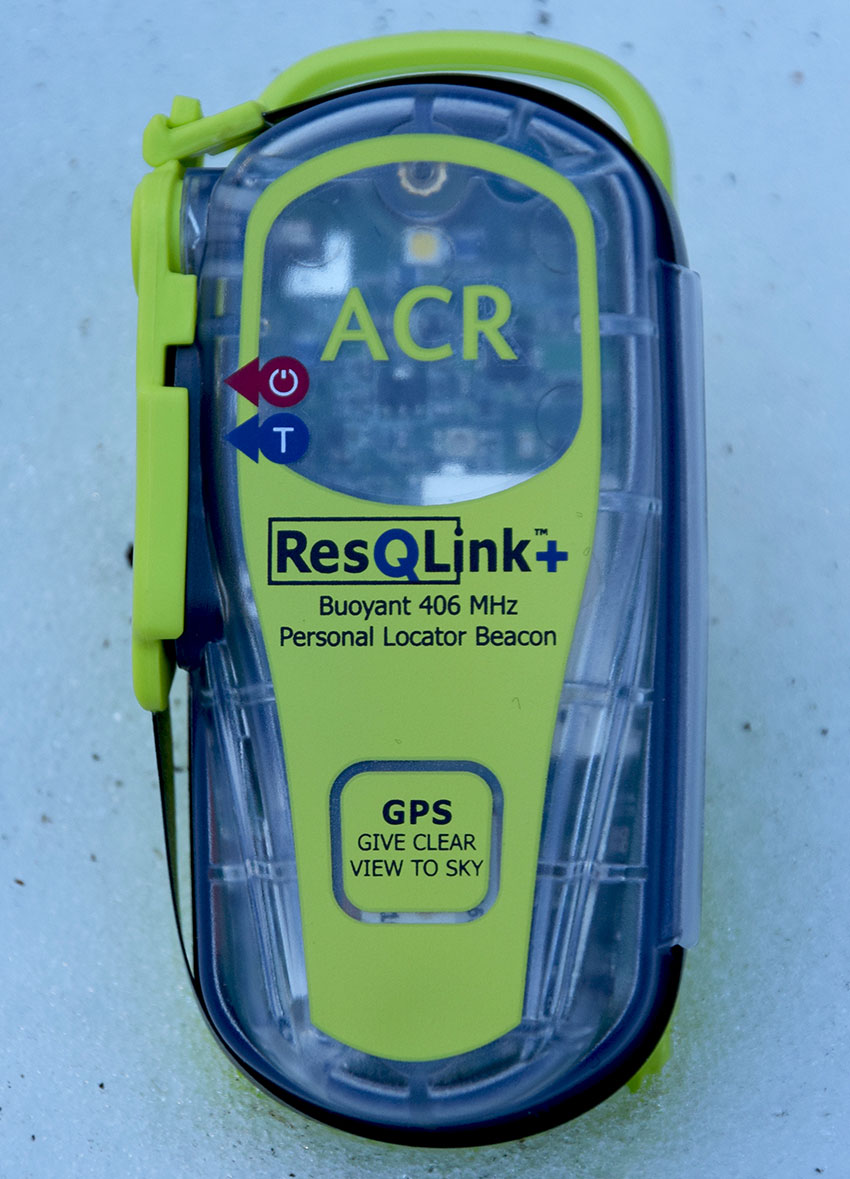
That said, for solo adventurers I recommend carrying a Personal Locator Beacon (PLB) such as one made by ResQLinkTM. PLBs notify official search and rescue organizations when deployed. They send out a powerful signal to satellites with your GPS data. Keep in mind, though, that a lot of time can pass before the cavalry actually arrives to save the day. And, you can’t deploy the rescue beacon if you’re unconscious.
Long story short, carry the necessary safety gear for your specific adventure. And, just as important is to actually know how to use it!
Stay Hydrated and Fueled for your Winter Adventure
Always carry with you plenty of food and water regardless of what your “plans” are. As much as we all love Mother Nature, she cares not for what you have in mind for the day.
You may find yourself outside a lot longer than you had originally intended. And, you don’t want to risk running out of energy. This is especially important when you still have three miles of deep snow to trudge through before reaching your vehicle!
Again, winter adventuring is very aerobic and burns up calories. It depletes your body of water faster than you might think.
Stay adequately fueled and hydrated when playing in Lake Tahoe’s backcountry during the winter.
Park in Legal Parking Areas
For the most part, you can park on the side of most roads at Lake Tahoe. This assumes there aren’t any signs posted that restrict parking.
There are some restrictions when it comes to parking along roads in the winter, however:
- Don’t block traffic.
- Avoid parking alongside roads when snow removal vehicles are in operation.
- Don’t park in front of Forest Service Gates.
Also note that roads are often lined by 4+ foot tall snowbanks in a normal or big snow winter. And, there’s usually a very narrow shoulder (i.e. nowhere to park). There are a handful of specific locations where snow removal operations intentionally clear parking spaces. Grass Lake on Luther Pass is one such place. But this isn’t something you can always count on.
I usually cross-country ski or snowshoe from a Sno-Park on days where parking may be an issue. Sno-Parks are usually sure bets on snowstorm days. You can’t purchase the permits on-site, however. So be sure you pick up either a day-pass or seasonal pass in advance of driving to the Sno-Park.
Access is a major topic of discussion, particularly with regard to winter backcountry travel at Lake Tahoe. The grassroots organization Tahoe Backcountry Alliance formed specifically to address and advocate for winter backcountry rights and access.
Share the Backcountry
Hiking, backpacking, cross-country skiing, and snowshoeing are some of the most enjoyable ways to venture into Lake Tahoe’s backcountry. However, a variety of outdoor enthusiast use most of these areas. So, be courteous to your fellow outdoor adventurers.
Always know that no matter how secret/special your favorite spot is, if it’s on public lands, everyone is entitled to access it.
Public lands are for everyone.
Be a Responsible Dog Owner
Tahoe is definitely a dog-friendly region. And, dogs are allowed on public lands.
However, keep your dogs on a leash and pick up after them.
The issue with dogs on trails is the increase of bags full of dog shit lining those trails. No one is coming after you to clean up. So, pack your dog’s poo out like you would any other trash.
Cross-Country Skiing Explained Articles and Videos
Please note that I wrote and produced the Cross-Country Skiing Explained series of articles and videos with the beginner and intermediate cross-country skier in mind. This is the demographic for whom I most often serve(d) while working in the outdoor recreation industry at Lake Tahoe. I basically treat these articles and videos as extensions of the conversations that I have (had) with those customers.
That said, expert skiers probably could take away something of value from these resources. Just know that I don’t address race-oriented philosophy, technique, or gear selection.
Considerations for buying cross-country ski gear (new and beginner xc skiers)
- Intention, Types of XC Skis, and Whether to Buy New or Used (Part 1)
- How Much Gear to Acquire, Evaluate Your Commitment, Value of Taking XC Ski Lessons (Part 2)
- Can One Set of Classic Cross-Country Skis Work for Groomed and Off-Track XC Skiing? (Part 3)
- Can I Use One Set of XC Ski Boots for All of My Cross-Country Skiing Needs? (Part 4)
- Overview of Off-Track and Backcountry Cross-Country Ski Gear
- Invest in Technique More than Gear
Classic Cross-Country Ski Components
- Introduction to Classic Cross-Country Skis (Part 1)
- Geometry of Classic Cross-Country Skis (Part 2)
- The Grip Zone of Classic Cross-Country Skis (Part 3)
- Types of Bindings for Classic Cross-Country Skiing (Part 4)
- Ski Boots for Classic Cross-Country Skiing (Part 5)
- Classic Cross-Country Ski Poles (Part 6)
- FAQs about Classic Cross-Country Skiing
Waxing Your “Waxless” Cross-Country Skis (for beginner and intermediate xc skiers)
- Introduction to Waxing Your Waxless XC Skis
- Step-by-Step Waxing Tutorial
- FAQs About Waxing Your Waxless XC Skis
Cross-Country Skiing Techniques, Demonstrations, and Related Concepts
- Outdoor VLOG (emphasis on the cross-country skiing experience)
- Cross-Country Skiing in Challenging Conditions
- Considerations for Winter Adventure in Lake Tahoe’s Backcountry
- Using the Side-Step and Herringbone Techniques in the Backcountry
- 10 Tips for Spring Cross-Country Skiing in the Backcountry
- 5 Reasons to Love Spring Cross-Country Skiing
- Considerations for Cross-Country Skiing During the Fall and Early Winter
- Discussing the Goal of Becoming a Better Cross-Country Skier and Embracing Backcountry and Groomed Terrain in Pursuit of that Goal
- The Cross-Country Skiing Experience: Immersing Yourself in Winter
20 years ago an amiga did a 5 day 50 mile trek with 4 refuges to stay at night for sleeping bag and food.. I don’t know if it was backcountry OR from commercial XC Centers. Anything U can recommend like this is much appreciated. I live in Santa Barbara and ususlly XC at Rock Creek area in the Sierras.
Hey Dennis,
I believe you’re referring to a hut and lodge system where people ski from hut to hut, spending the night. I’m going to have to dig around and ask some questions because I don’t know too many people who still do this. I know those huts and lodges still exist, but I think most of the people I know who’ve done this type of trip also did it 20 years ago. For the time being, however, take a look at this website. Looks like a pretty comprehensive listing of all the huts and lodges in and around Lake Tahoe and the Sierra Nevada Mountains. http://www.backcountryskitours.com/pages/general/huts.htm